GCR POS — Label Printing
How to print product labels and shelf (gondola) tags from the POS. Applies to every mode (Supermarket, Retail, Quick Service, Full Restaurant, Services).
Before you start: your technician sets the label printer up once (see Technician Manual — Label Printing). If the print window shows a red "No label printer configured", call support: the initial setup is missing — you are not doing anything wrong.
1. What you can print
| Design | What it is for | Content |
|---|---|---|
| Classic | Product label: stuck on the item or on the shelf edge. | Name, price, item code and barcode. |
| Gondola dual price | Shelf tag for stores running a cash discount program: both prices large enough to read from the aisle. | Name, pack size, giant cash price, boxed card price, PLU and UPC barcode. |

Each design prints through a template, which defines the physical label size (the roll loaded in the printer). The POS ships built-in templates and you can create your own (§6).
2. Print a label for one product
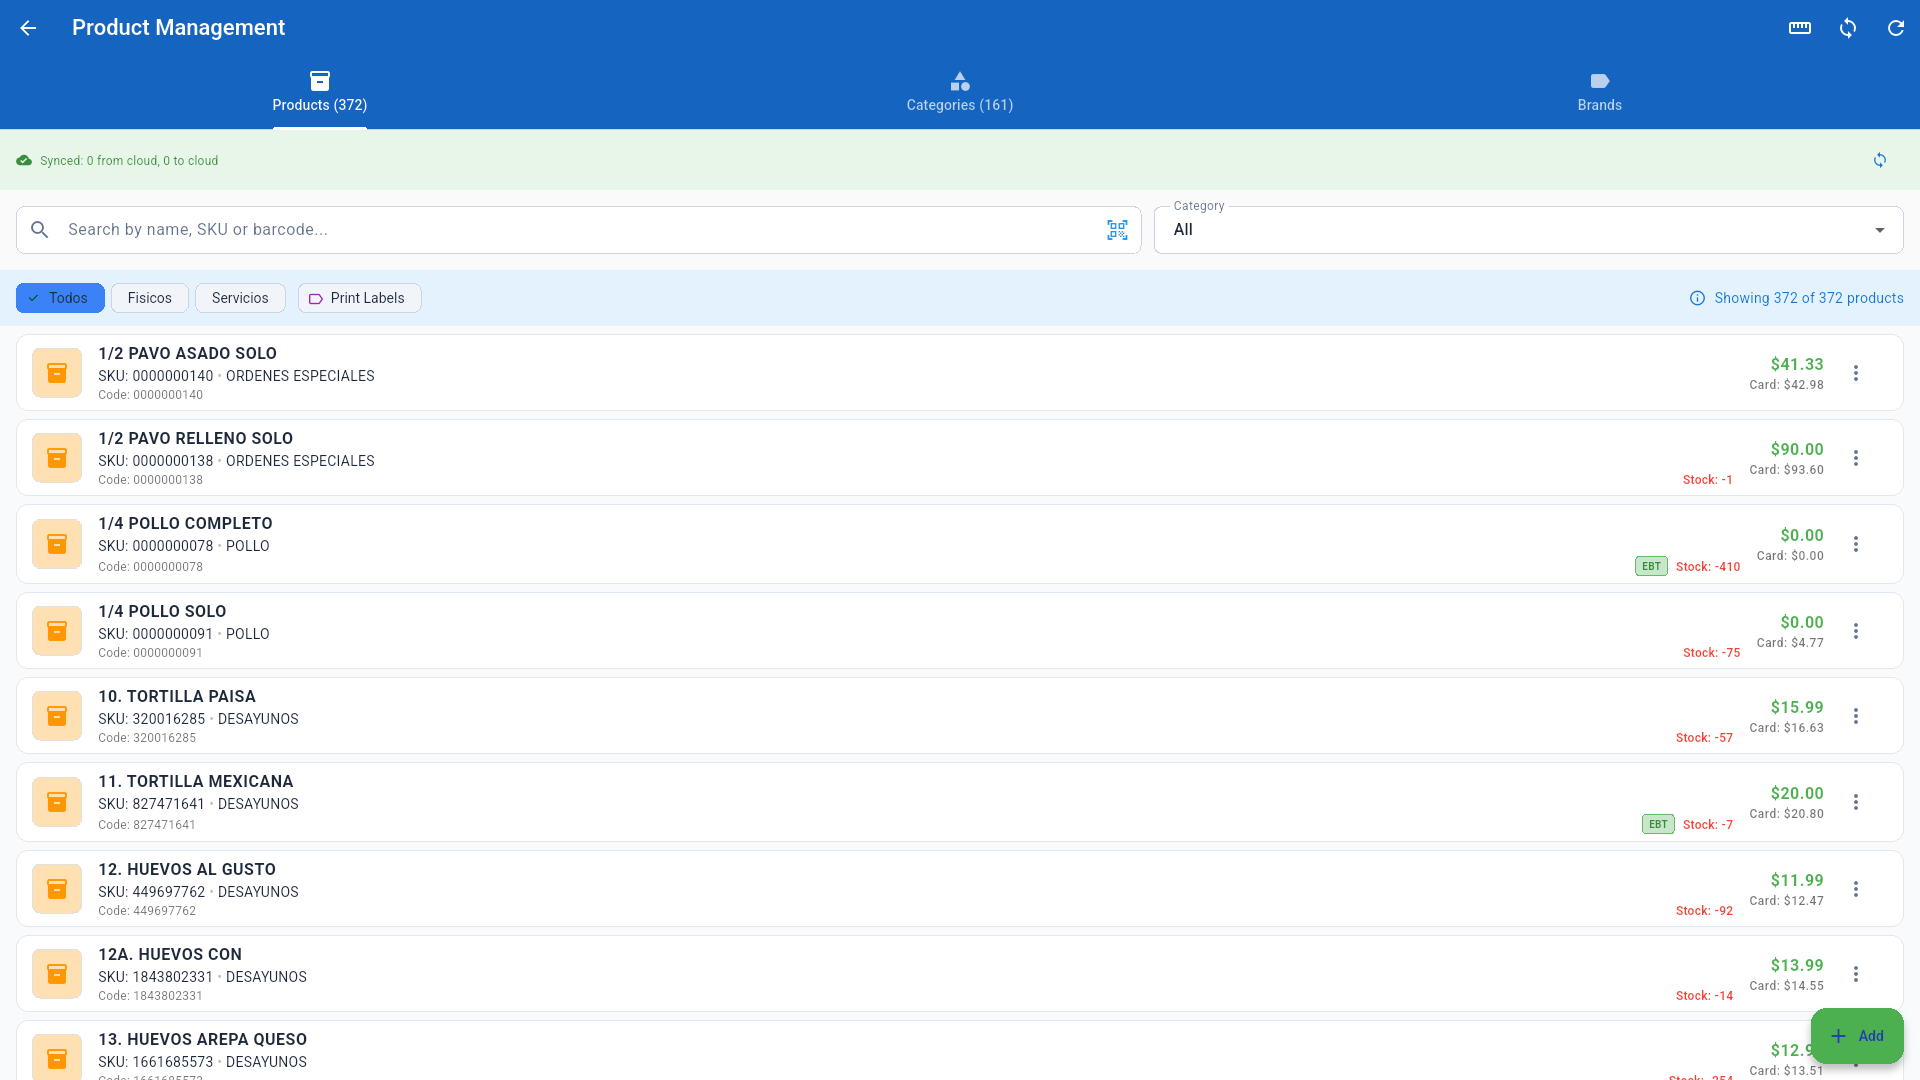
- Go to Back Office → Products.
- Find the product.
- Open the ⋮ menu on the right of the product row and choose Print Label.
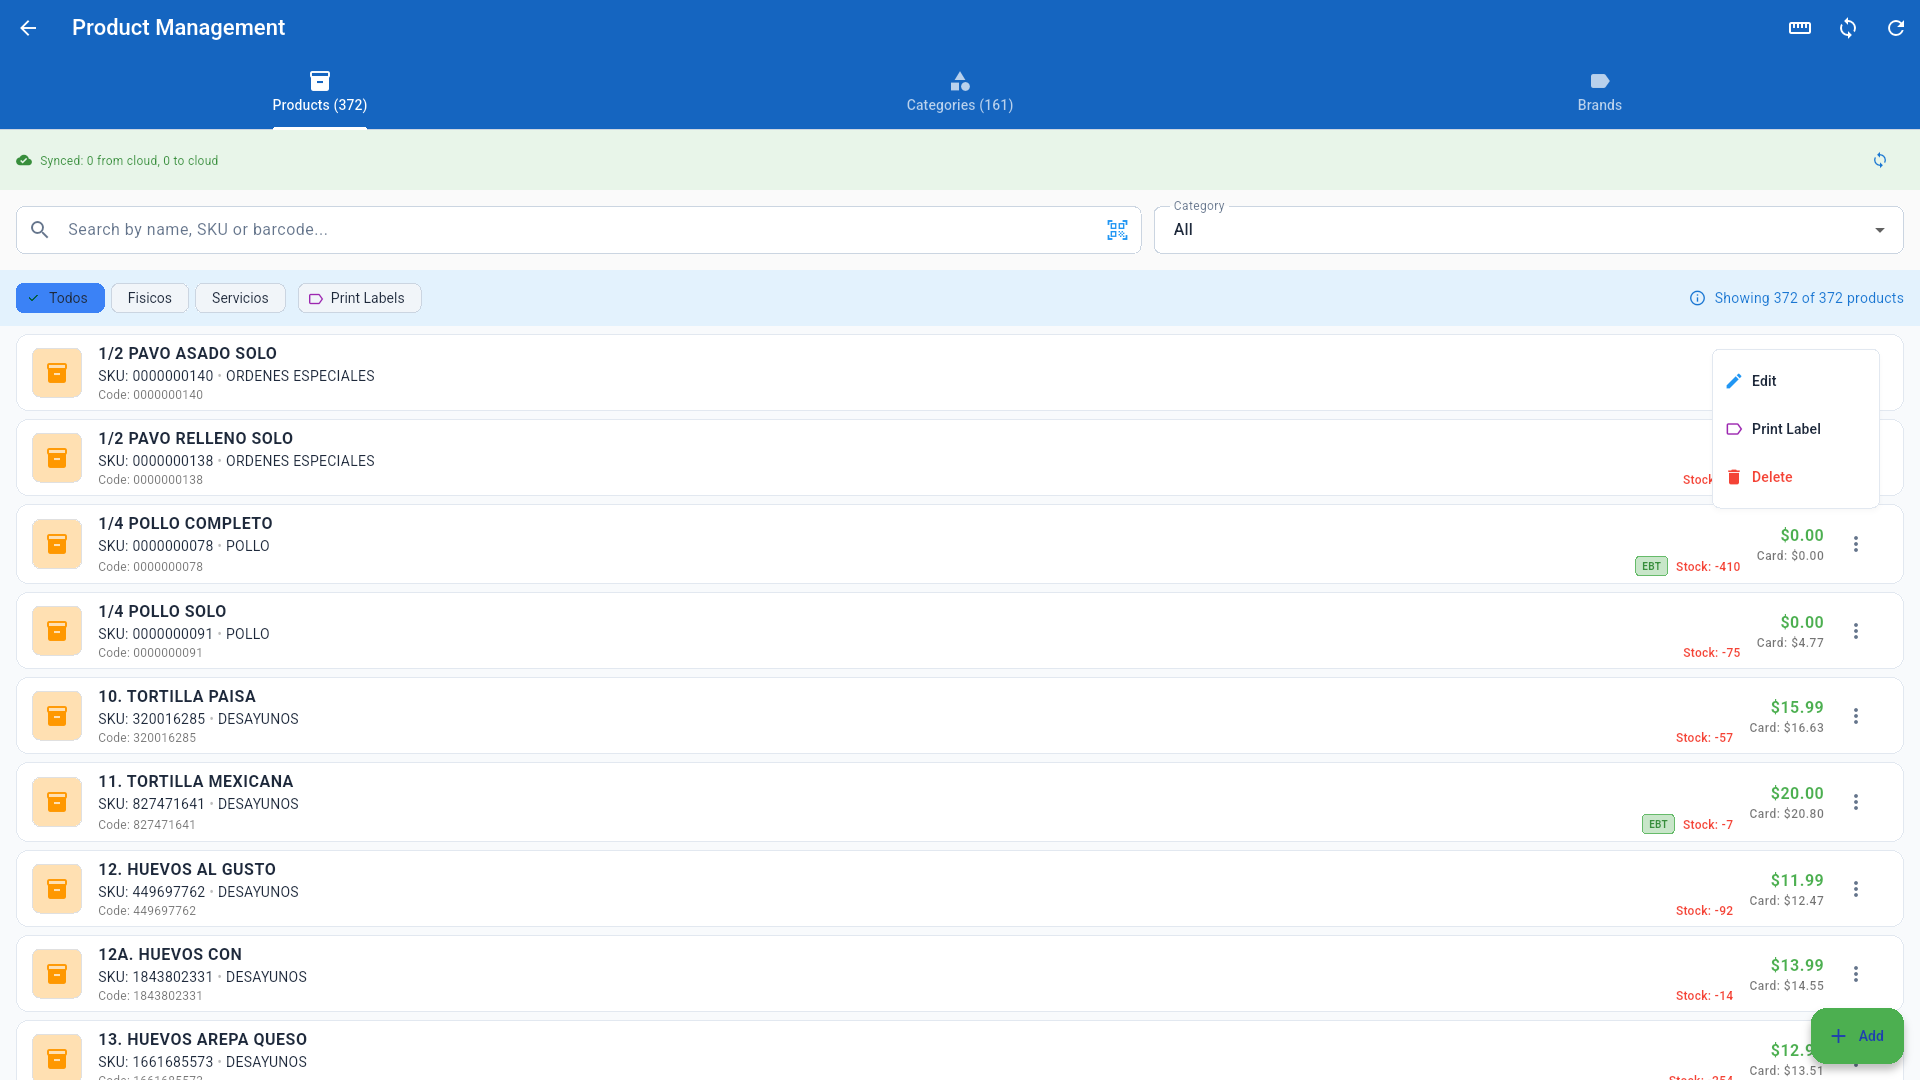
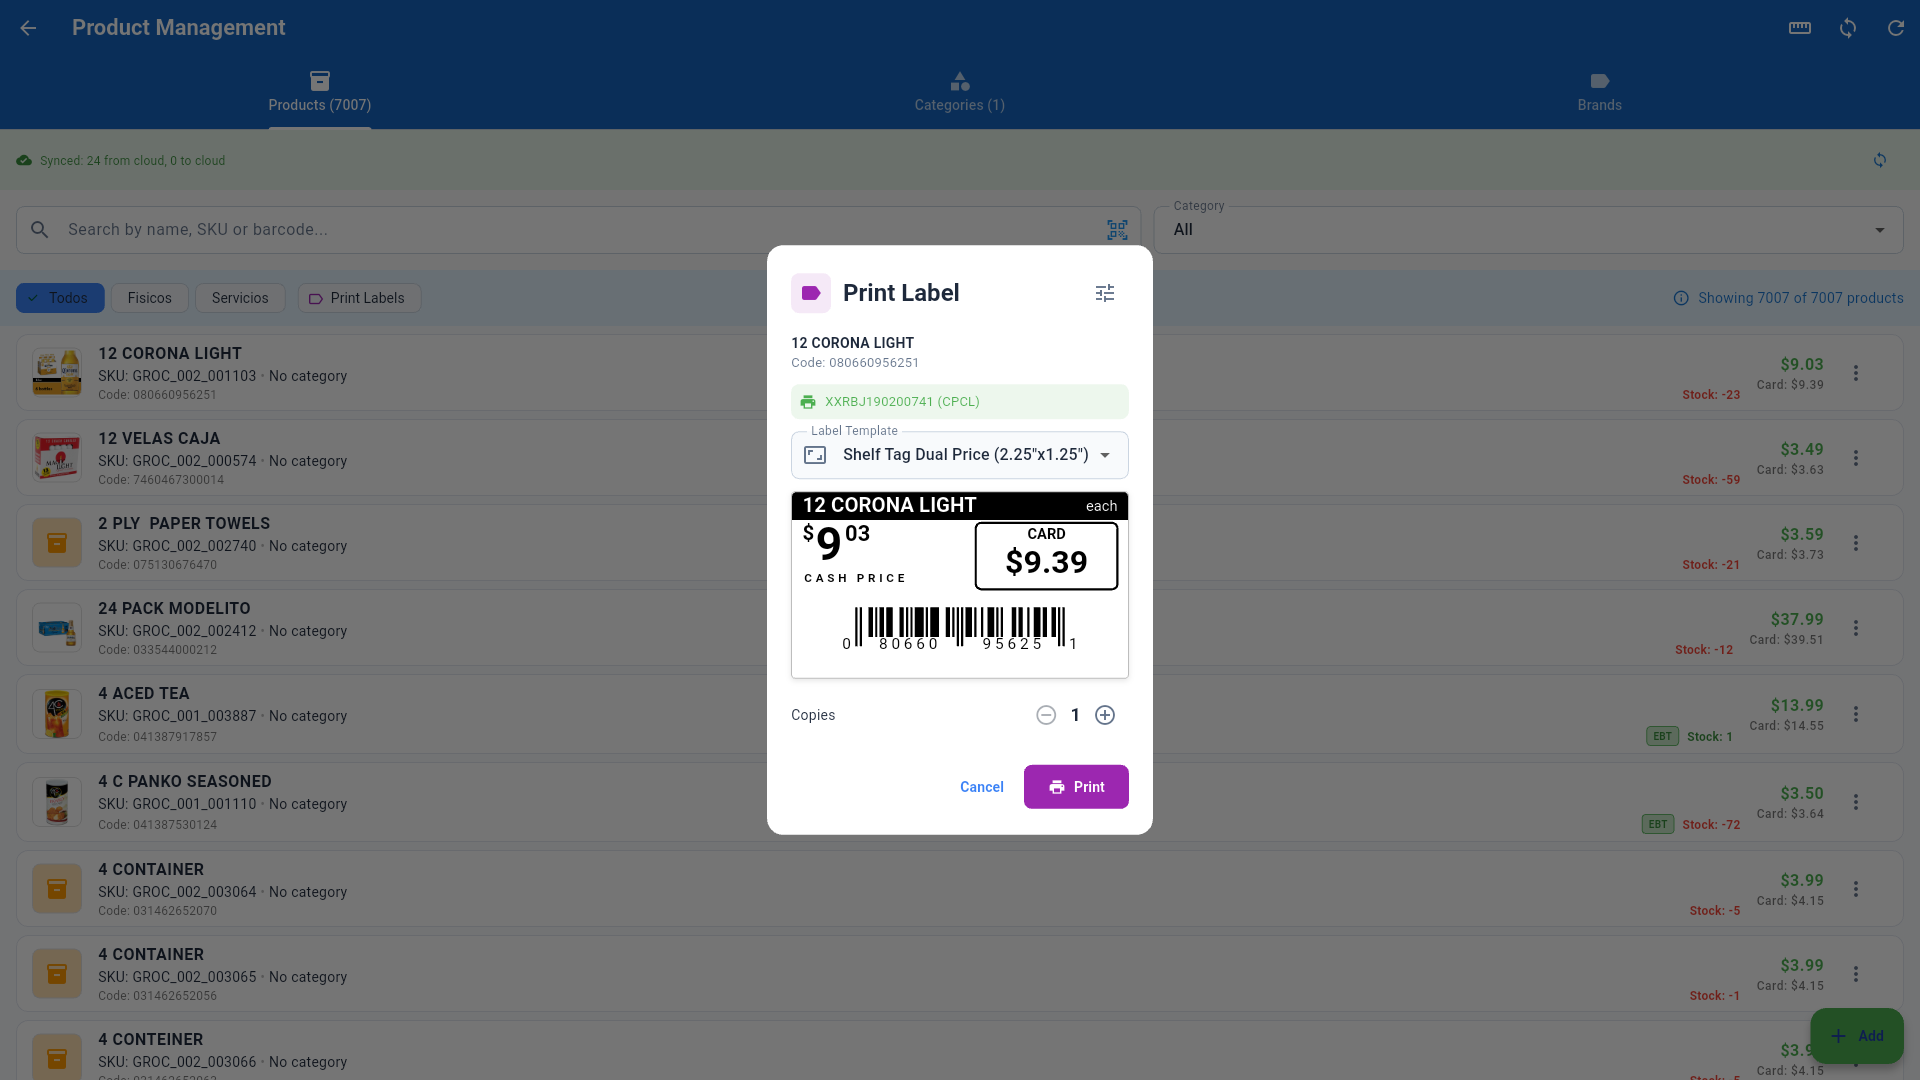
- The Print Label window opens:
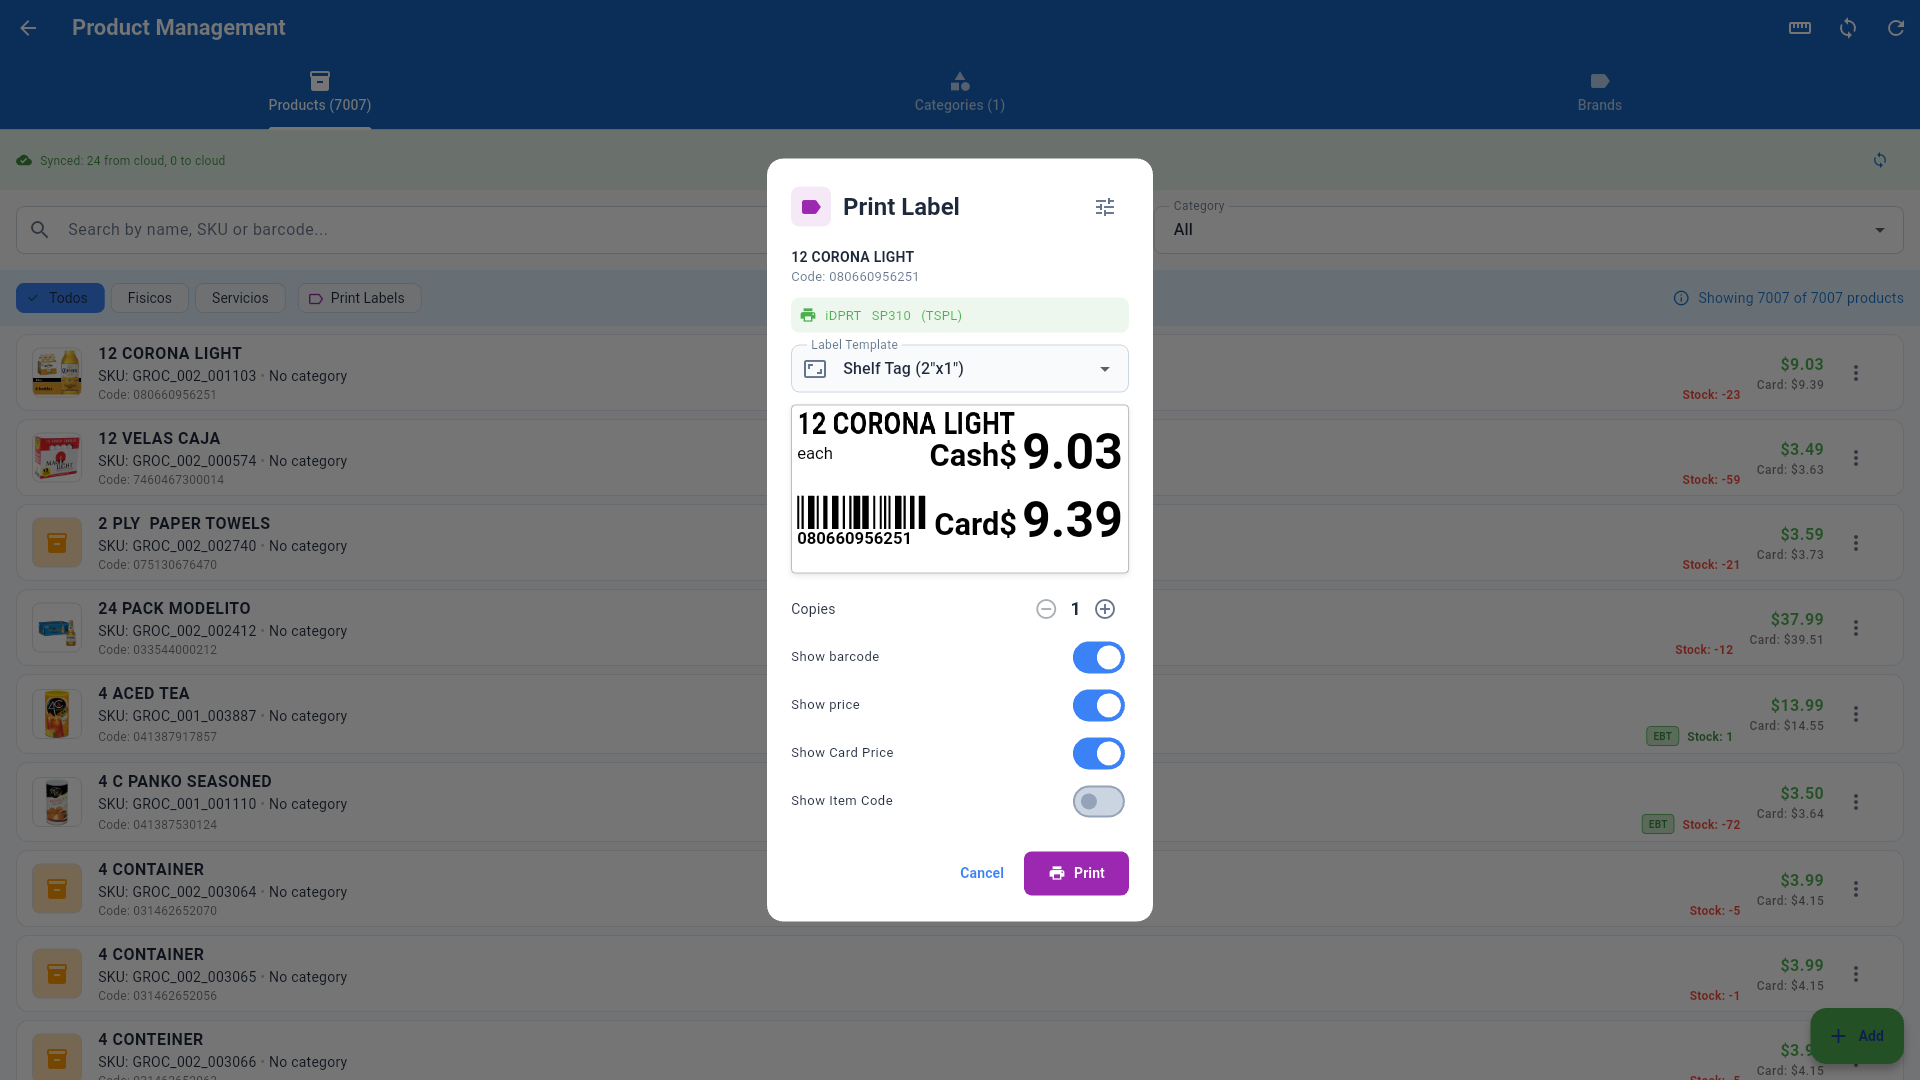
| Control | What it does |
|---|---|
| Green/red status bar | Connected printer and command language (green = ready). Red means no printer is configured. |
| Label Template | Template (size and design). See §3. |
| Preview | Shows exactly how the label will print, with the product's real data. |
| Copies | How many copies to print (1–99). |
| Show barcode | Print the barcode or not. |
| Show price | Print the cash price or not. |
| Show Card Price | Print the card price or not. |
| Show Item Code | Print the item code (SKU) or not. |
| Sends the job to the printer. |
The Show… switches only appear for the Classic design. The gondola tag always prints its fixed field set.
- Press Print. A green "1 label sent to printer" confirmation appears.
3. Choosing the template
The Label Template dropdown lists what is available:
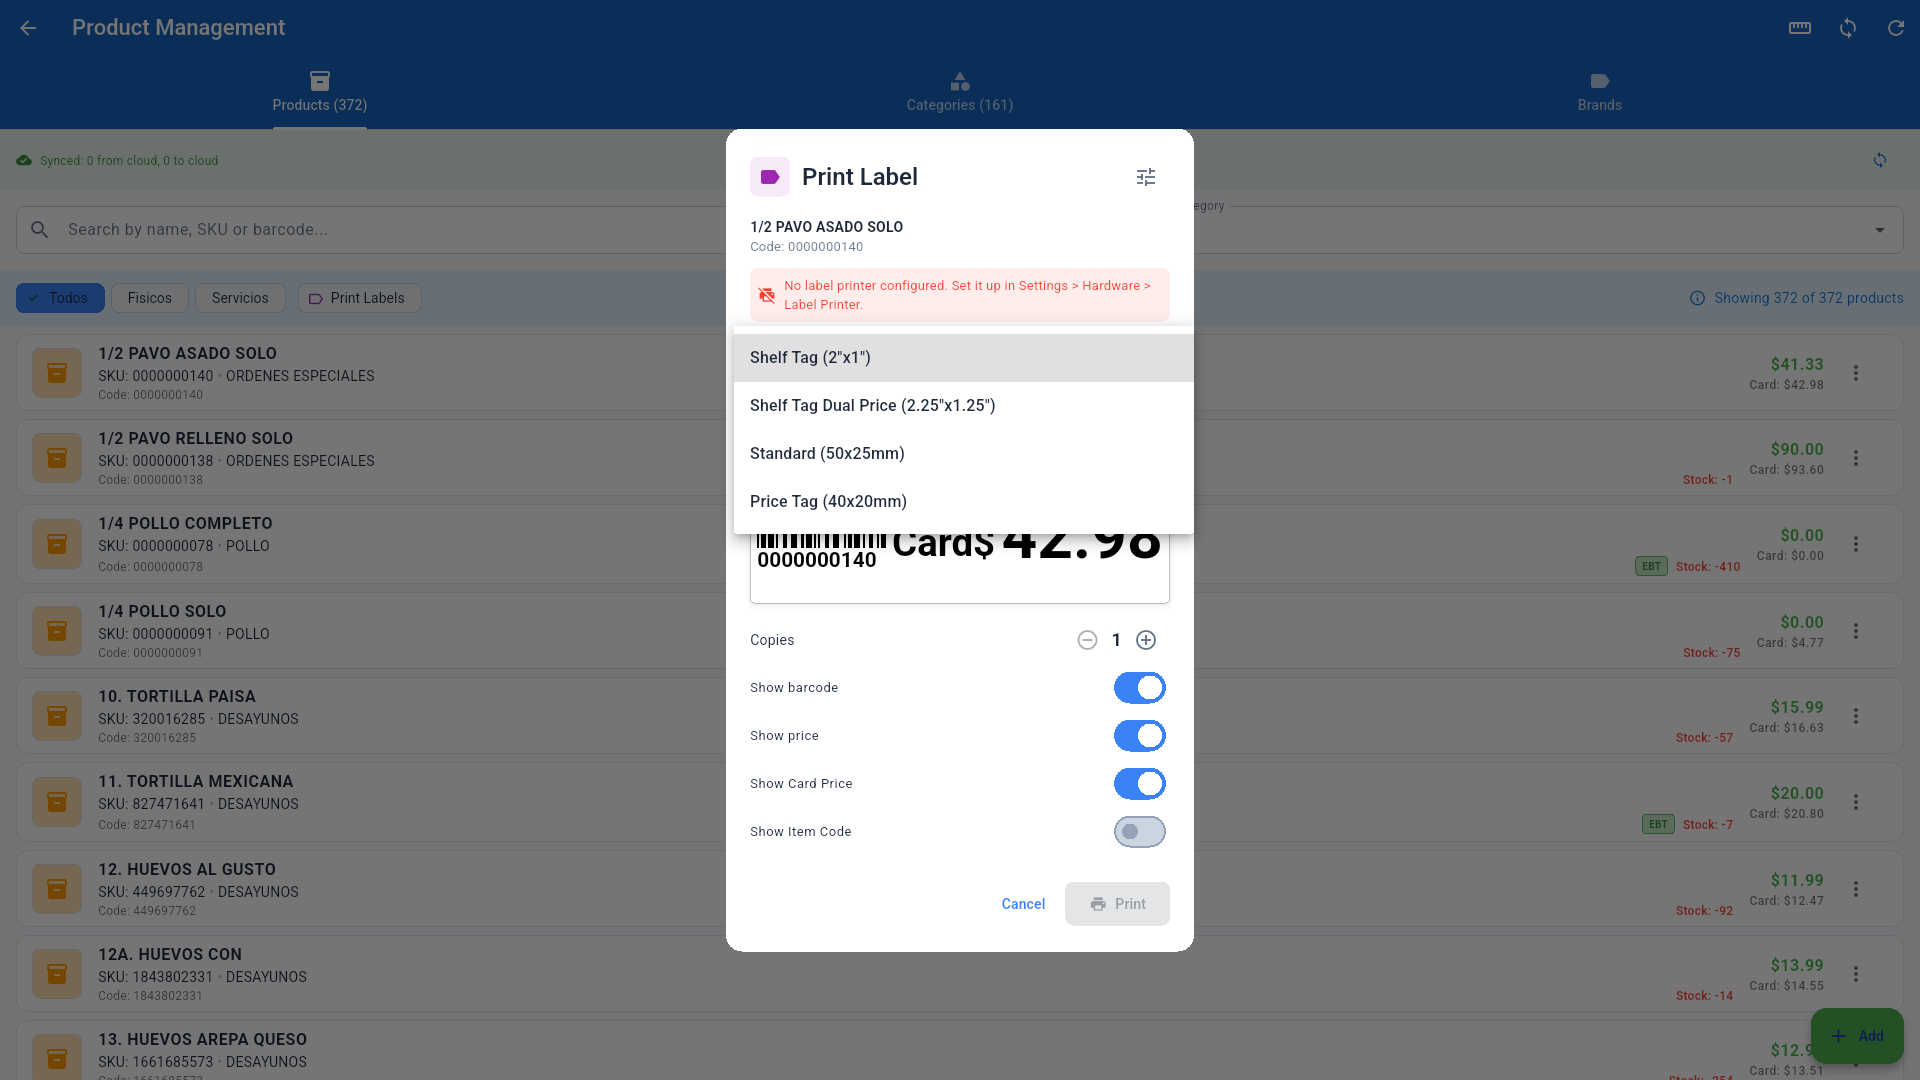
Built-in templates:
| Template | Size | Design |
|---|---|---|
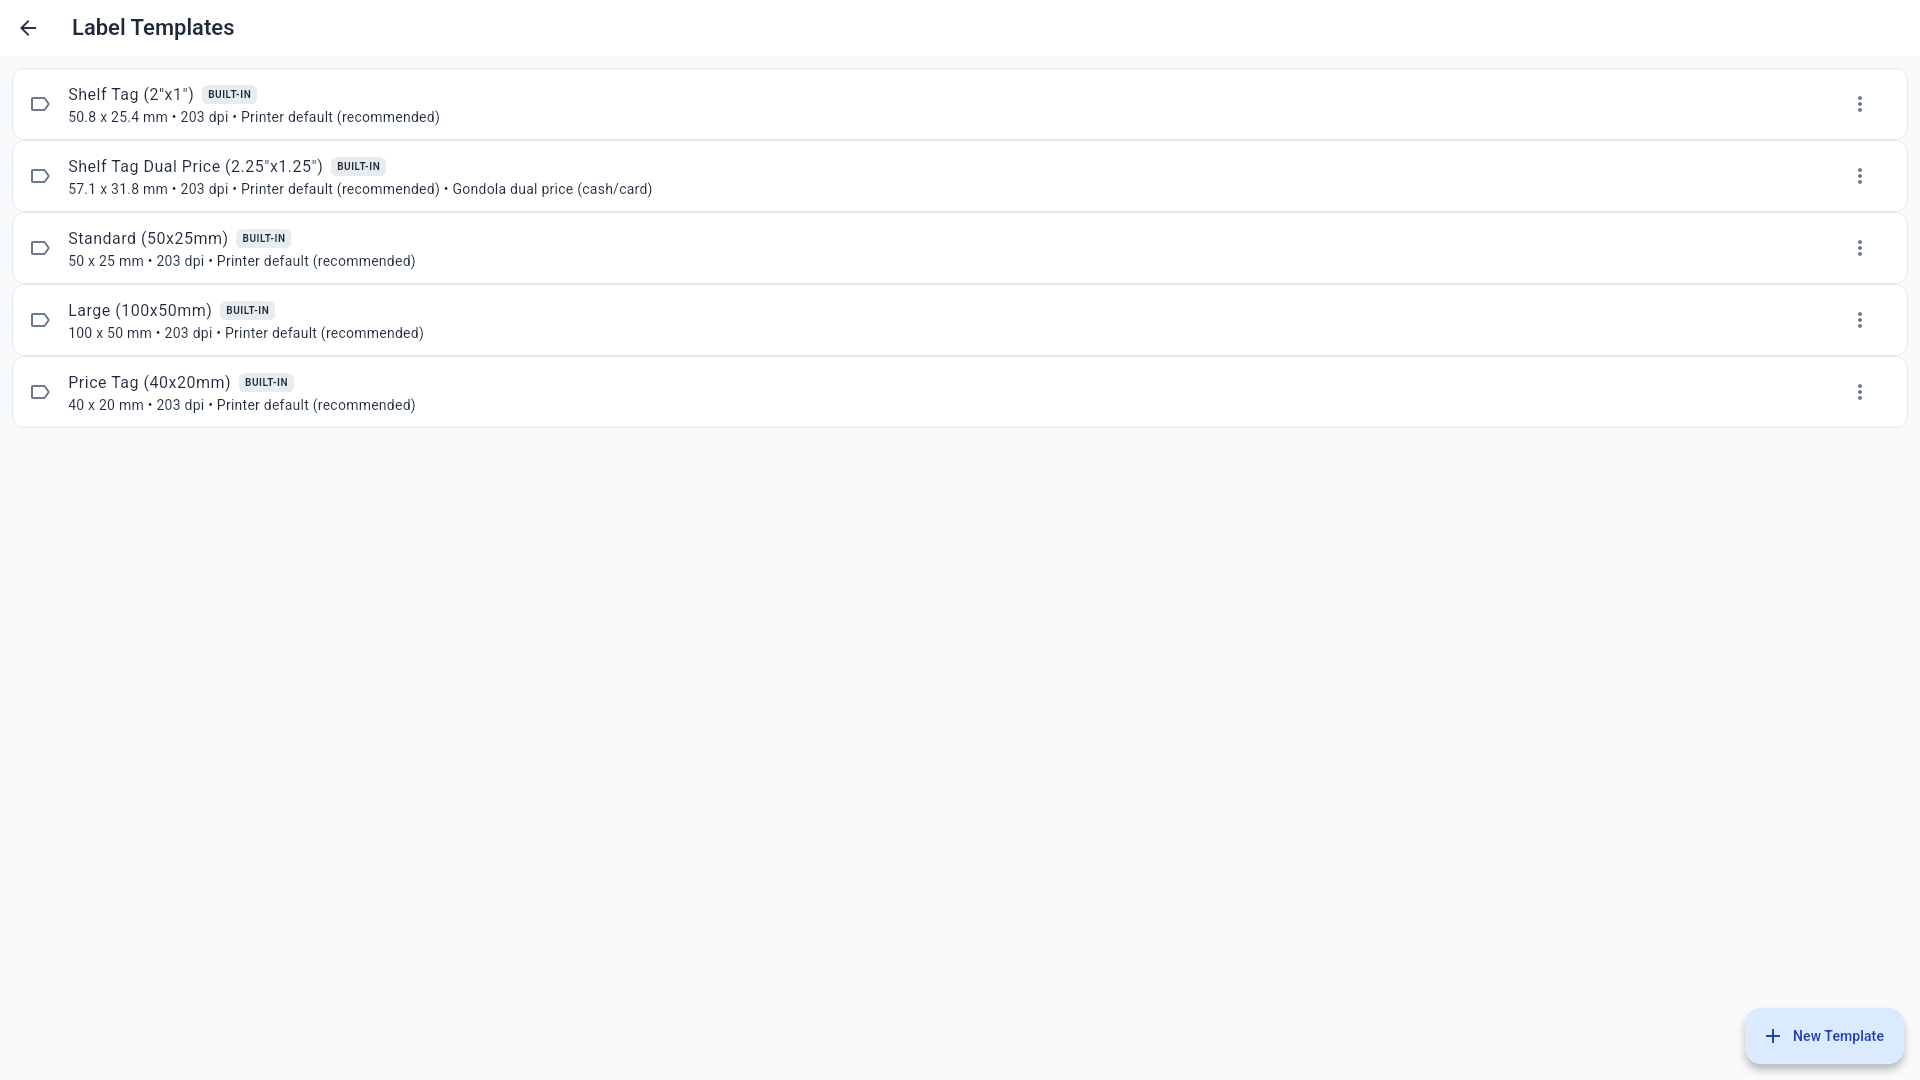
| Shelf Tag (2"x1") | 50.8 × 25.4 mm | Classic |
| Shelf Tag Dual Price (2.25"x1.25") | 57.15 × 31.75 mm | Dual-price gondola |
| Standard (50x25mm) | 50 × 25 mm | Classic |
| Large (100x50mm) | 100 × 50 mm | Classic |
| Price Tag (40x20mm) | 40 × 20 mm | Classic (no barcode) |
The POS remembers the last template used and offers it next time.
If a template is missing from the list, it is wider than your printer. Example: a 3" (80 mm) printer does not offer the Large 4"x2" template. Your technician sets the printer width during configuration.
4. Batch printing (many products)
Use it to re-tag a whole aisle or after a price change.
- In Products, press the purple Print Labels chip (above the list, next to the All / Physical / Services filters).
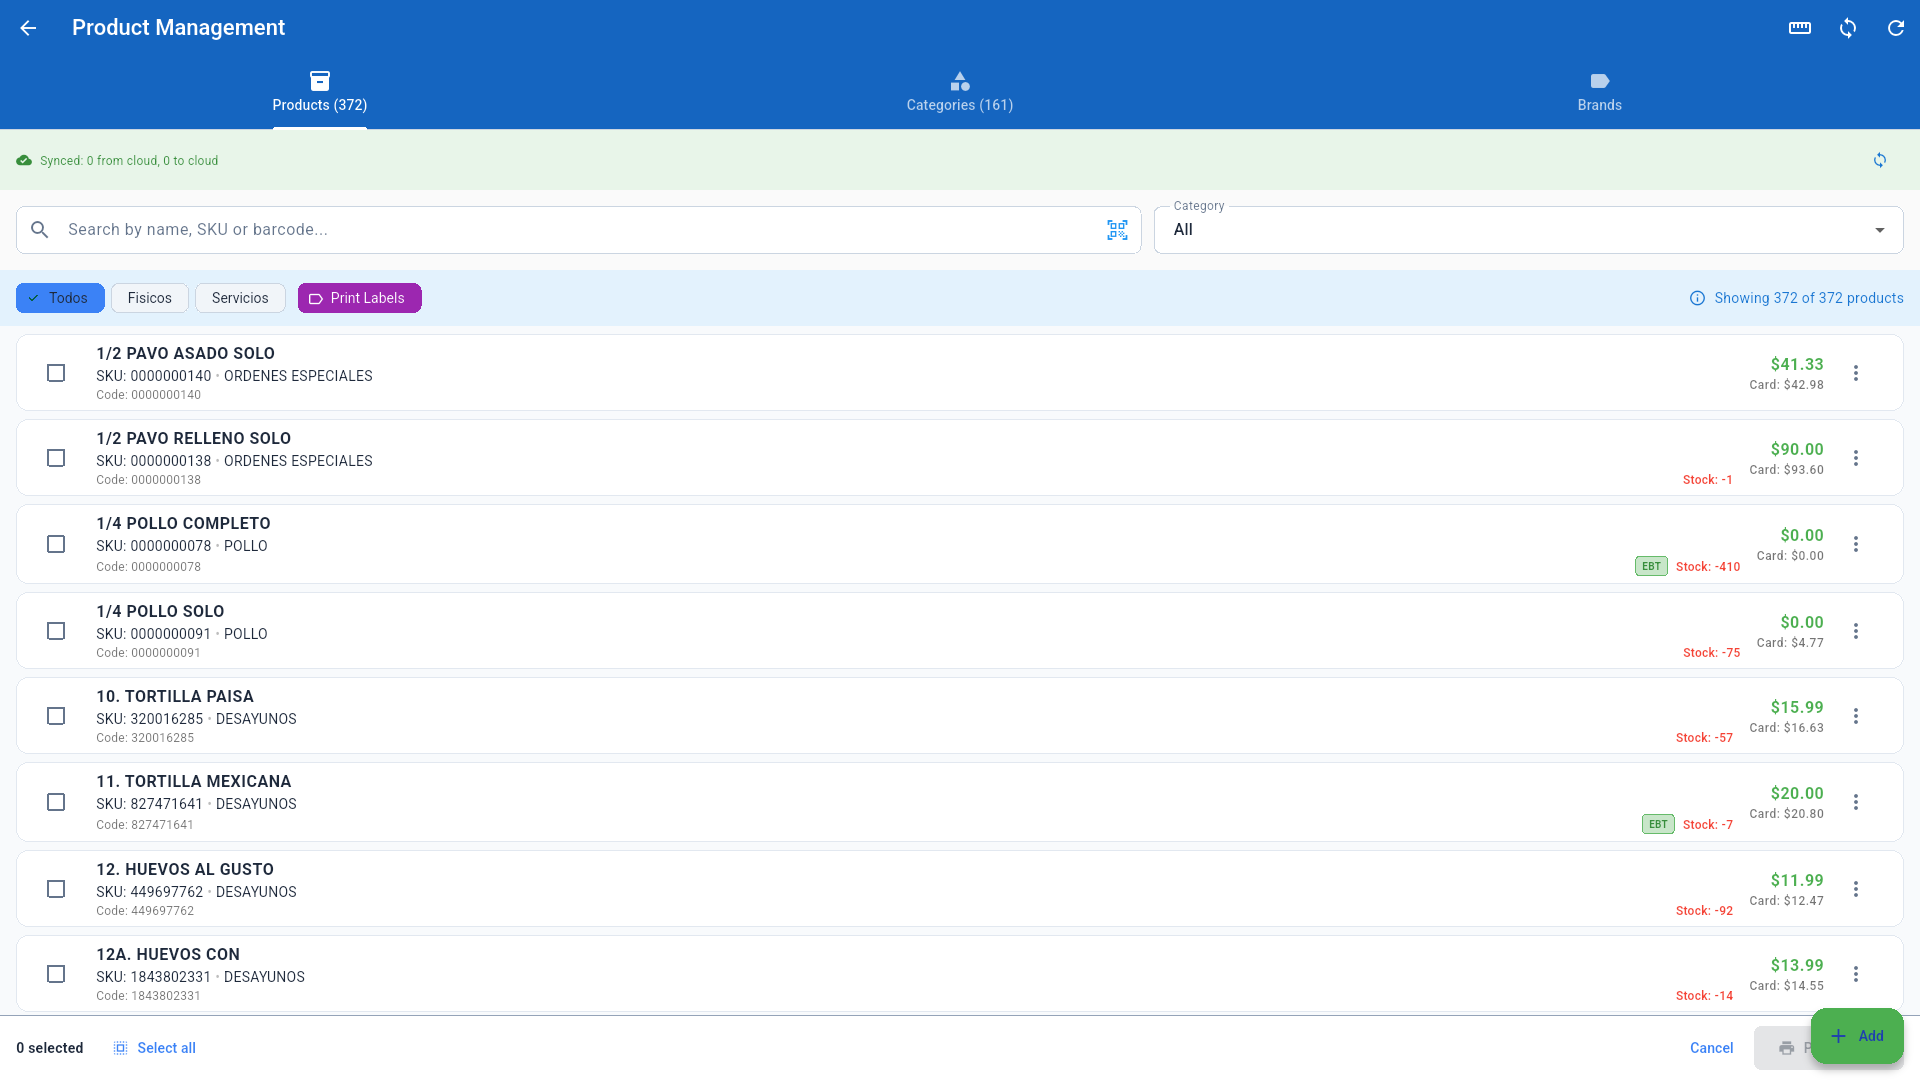
- The list switches to selection mode: every product shows a checkbox. Tick the products you want to label (tap the row or the checkbox).
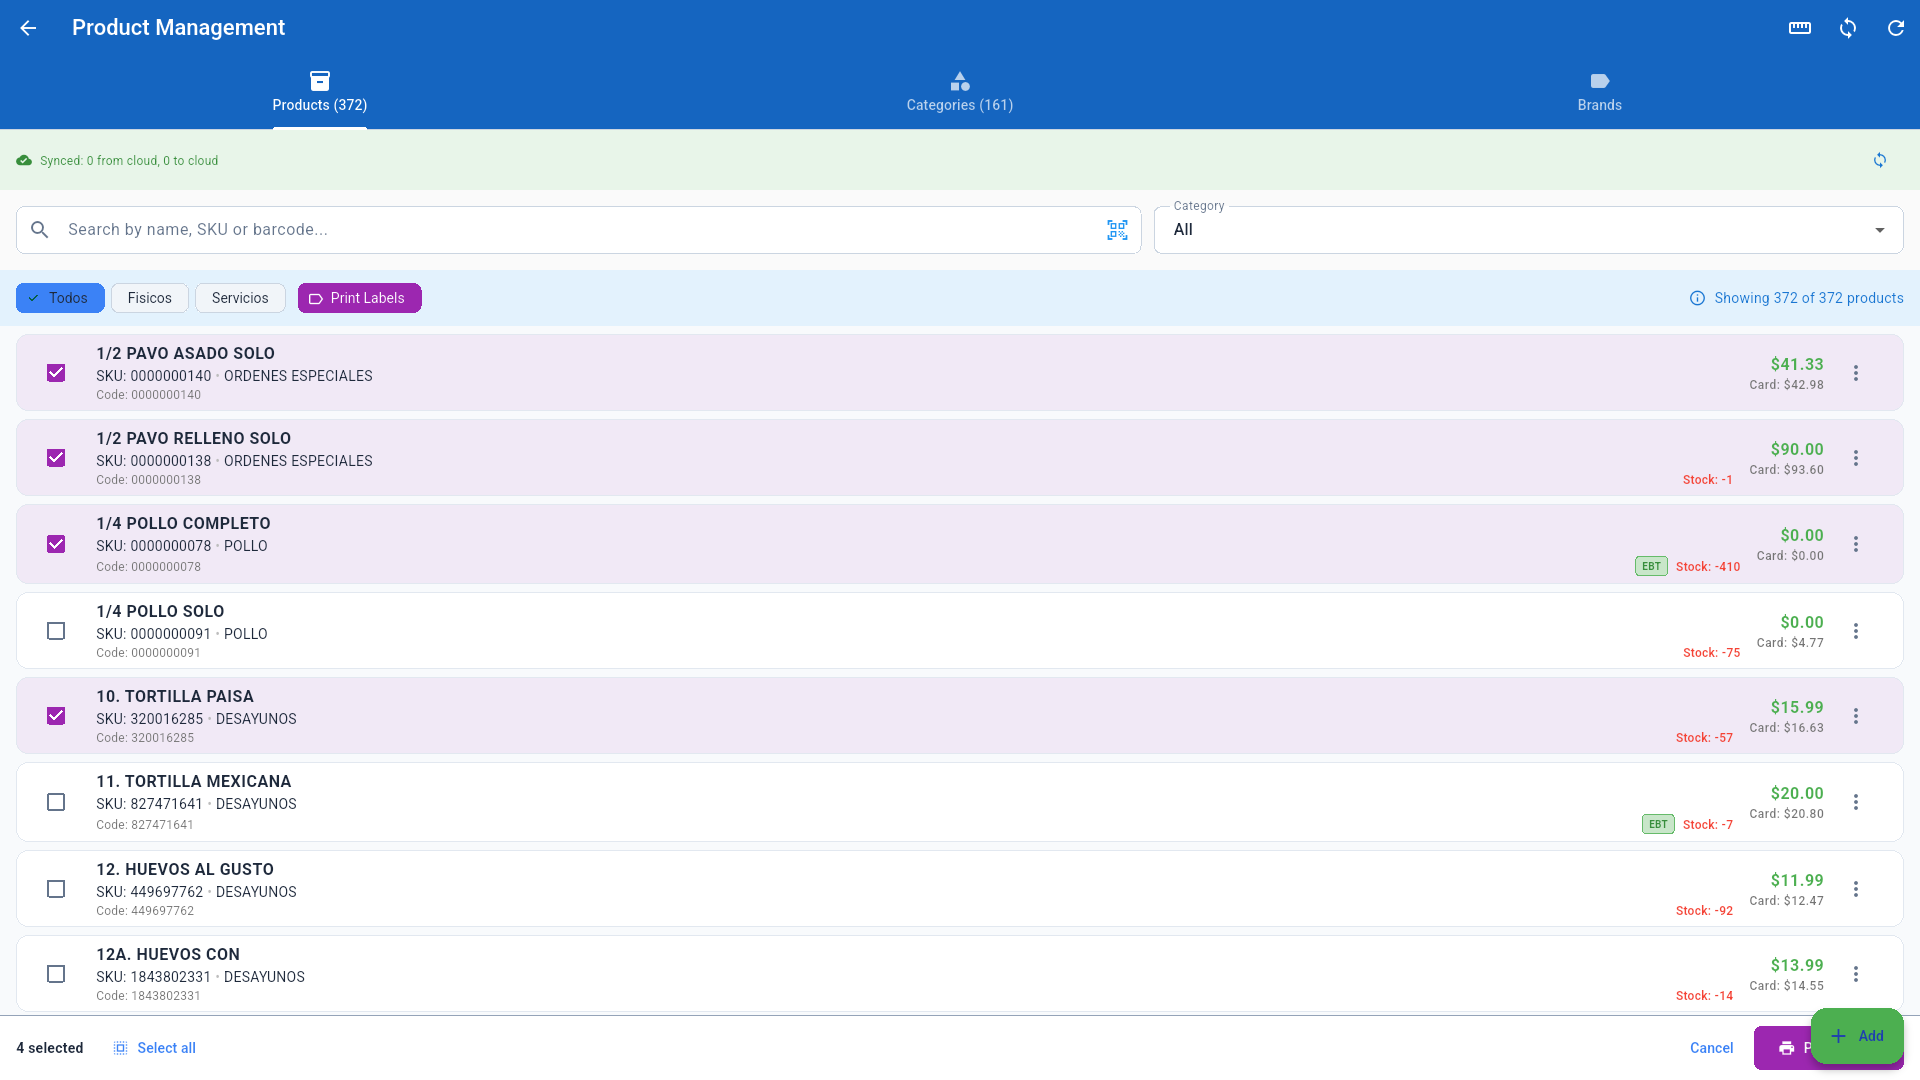
- The action bar appears at the bottom:
| Button | What it does |
|---|---|
| N selected | How many products are selected. |
| Select all | Selects every product in the current filter. Combine it with the search box or category filter to tag a whole category. |
| Clear selection | Unticks everything. |
| Cancel | Leaves selection mode. |
| Print Labels | Opens the print window with the chosen products. |
- The window title reads Print Labels (N) and, instead of Copies, it shows Copies per product plus the total to be printed.
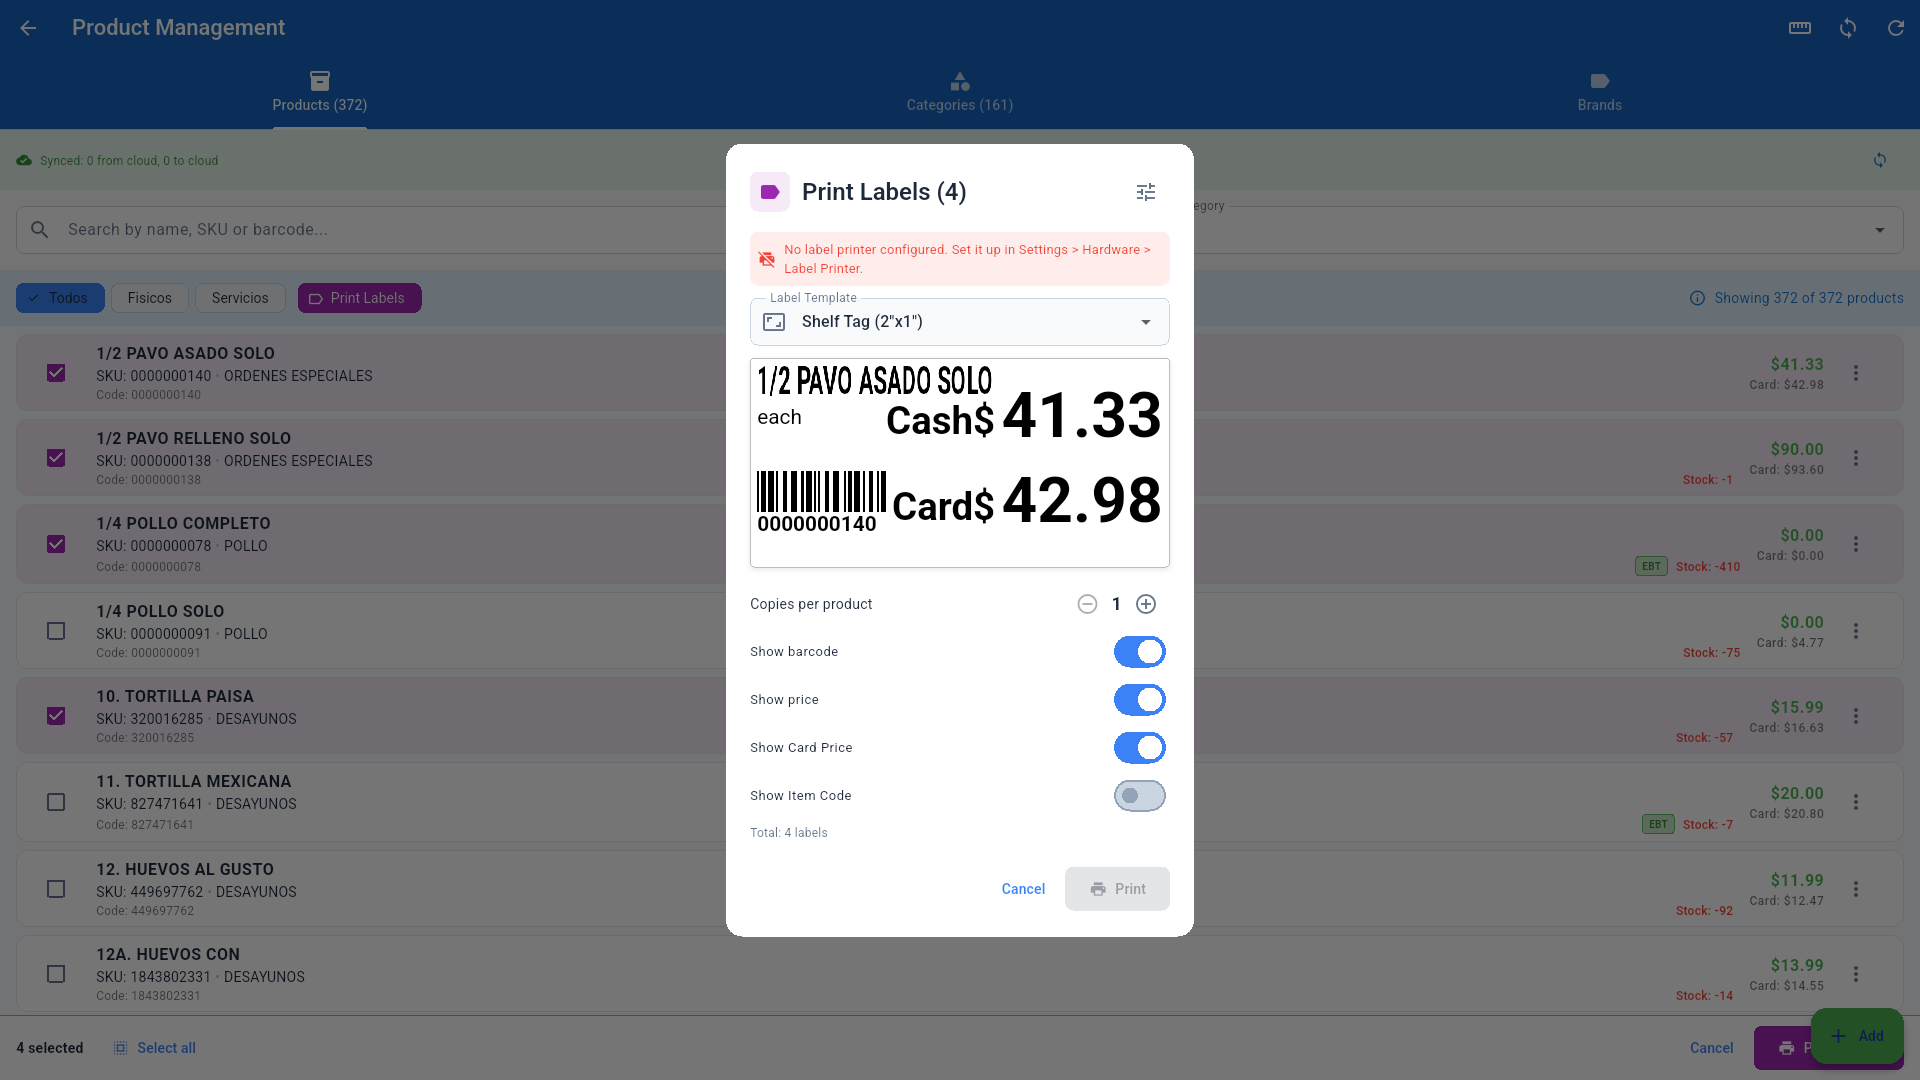
- Press Print. All labels go out as a single print job, in list order.
Tip: filter by category and use Select all to re-tag an entire category after a price change.
5. The dual-price (gondola) tag
This is the design for stores running a cash discount program.
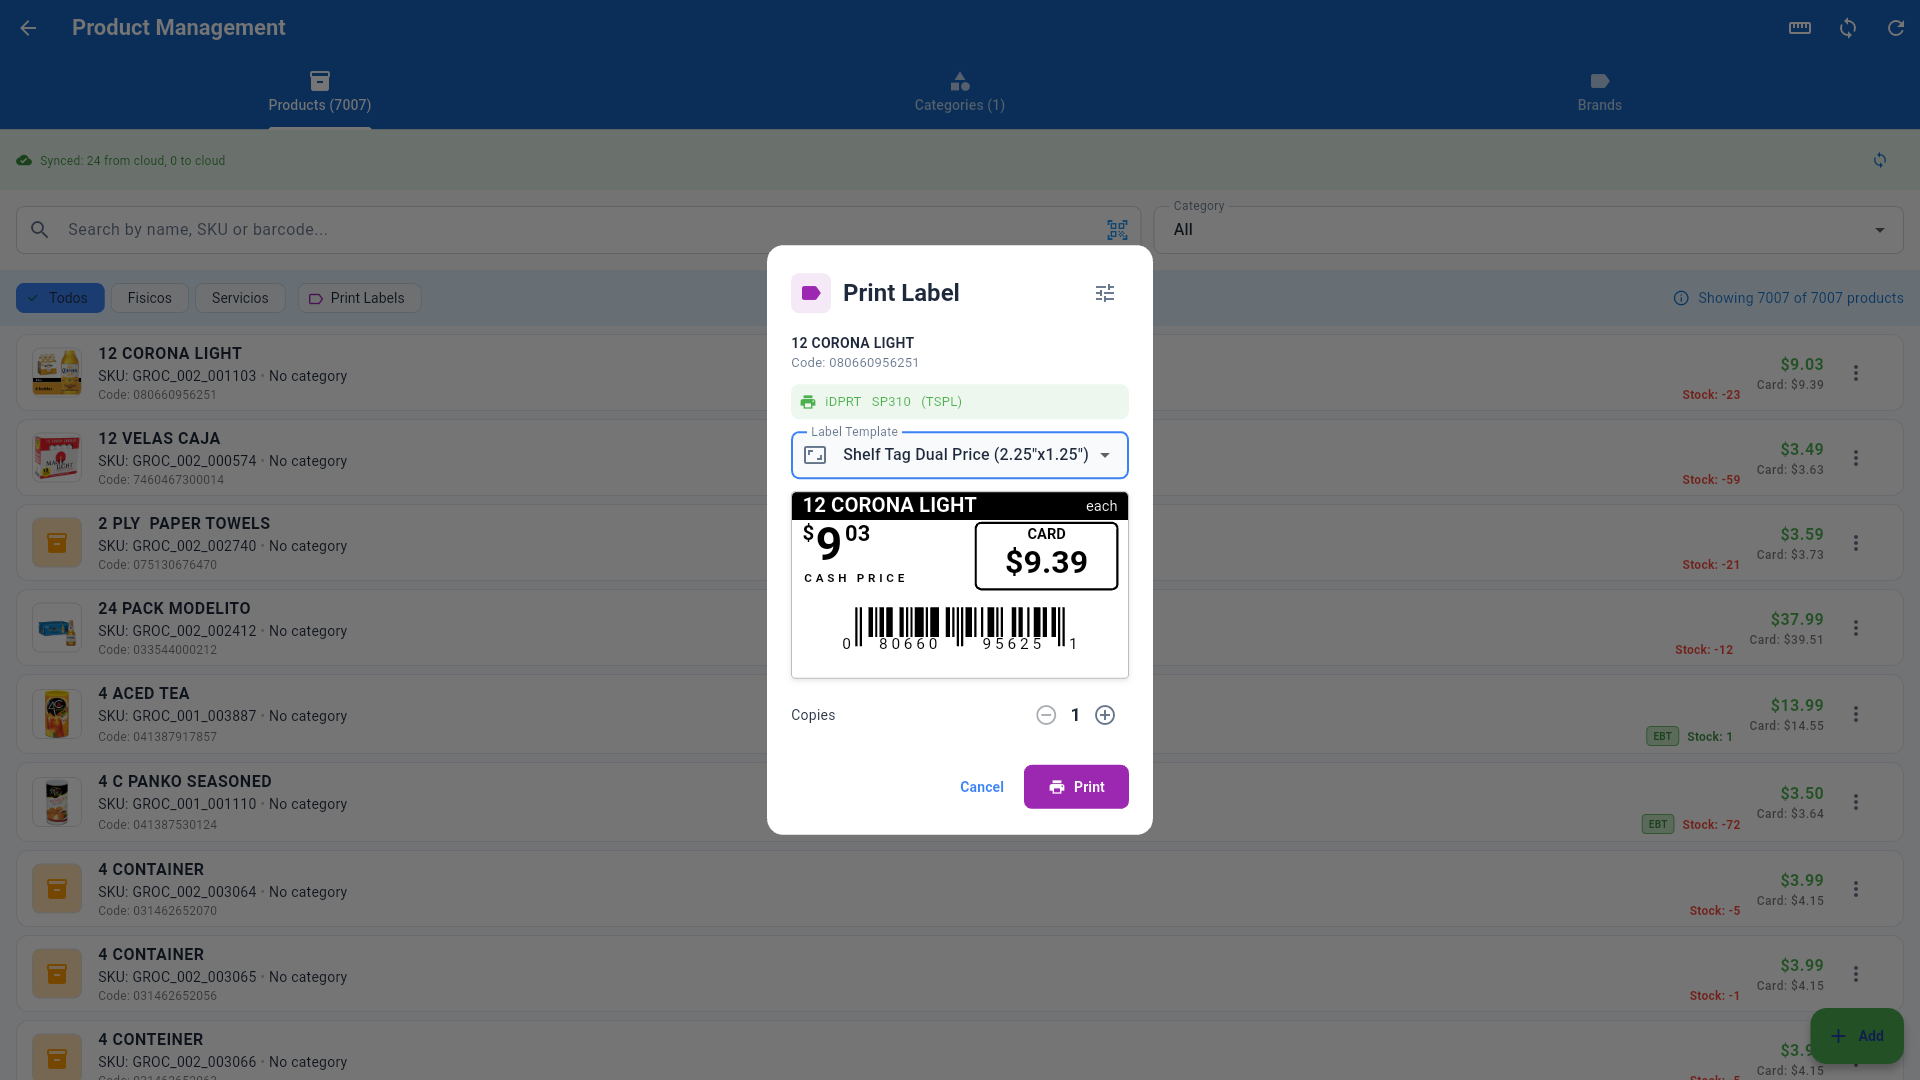
- The large price on the left is the cash price, taken from the product's price 1.
- The CARD box on the right is the card price, taken from the product's price 2 — the value the register actually charges. If the product has no price 2, the POS computes it from the store's cash discount percentage.
- Products flagged as excluded from the cash discount print the same price twice (correct: those items have no difference).
- The barcode prints as a real UPC-A when the product has a valid 12-digit UPC; any other code prints as Code 128. Both scan.
If a price looks wrong, the issue is in the catalog (price 1 / price 2 / cash-discount exclusion), not in the label: fix the product and print again.
6. Creating a template for your roll
If your label roll does not match any built-in template, create your own. It is a one-time job.
- In the print window, press the ⚙ (Label Templates) button at the top right. (Also reachable from Settings → Hardware → Label Printer → Label Templates.)
- Press New Template, or open the ⋮ menu of a similar template and choose Duplicate — the fastest path, since everything is already set.
- Adjust the fields and press Save:
| Field | What to enter |
|---|---|
| Name | A name you will recognize ("3-inch gondola"). |
| Layout | Classic or Gondola dual price (cash/card). |
| Width / Height | The physical size of your label. Type it in mm or inches — both fields convert automatically. |
| Gap | Space between labels on the roll (usually 3 mm). |
| Darkness | Print intensity. If it prints faint or grainy, raise it. |
| Speed | Print speed. Lowering it improves quality. |
The remaining fields (offsets, DPI, media type) are fine calibration: leave them alone unless your technician says otherwise.
Built-in templates carry the BUILT-IN badge and cannot be edited or deleted; duplicate them to start from one.
7. On Android tablets and the handheld scanner
The POS on Android tablets prints the same labels: the printer connects over USB (OTG cable) or Bluetooth, and the printing flow (§2–§6) is identical. Your technician sets the connection up once.
The Scanner app (inventory handhelds) also prints, to a Bluetooth printer.
- Scan the product.
- Open the product detail and press Print Label.
- Pick template and copies, then press Print.
The Bluetooth printer is paired once from the scanner settings (your technician leaves it ready).
8. Common problems
| What you see | What to do |
|---|---|
| Red "No label printer configured" | Initial setup is missing. Call support. |
| The printer feeds blank labels | The configured language does not match the printer. Technician setting. |
| The label prints upside down | Your technician must turn on Inverted (180°) in the setup. |
| Prints faint, grainy or streaked | Raise Darkness and lower Speed in the template (§6). If it persists, call support. |
| Print runs over onto the next label | Roll out of calibration: calibrate from the printer driver utility (support does it in a minute). |
| The barcode does not scan | Check the product has a valid code and raise Darkness. |
| The template I want is not listed | It is wider than the configured printer (§3). |
| The price on the label is wrong | Fix the price in Products; the label always prints what the catalog says. |
9. Operating recommendations
- Print one test label before a large batch: check price, code, and that the scanner reads it.
- After a mass price change, use batch mode filtered by category (§4).
- Store rolls cool and out of sunlight: thermal paper darkens with heat and the label becomes unreadable.
- Clean the printhead with isopropyl alcohol periodically: most print "streaks" are printhead dirt.