GCR POS — Supermarket Mode
Daily-operation guide for cashiers and managers of stores configured in Supermarket mode (large numeric keypad, PLU/barcode selling, scale support, EBT, and cash-discount pricing).
Administrative features (reports, inventory, users, settings) are covered in the Back Office & Settings manual. The POS language can be changed in Back Office → Settings → Language.
1. Logging in (PIN)
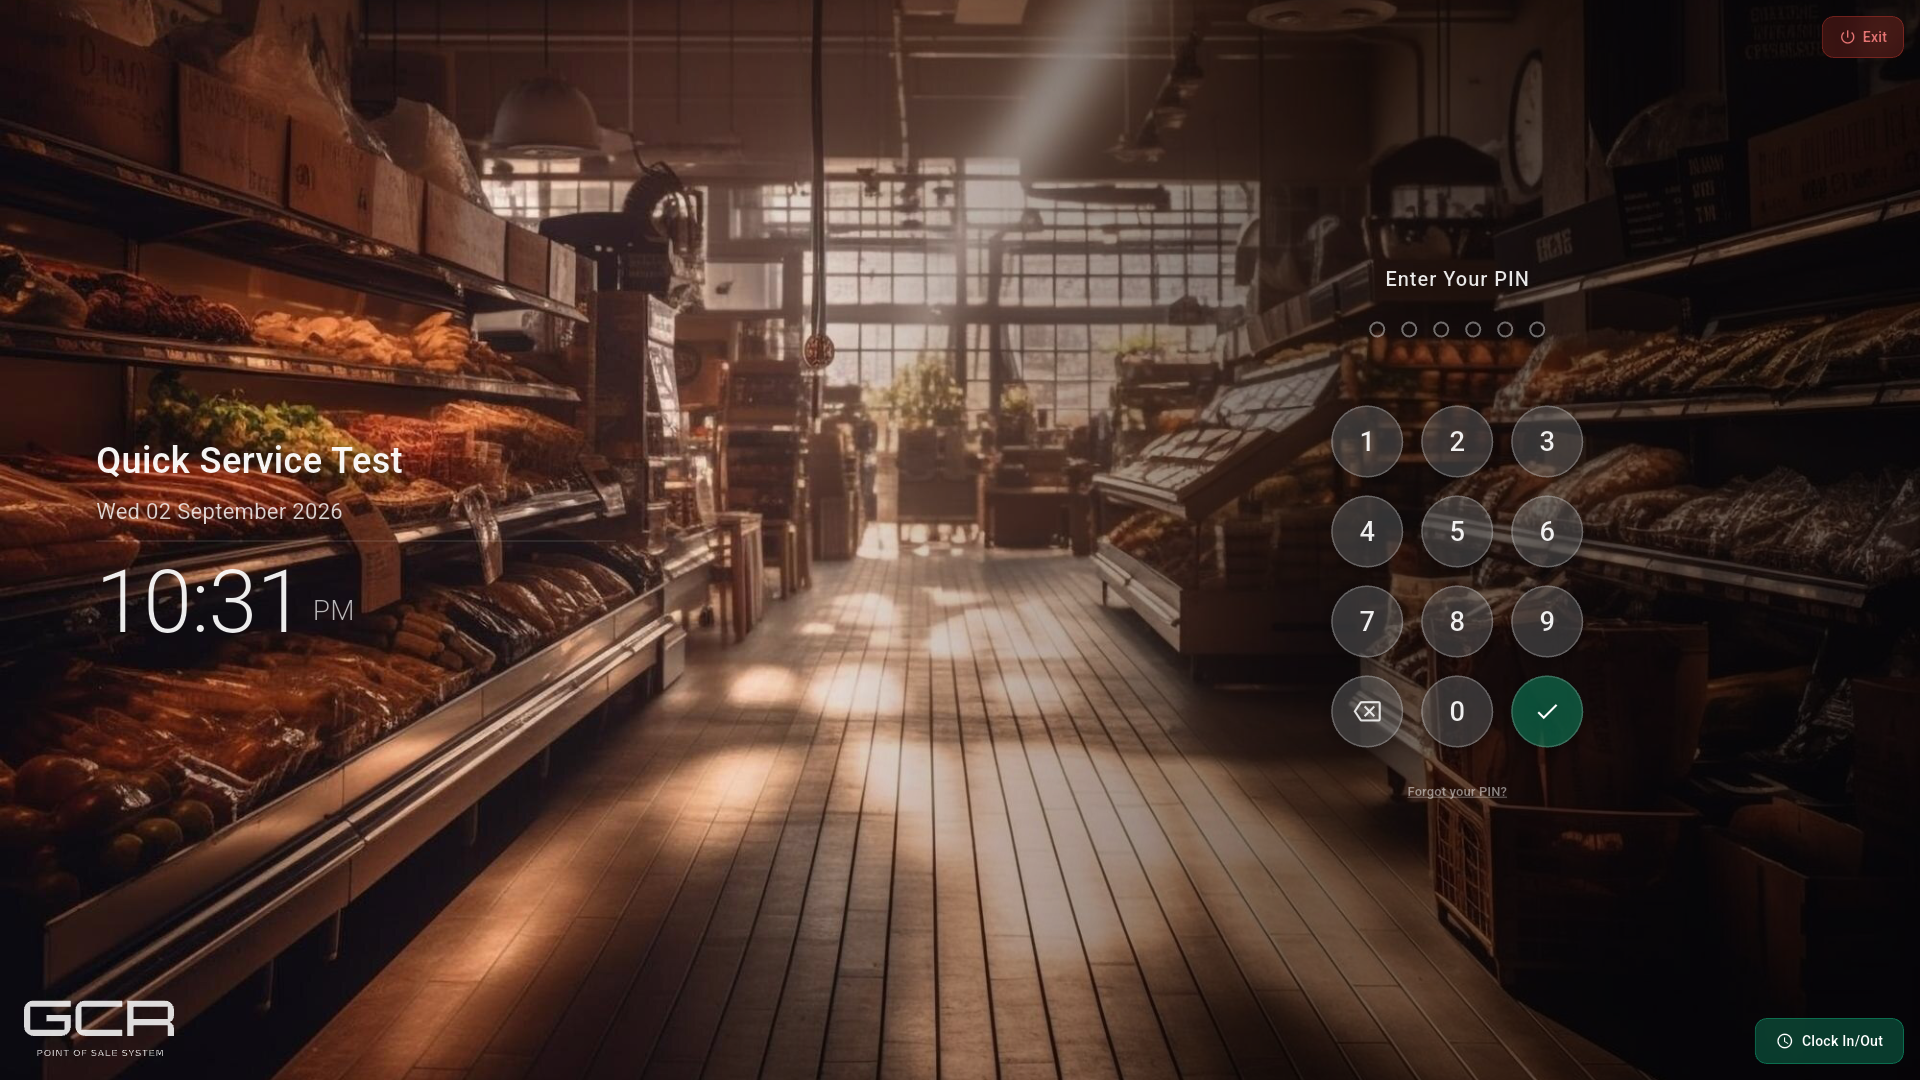
- Every employee has a personal PIN. Type it and confirm with the green button.
- The Clock In/Out button (bottom right) lets staff punch in/out without opening the register — useful for kitchen or non-cashier staff.
- Exit (top right) closes the application (normally restricted).
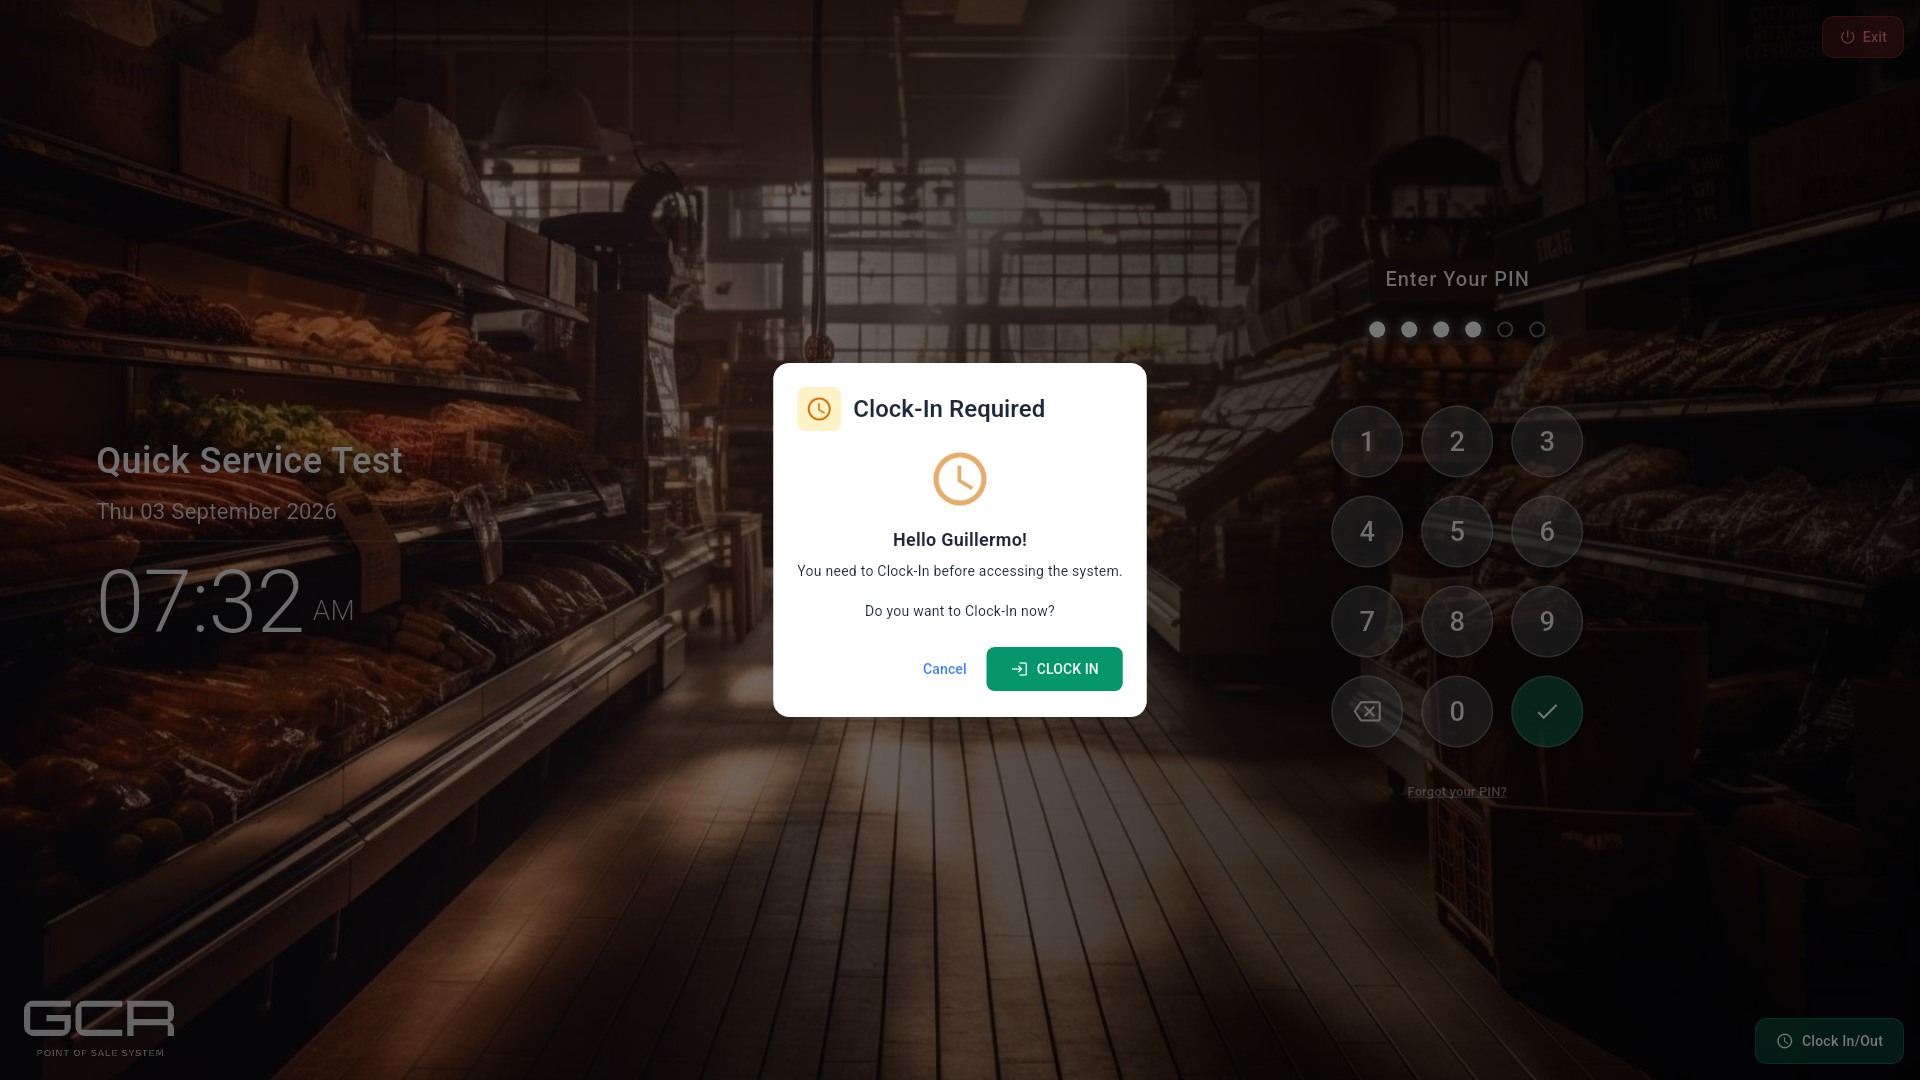
If the employee's role has "Require Clock In" enabled (portal → Employees → Roles & Permissions), the POS blocks entry until they punch in, and offers to do it on the spot:
2. Main screen
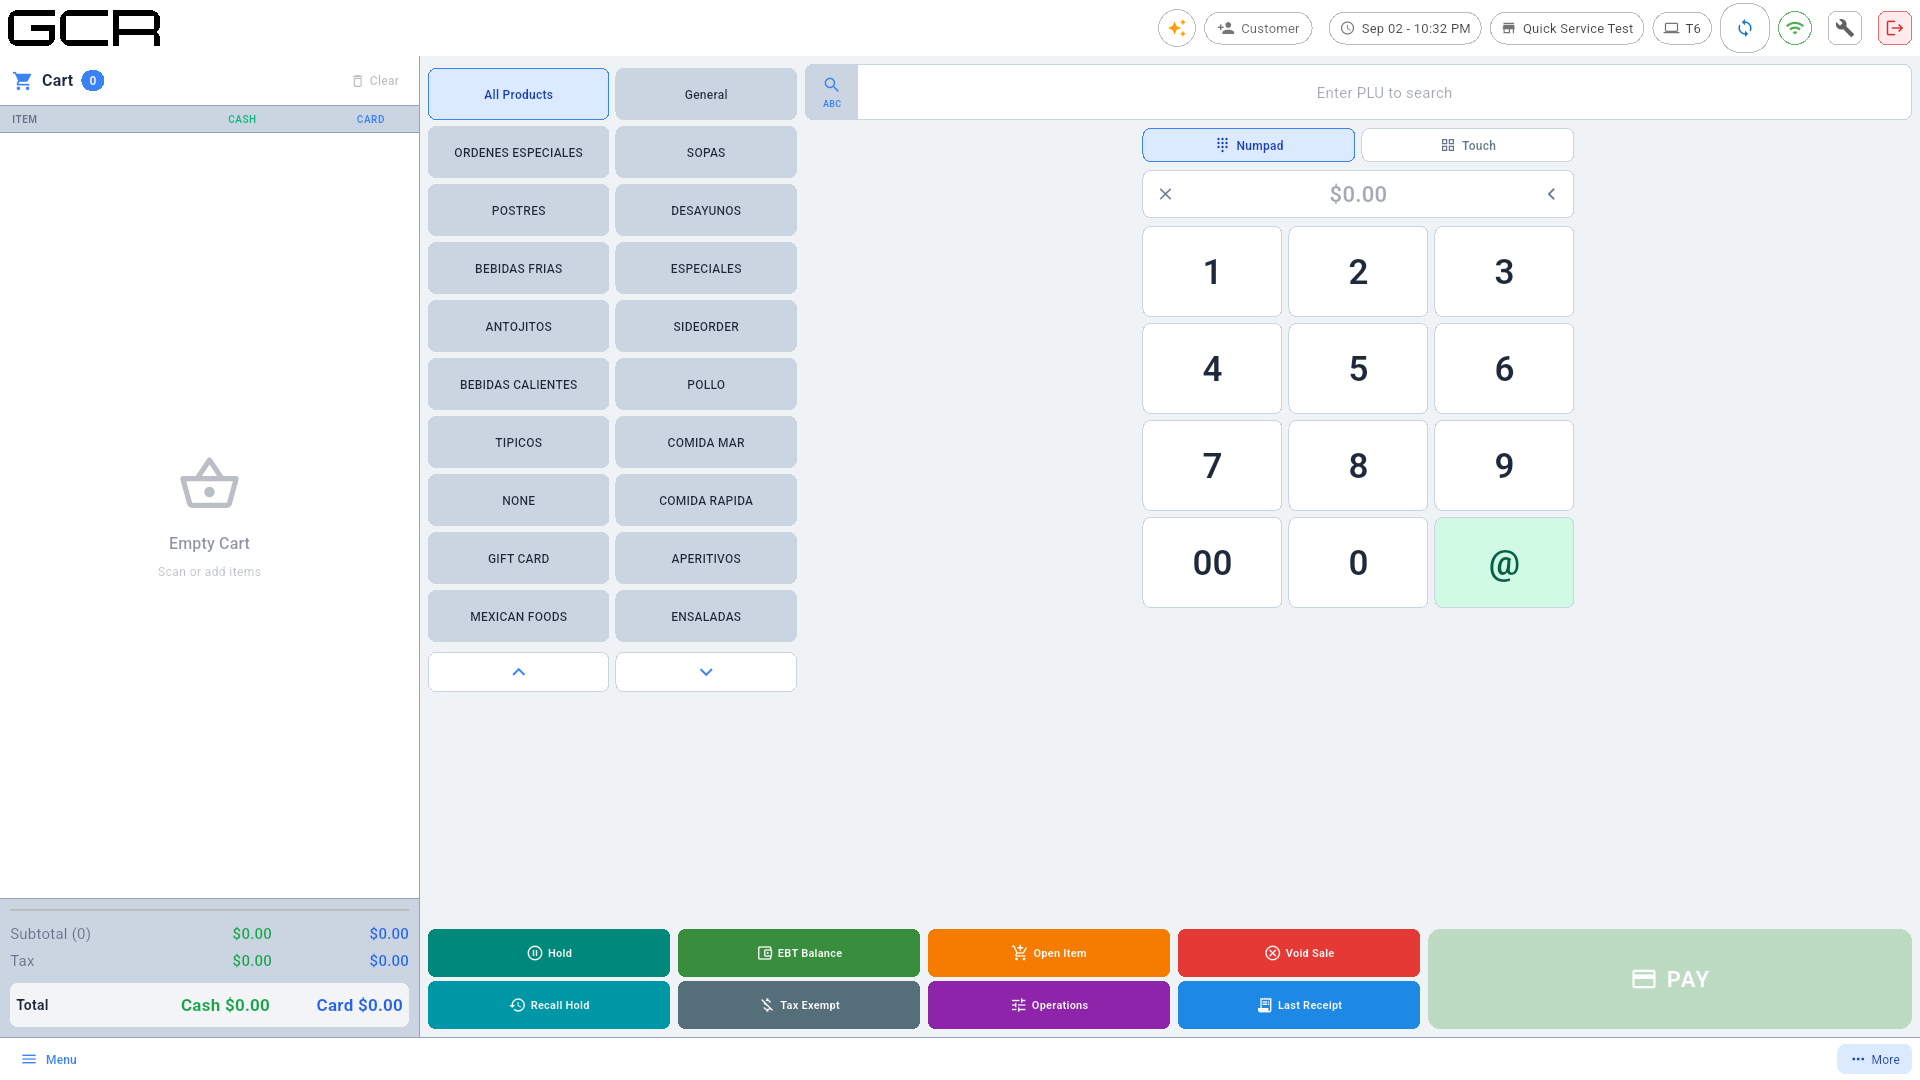
The selling screen is built for fast scanning:
- Left: the cart. Each line shows quantity, CASH price and CARD price. Below: subtotal, cash discount, tax, and TOTAL for both price modes.
- Center: category buttons to find a product by touch.
- Right: the Enter PLU to search bar (type a PLU or scan a barcode) and the large numeric keypad.
- Numpad / Touch toggles between keypad selling and the touch product grid.
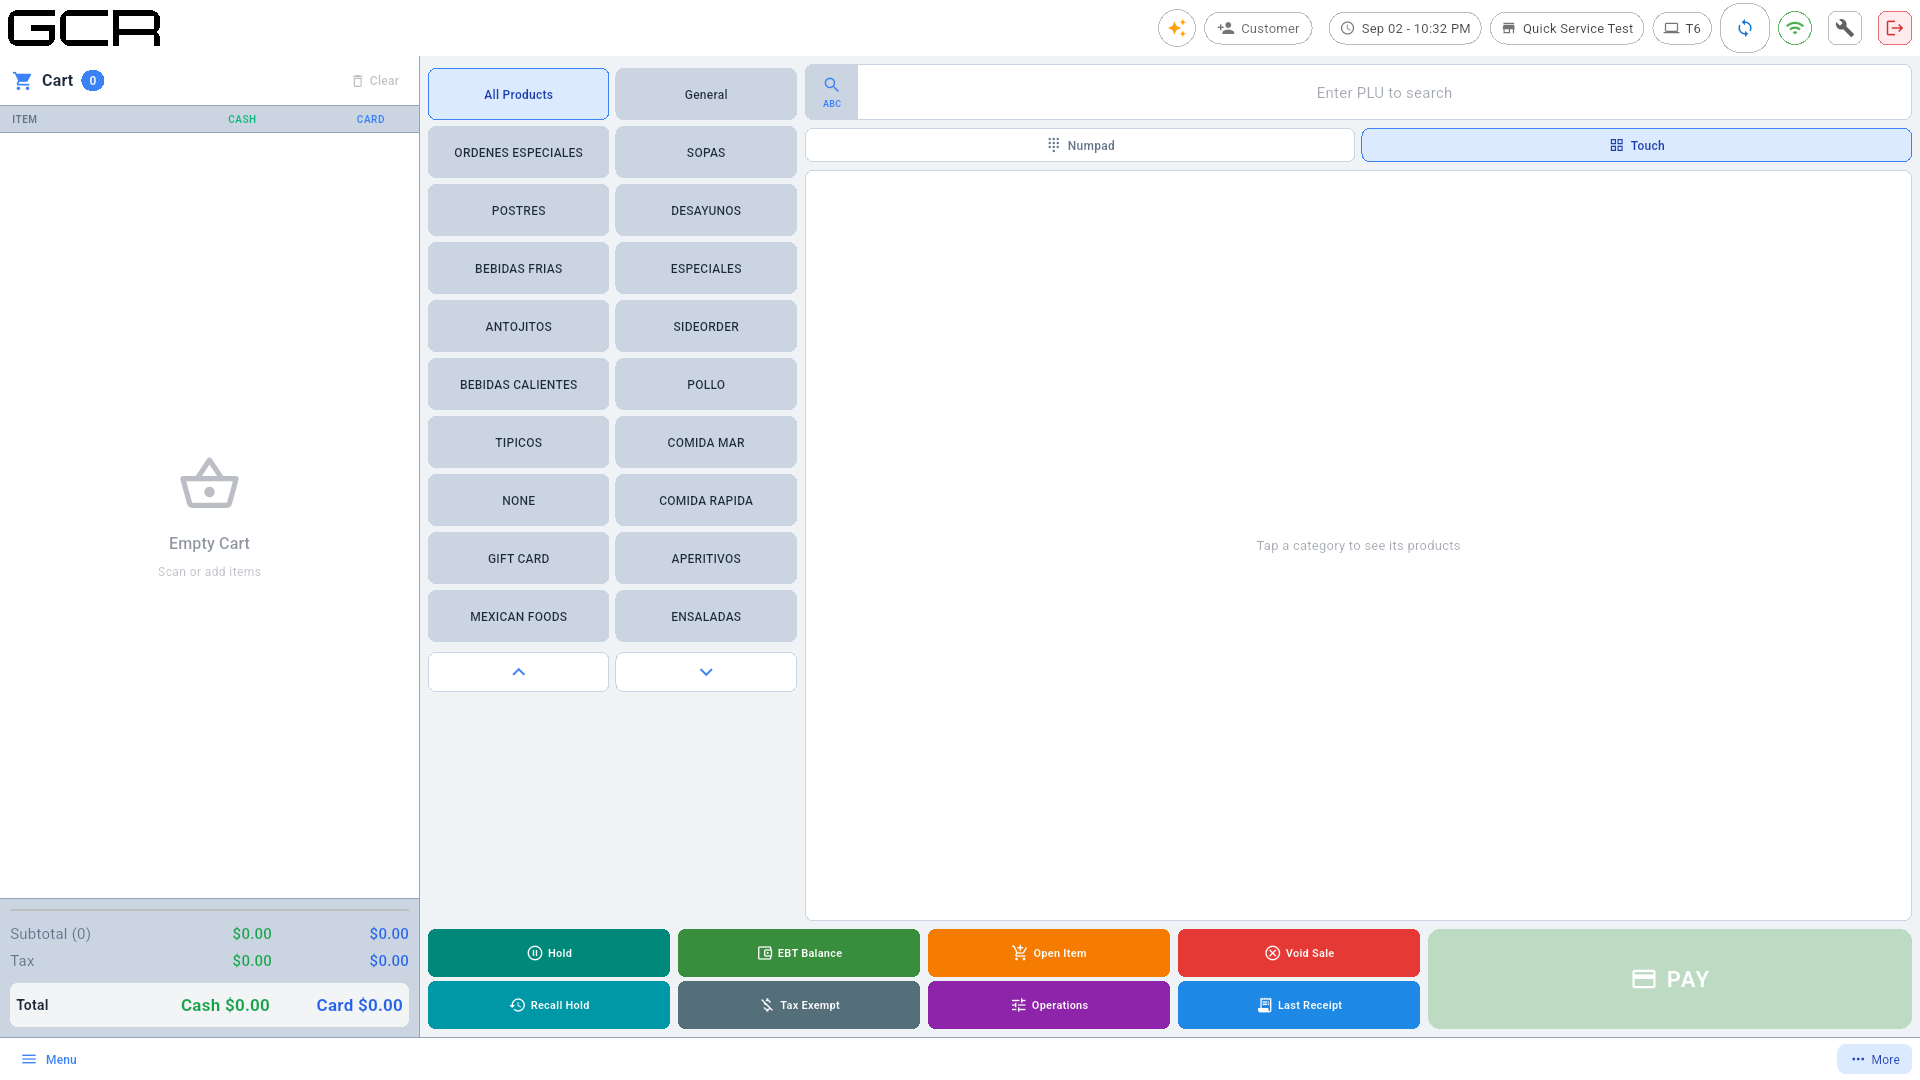
- Top bar: Customer, date/time, store, terminal (T6), cloud sync status, WiFi, tools, and logout.
Action buttons (bottom row)
| Button | Purpose |
|---|---|
| Hold | Parks the current cart so you can serve another customer. |
| Recall Hold | Brings a parked cart back. |
| EBT Balance | EBT balance inquiry (SNAP or Cash). |
| Tax Exempt | Marks the sale tax-exempt. |
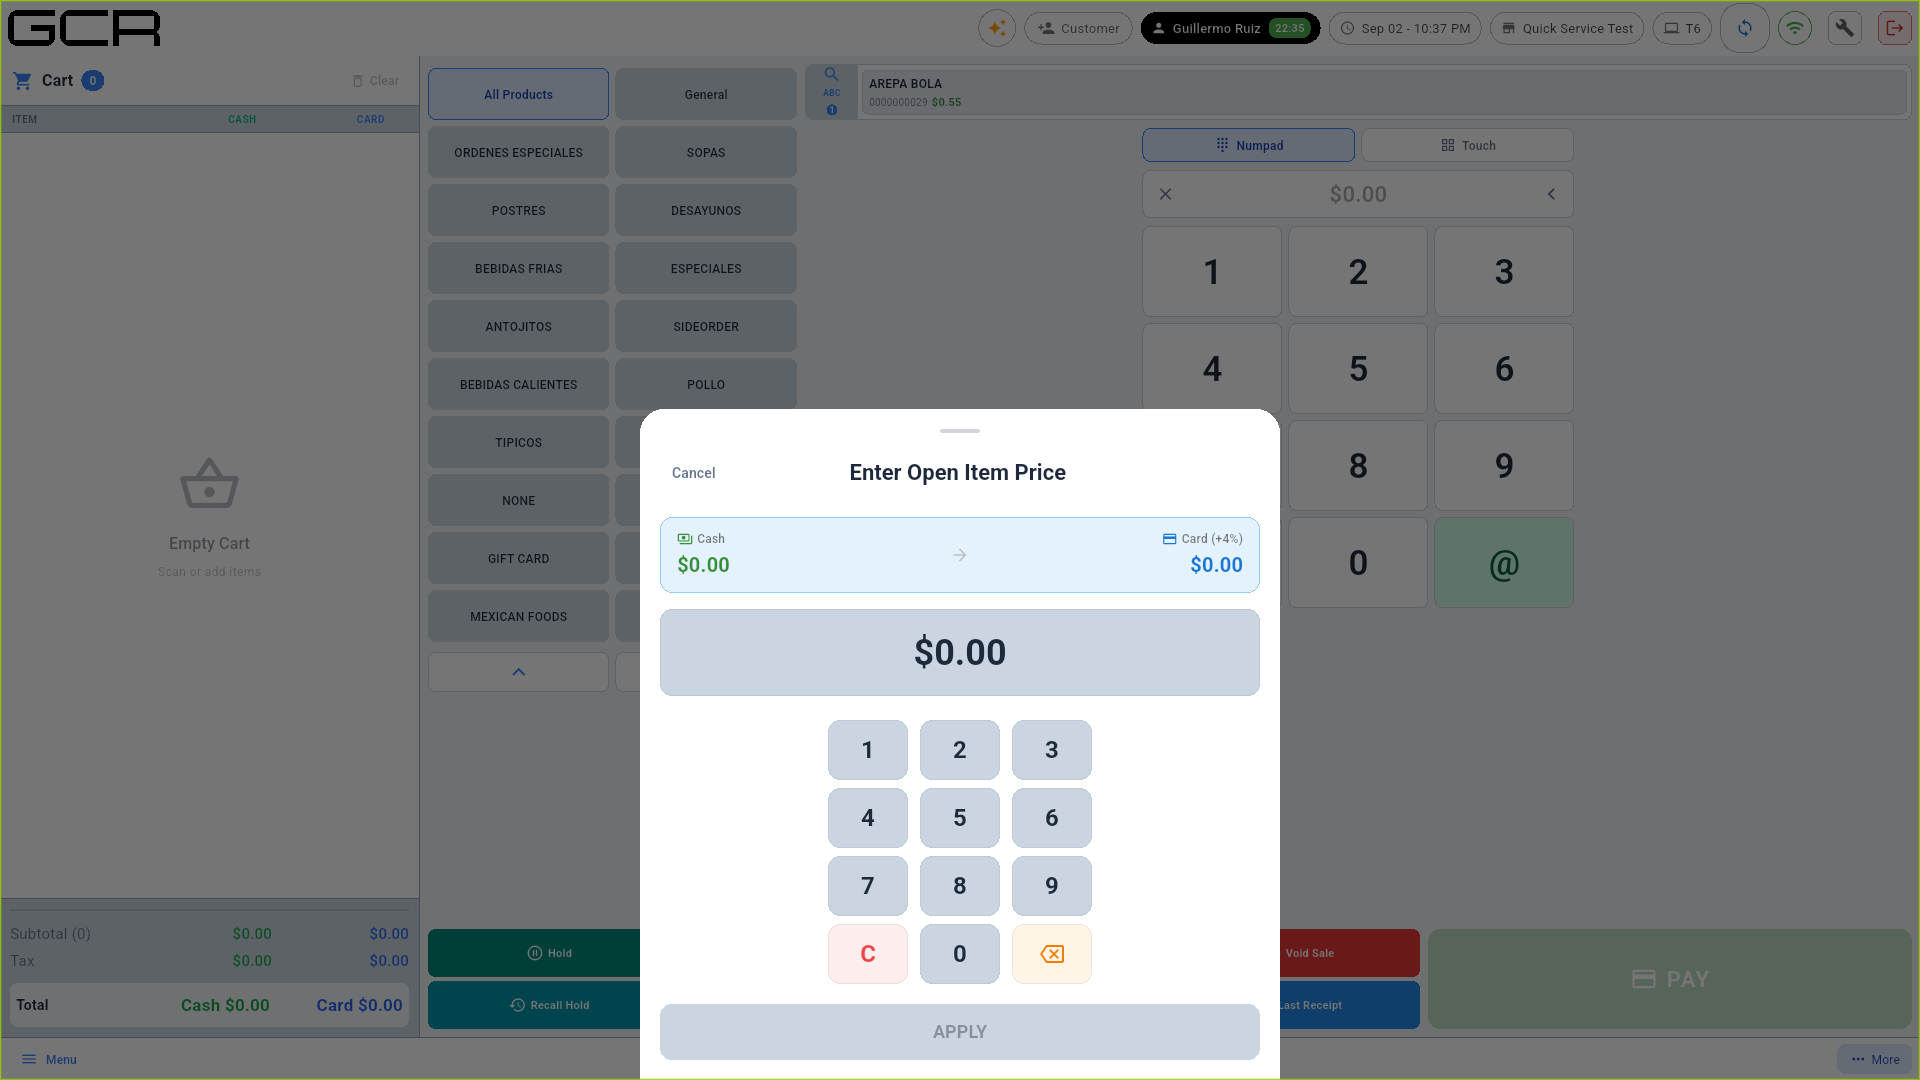
| Open Item | Sells an item without a code by typing its price. |
| Operations | Cart discounts, gratuity and special operations. |
| Void Sale | Voids a line, the cart, or a completed sale. |
| Last Receipt | Reprints the last receipt. |
| PAY | Opens the payment screen. |
3. Selling: the keypad in depth (quick keys)
The keypad is the heart of Supermarket mode. Knowing its combinations means no guessing with a line of customers waiting:
Base rule: the digits you type accumulate on the display as
cents — 250 shows as $2.50, 1000 as $10.00. That same number
works as a price (if you tap a category) or as a PLU/UPC code (if
you submit it with @ or Enter). The 00 key enters two zeros in one
tap.
| Combination | What it does |
|---|---|
[scan] | Adds 1 unit of the scanned product. |
digits | Builds the price/code on the display and live-searches: the strip above shows products whose code starts with it — tap one to add it. |
code + @ (2nd tap) | Submits the code as a PLU/UPC and adds the product. |
quantity + @ | Arms the multiplier: the display shows 3x @ $0.00. It applies to the next add (max 99). |
quantity + @ + [scan] | Adds N units of the scanned product. E.g. 3 @ then scan = 3 units. |
quantity + @ + code + @ | Adds N units of the PLU. E.g. 2 @ 4011 @ = 2 bananas. |
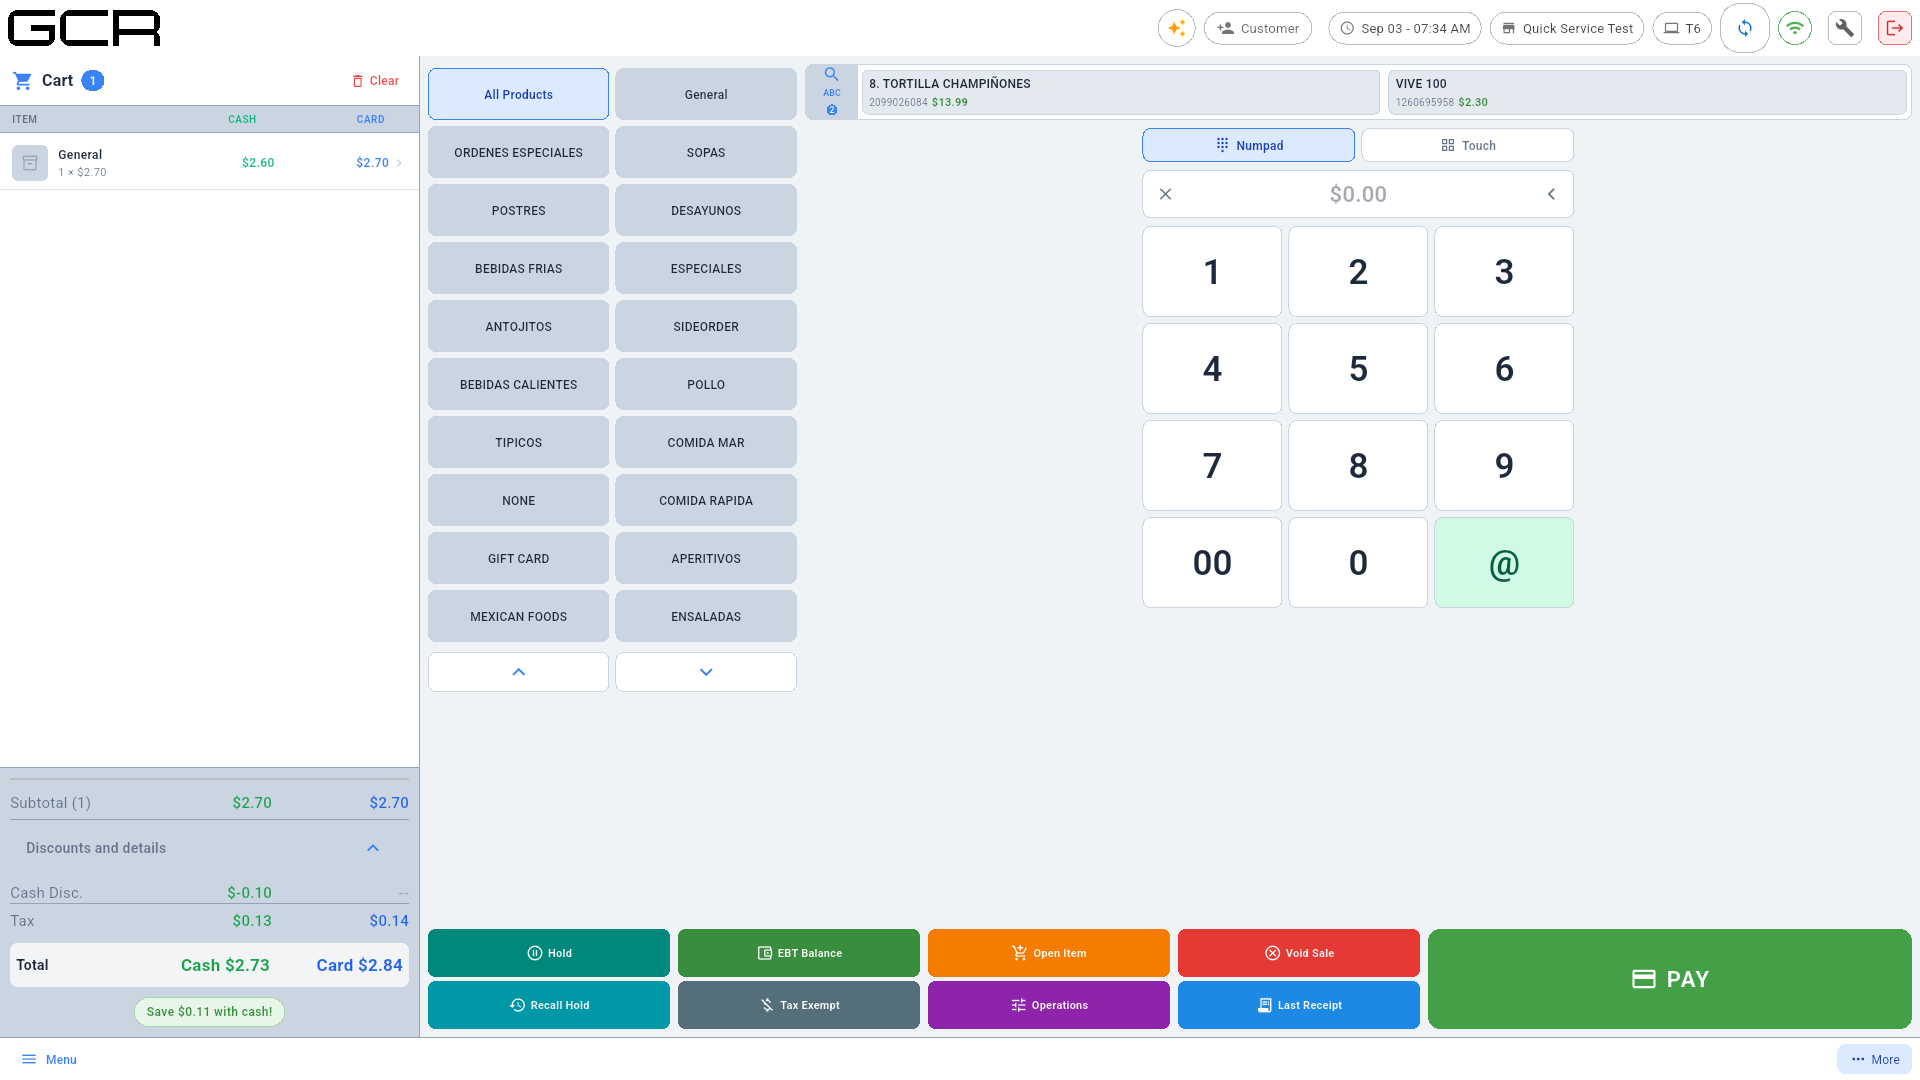
price + tap a category | Adds an open item in that category at that price. E.g. 250 + PRODUCE = a $2.50 PRODUCE item. |
quantity + @ + price + category | N open items. E.g. 3 @ 250 + PRODUCE = 3 × $2.50. |
X | Clears everything (price, code and armed quantity). |
< (backspace) | Deletes the last digit; with no digits and a quantity armed, it disarms it and puts the number back on the display. |
Important notes:
- The multiplier is one-shot: after the add it returns to 1.
- An armed quantity applies to the next add through any path: scan, code+@, a search tile, a Touch-grid tile, or a category open item.
- With digits on the display, tapping a category does not filter — it
adds the open item. To filter by category, clear first with
X. - The typed price is the cash price; the card price is computed automatically with the configured surcharge.
3.1 Live search while you type
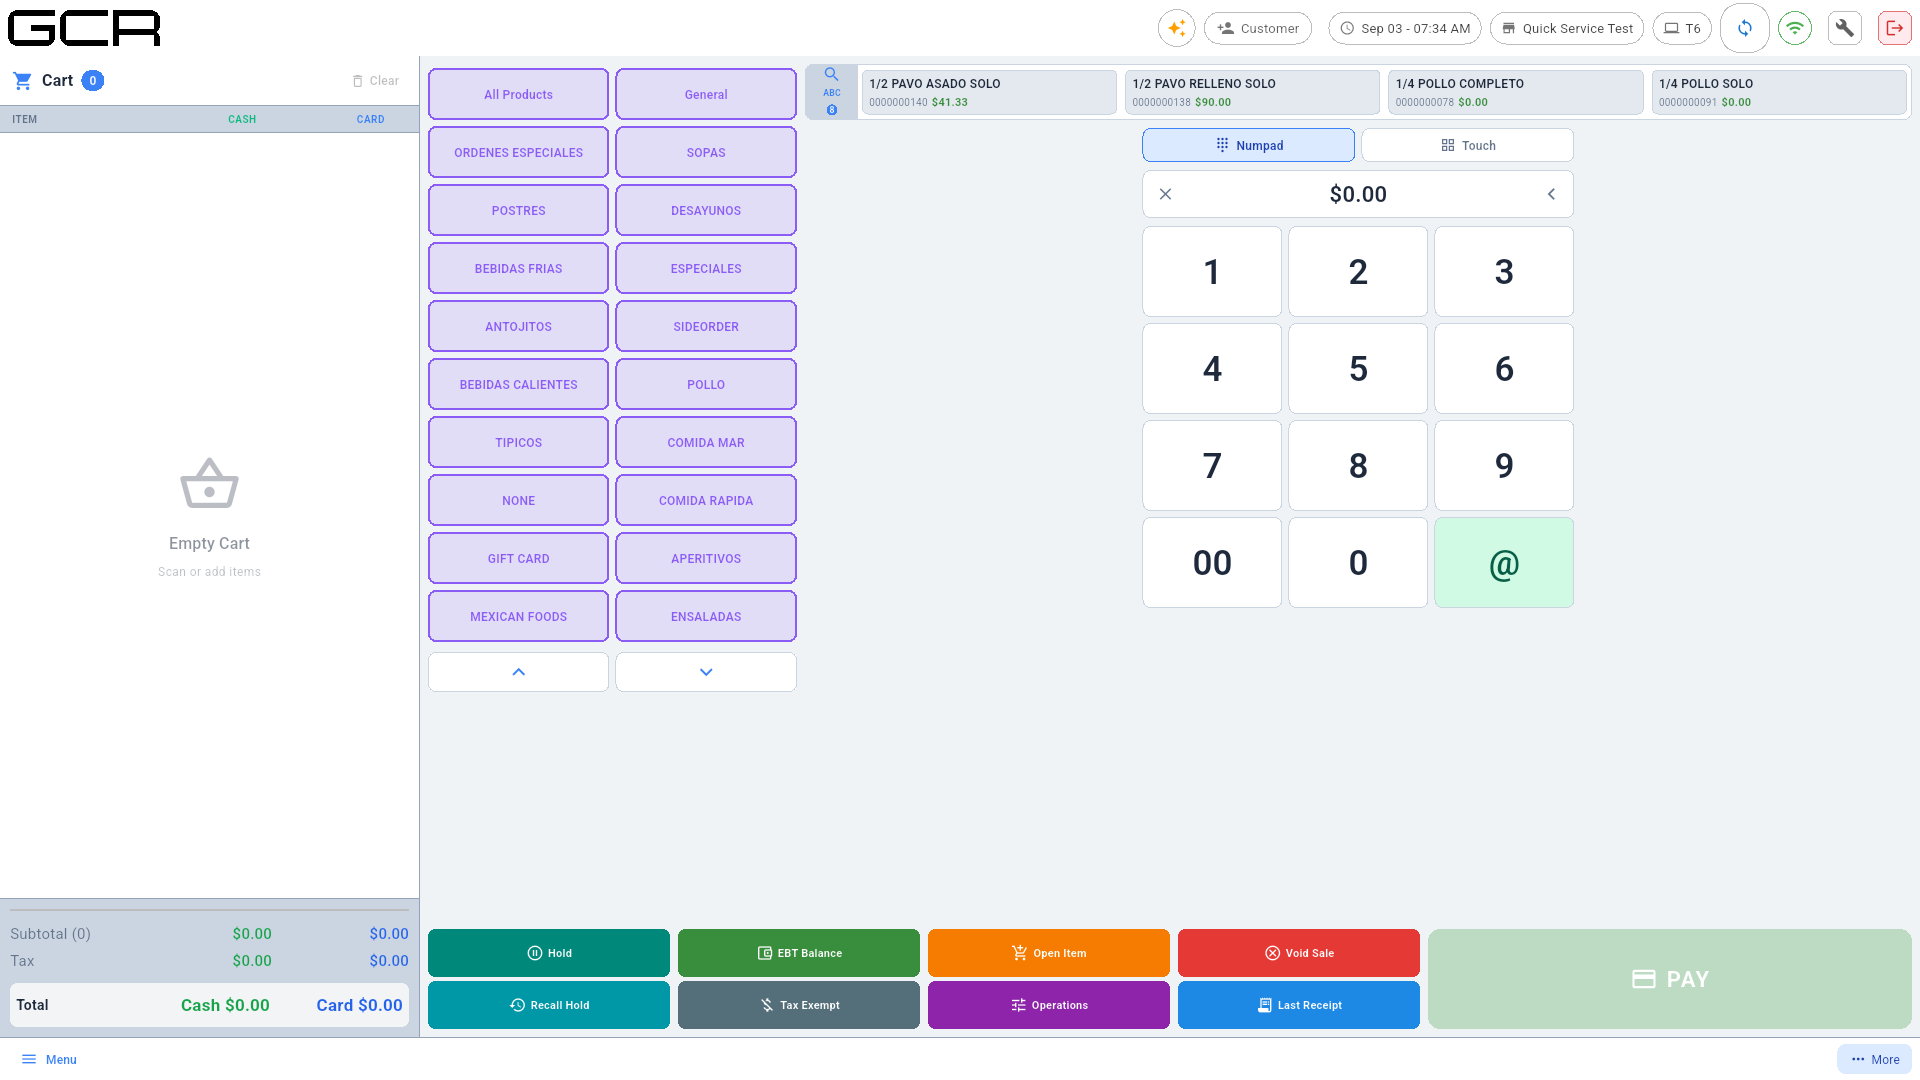
From the second digit on, the top strip shows the products whose code or UPC starts with what you typed (name, code and price). Tapping a tile adds it to the cart — with the armed quantity if there is one. Ideal when you only remember the start of a PLU.
3.2 Quantity multiplier (@) — full example
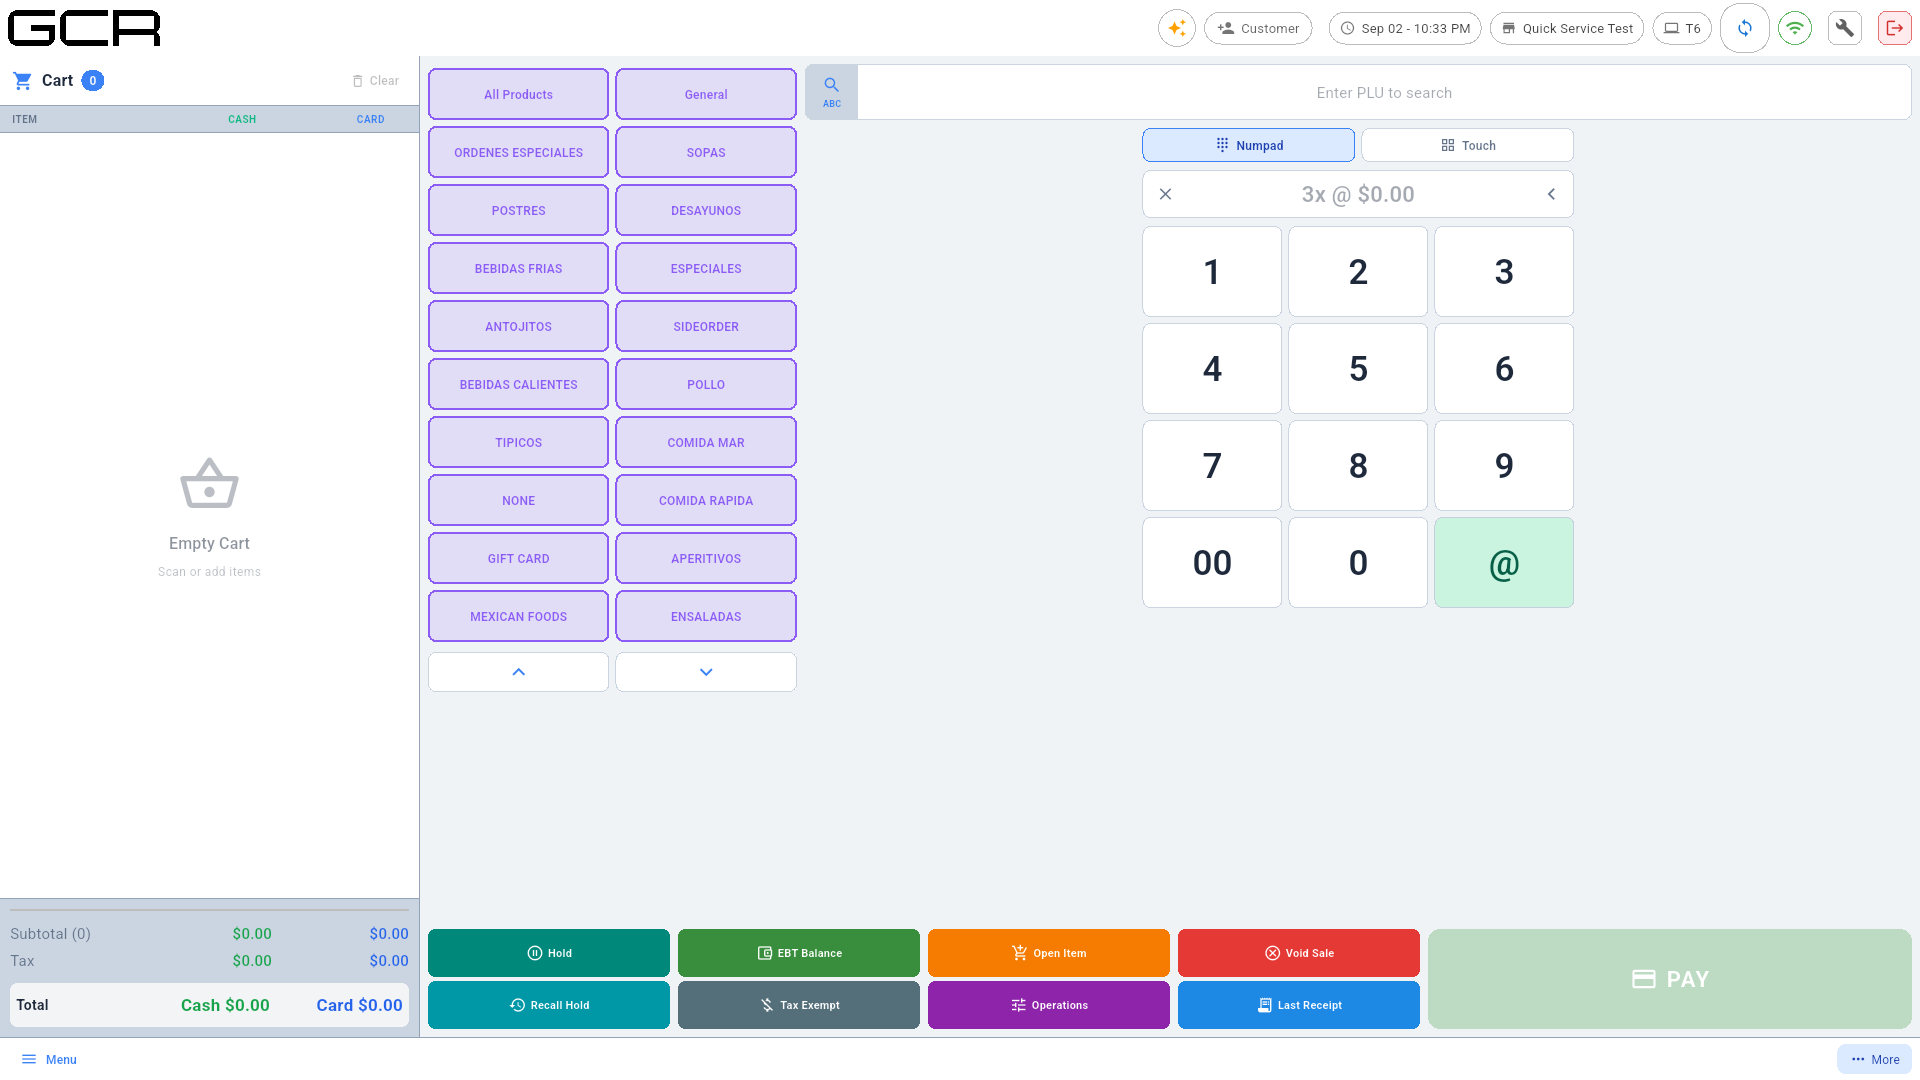
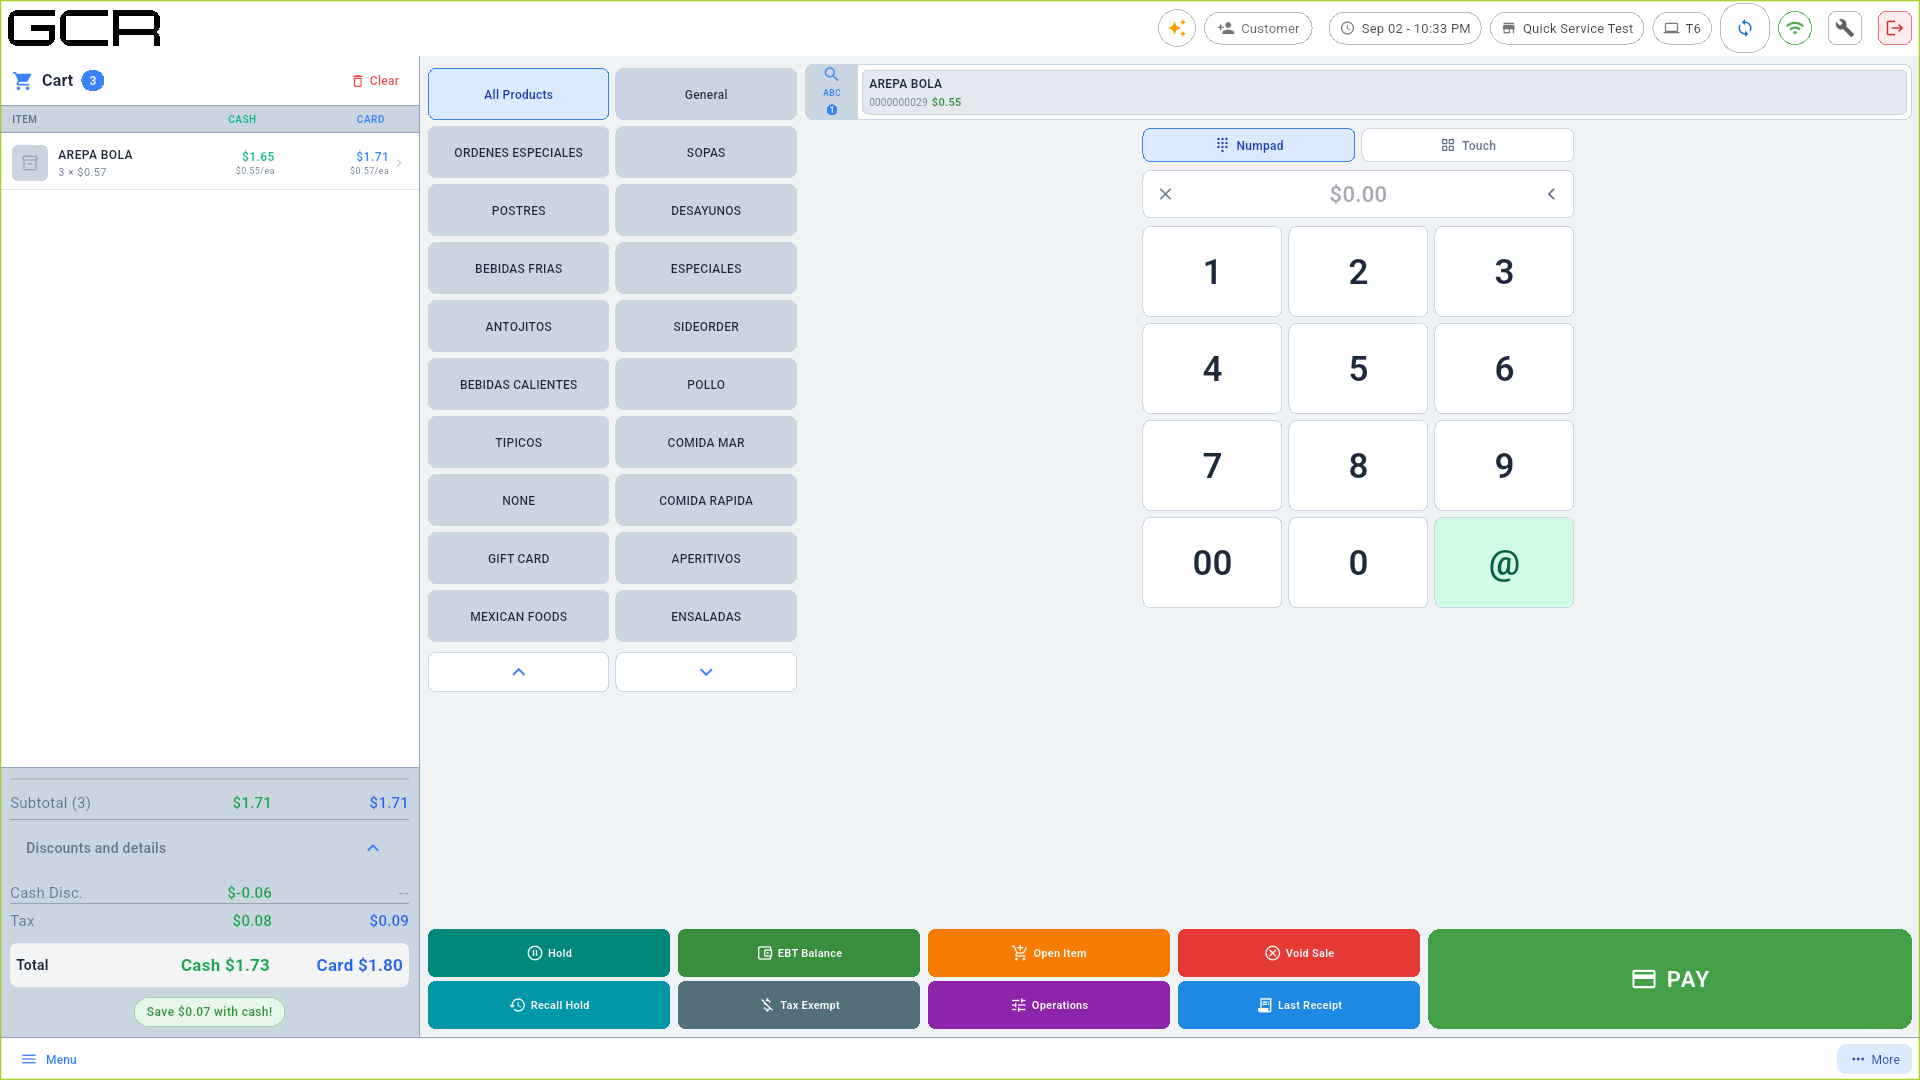
- Type the quantity (e.g.
3) and tap @ — the display shows3x @ $0.00. - Scan, submit a PLU with
@, or tap a product. It enters with quantity 3.
3.3 Open item by category (free-price selling)
The fastest path for no-code products (loose produce, miscellaneous):
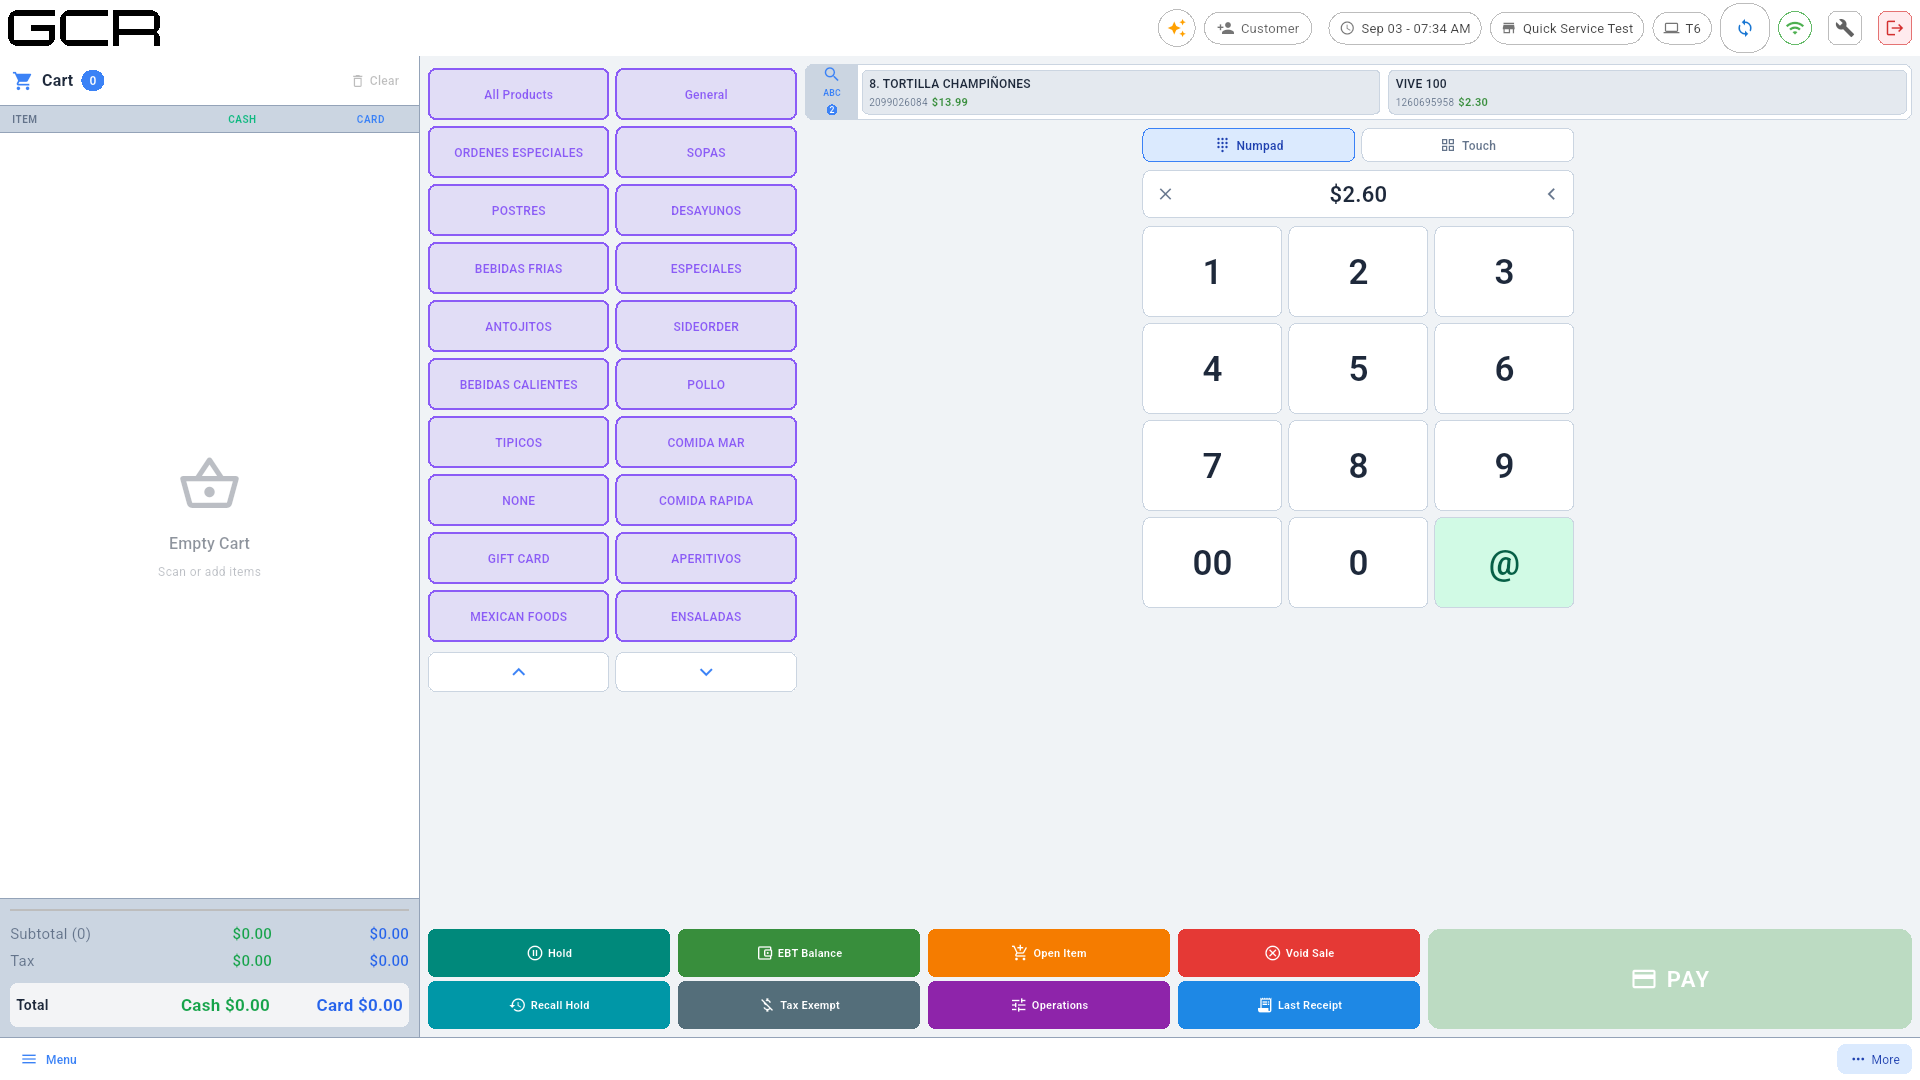
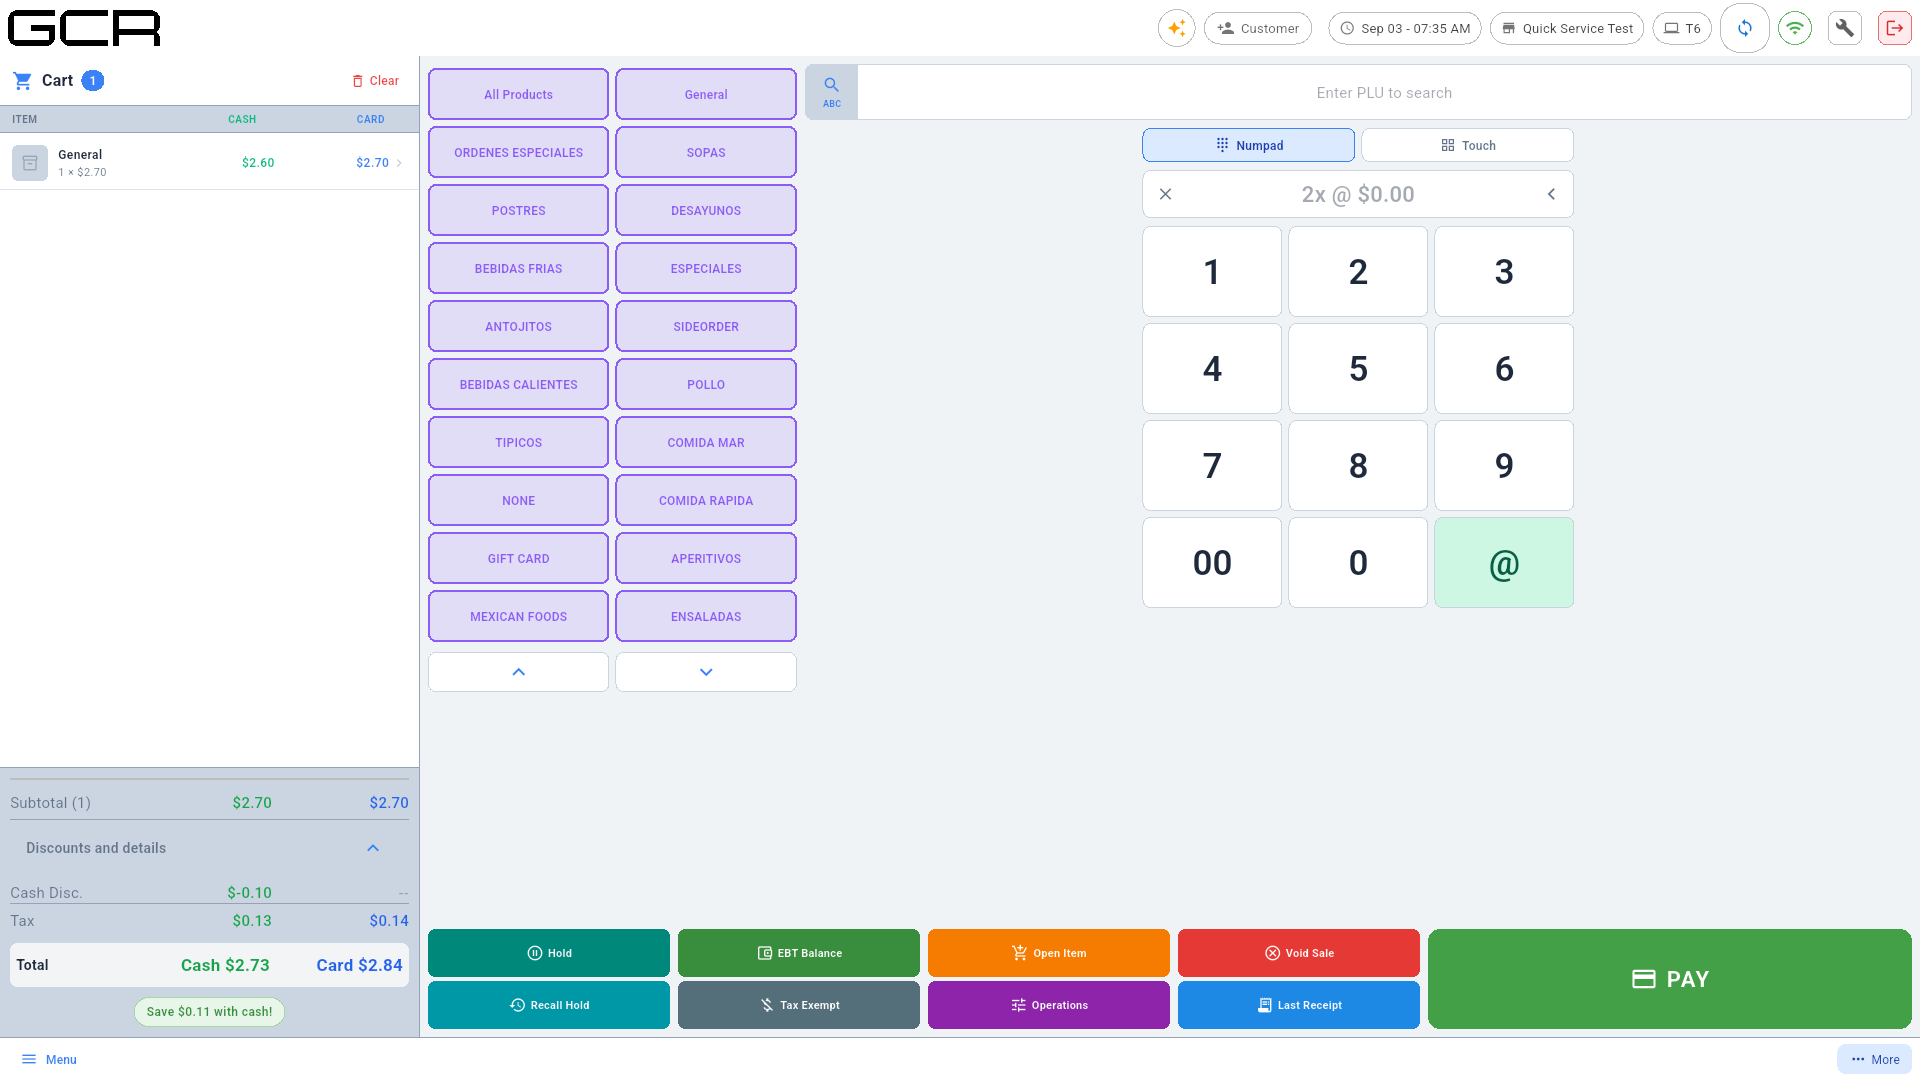
- Type the price on the keypad (e.g.
260→$2.60). - Tap the target category (e.g. General).
- The item enters the cart as an open sale of that category:
The orange Open Item button does the same through a dialog — useful when you want to preview the cash/card price before adding:
3.4 Physical keyboard and USB scanner
With a physical keyboard attached, the whole keypad works without touching the screen:
| Physical key | Equivalent |
|---|---|
0–9 | Keypad digits. |
@ or * | The @ button (arm quantity / submit code). |
Enter | Submits the typed code as a PLU (honors the armed quantity: 3 * 4011 Enter). |
Backspace | < (delete last digit). |
Esc or Delete | X (clear all). |
A USB scanner (keyboard wedge) is detected automatically by its burst
speed: no field needs focus, it never mixes with what you are typing, and
it honors the armed quantity (3 @ + scan = 3 units).
3.5 Products that ask for extra input when added
- Weighted product (sold by the pound): opens the weight dialog — it reads the connected scale or lets you type the weight.
- Ask-price product: prompts for the price on the spot.
- Product with pack sizes: asks whether you sell the unit or a pack (e.g. six-pack, case).
- Barcodes with embedded weight/price (label scales) are recognized per the profile configured in Settings → Hardware → Barcode Profile.
4. Hold and Recall
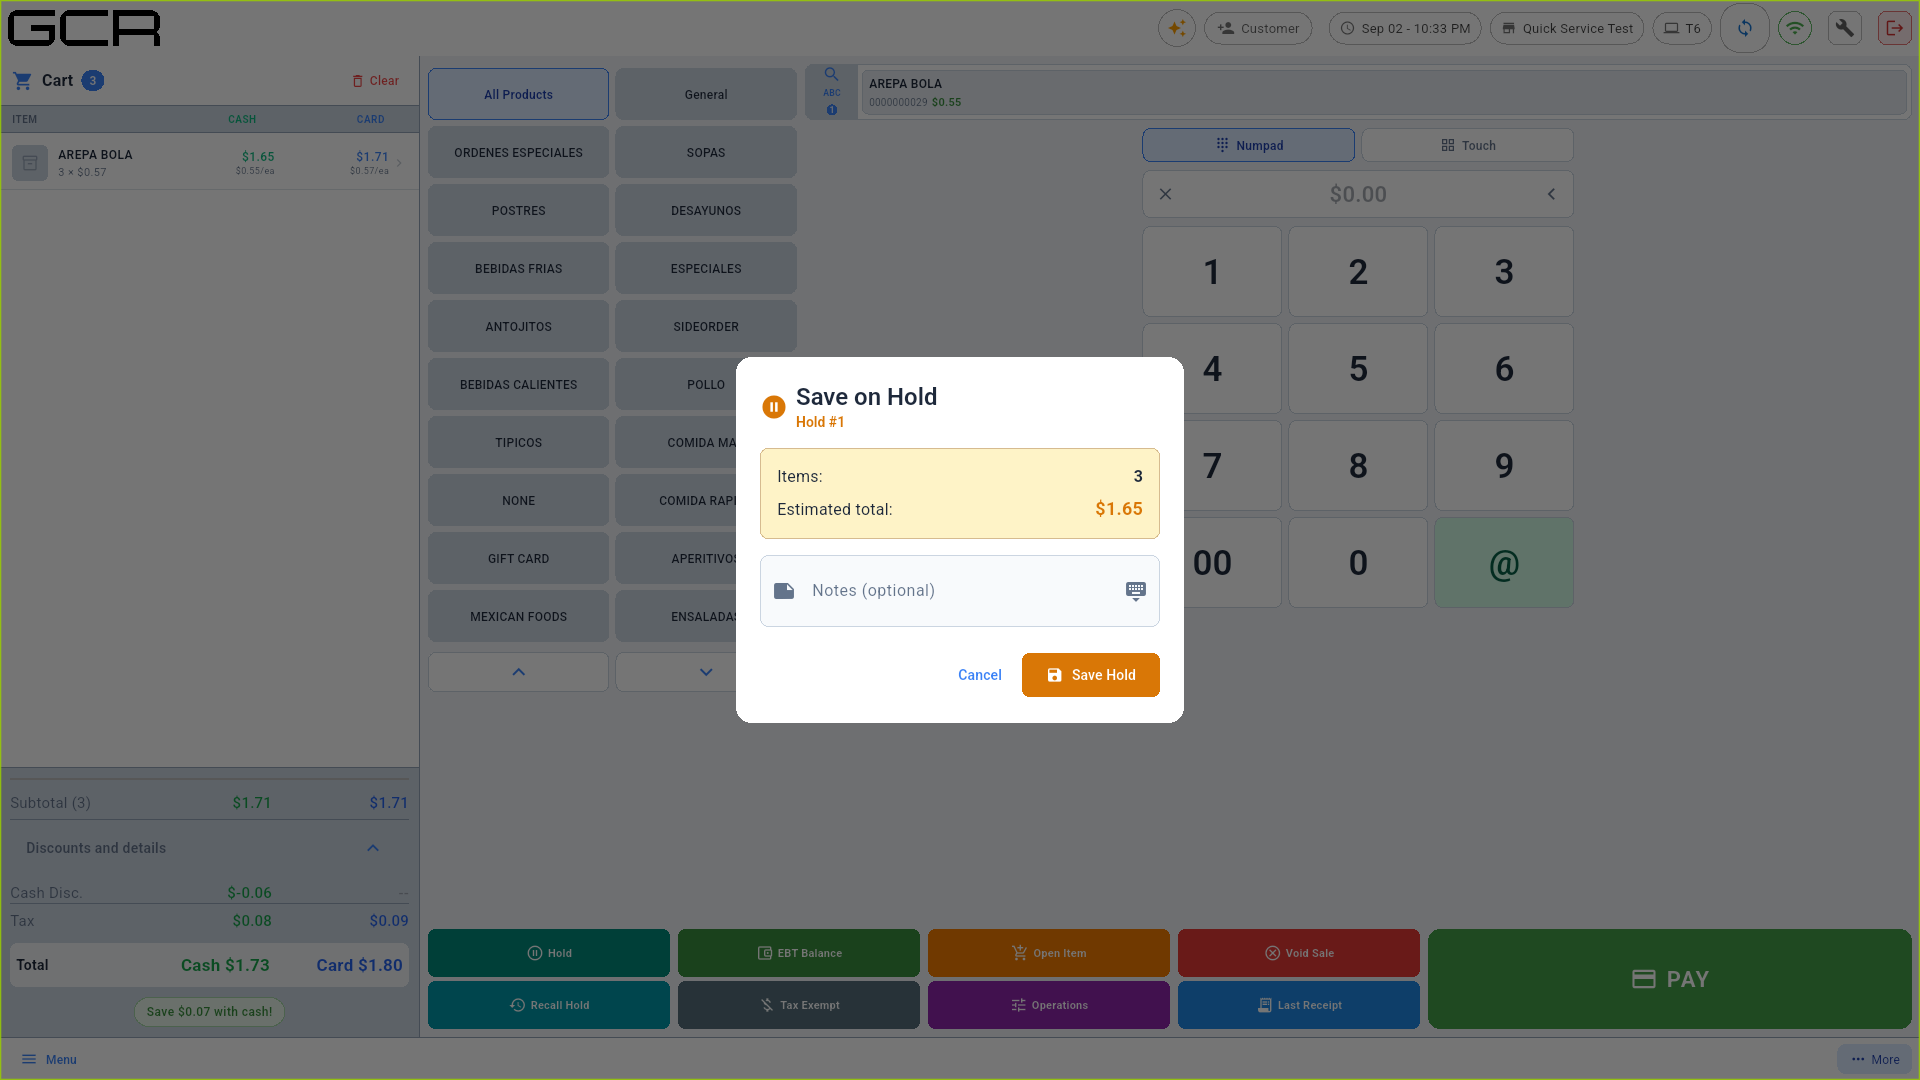
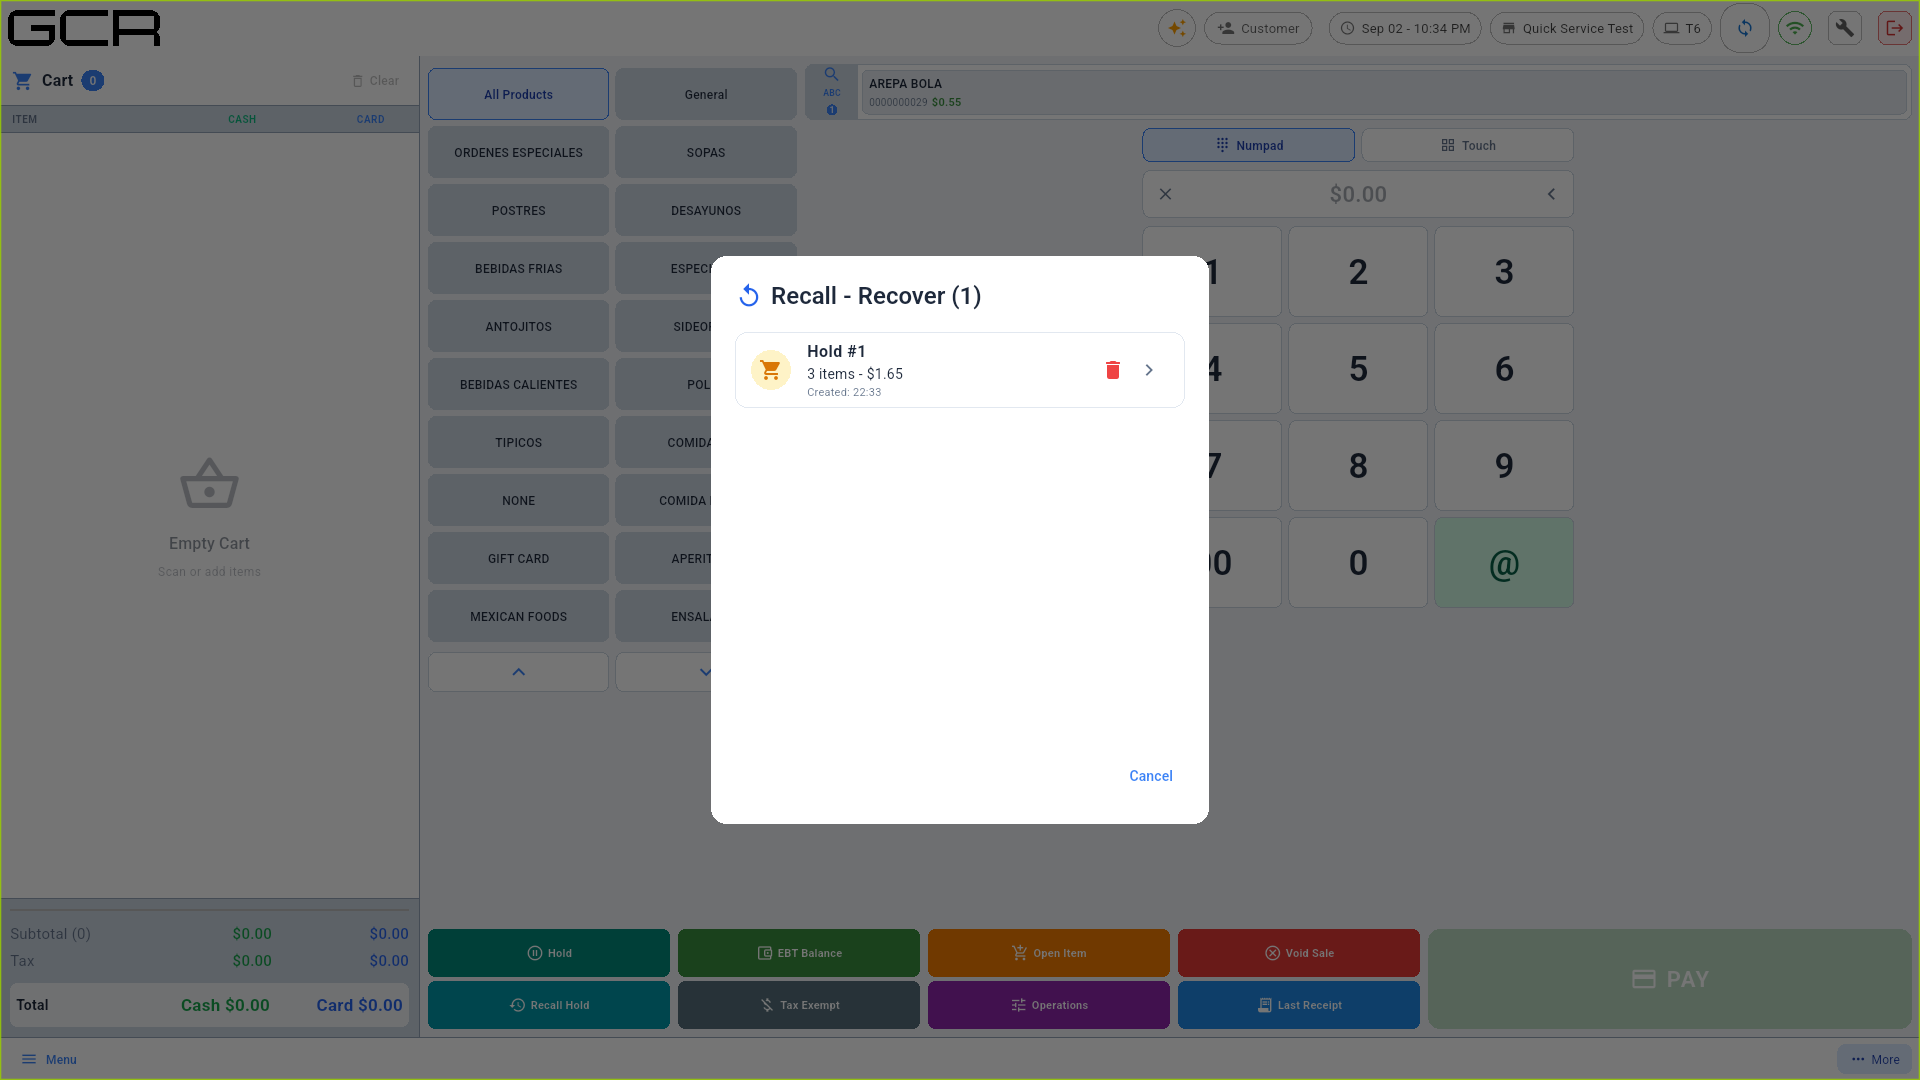
- Hold parks the cart under a number (#1, #2…) with an optional note, freeing the register for the next customer.
- Recall Hold lists parked sales; tap the arrow to recover one or the trash can to delete it.
5. Opening the register (shift)
A cash shift must be open before charging. If it is not, the POS shows "Shift Required" when you try to pay.
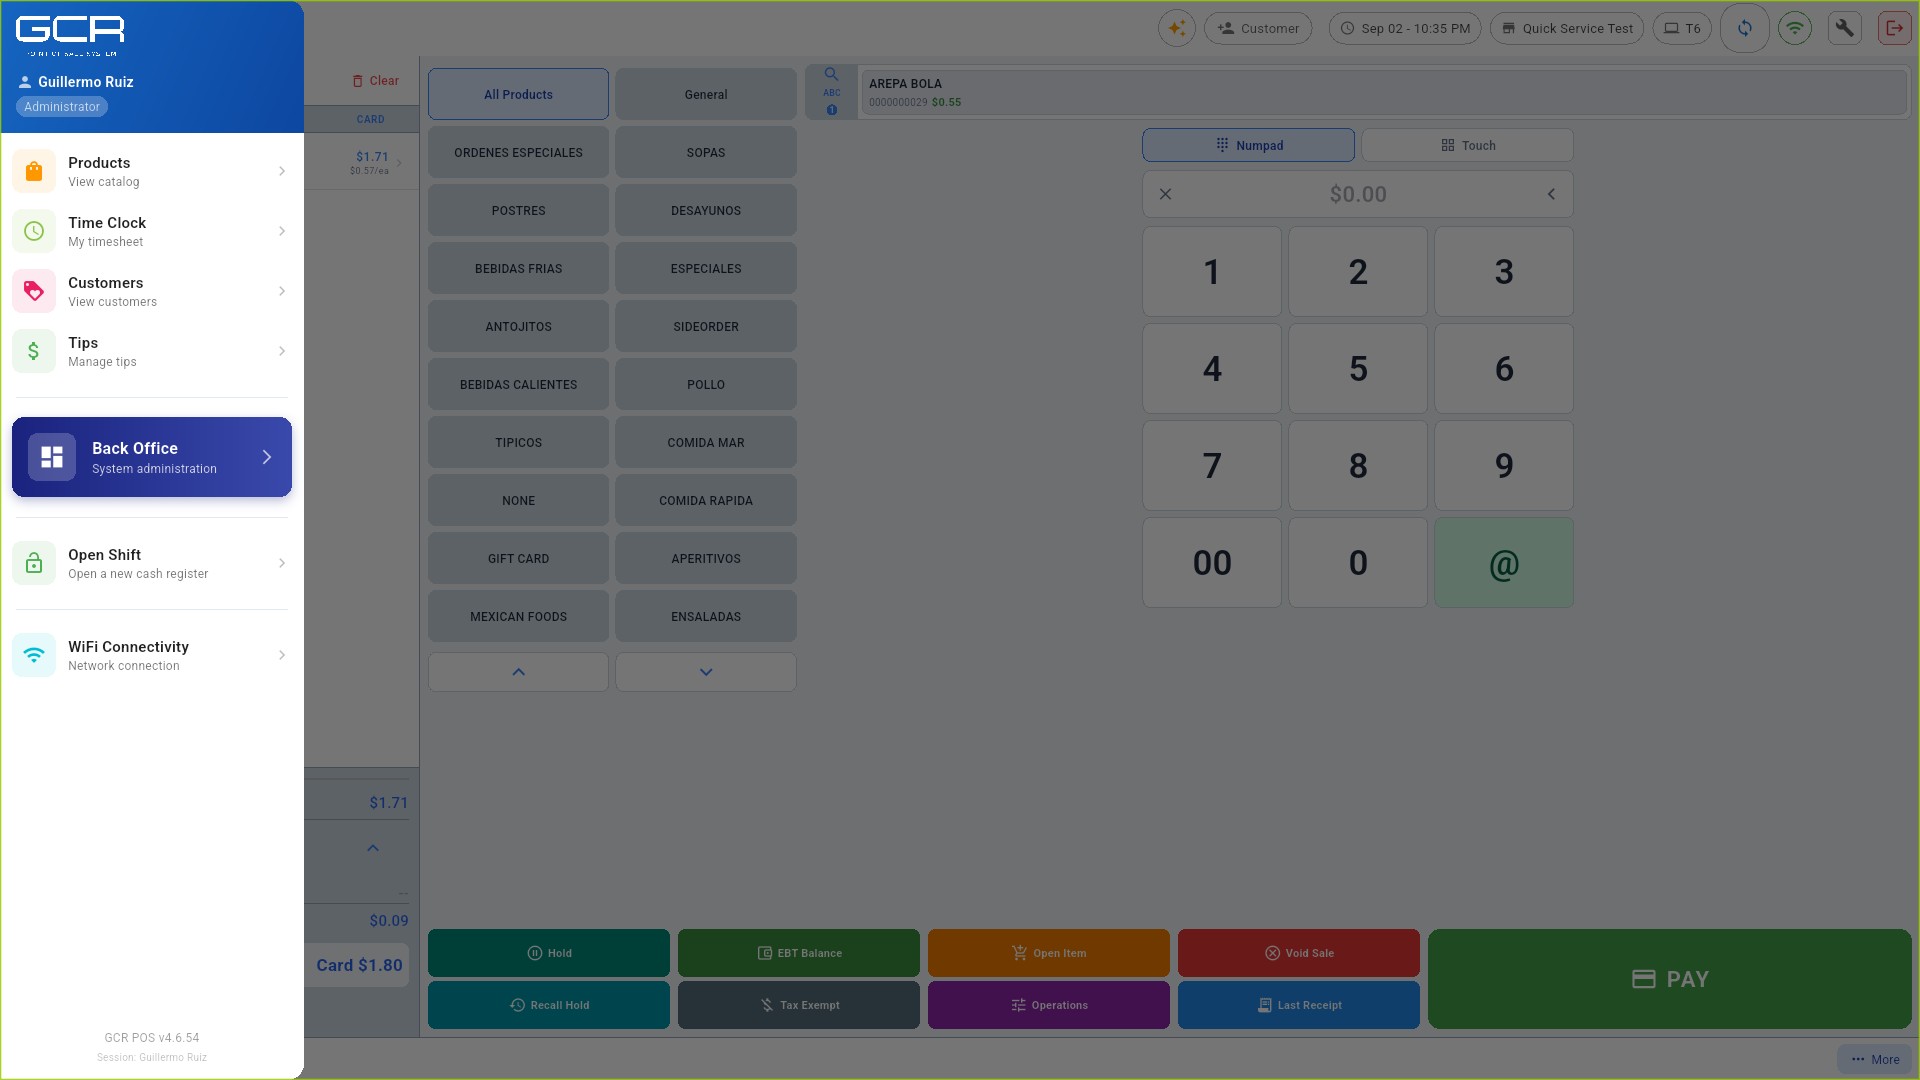
- Open the side menu (Menu, bottom left).
- Tap Open Shift (Open a new cash register).
- Enter the drawer's Starting Cash and confirm.
The header then shows the cashier with the active shift. Closing is done with the Z Report (see the Back Office manual).
6. Charging (PAY)
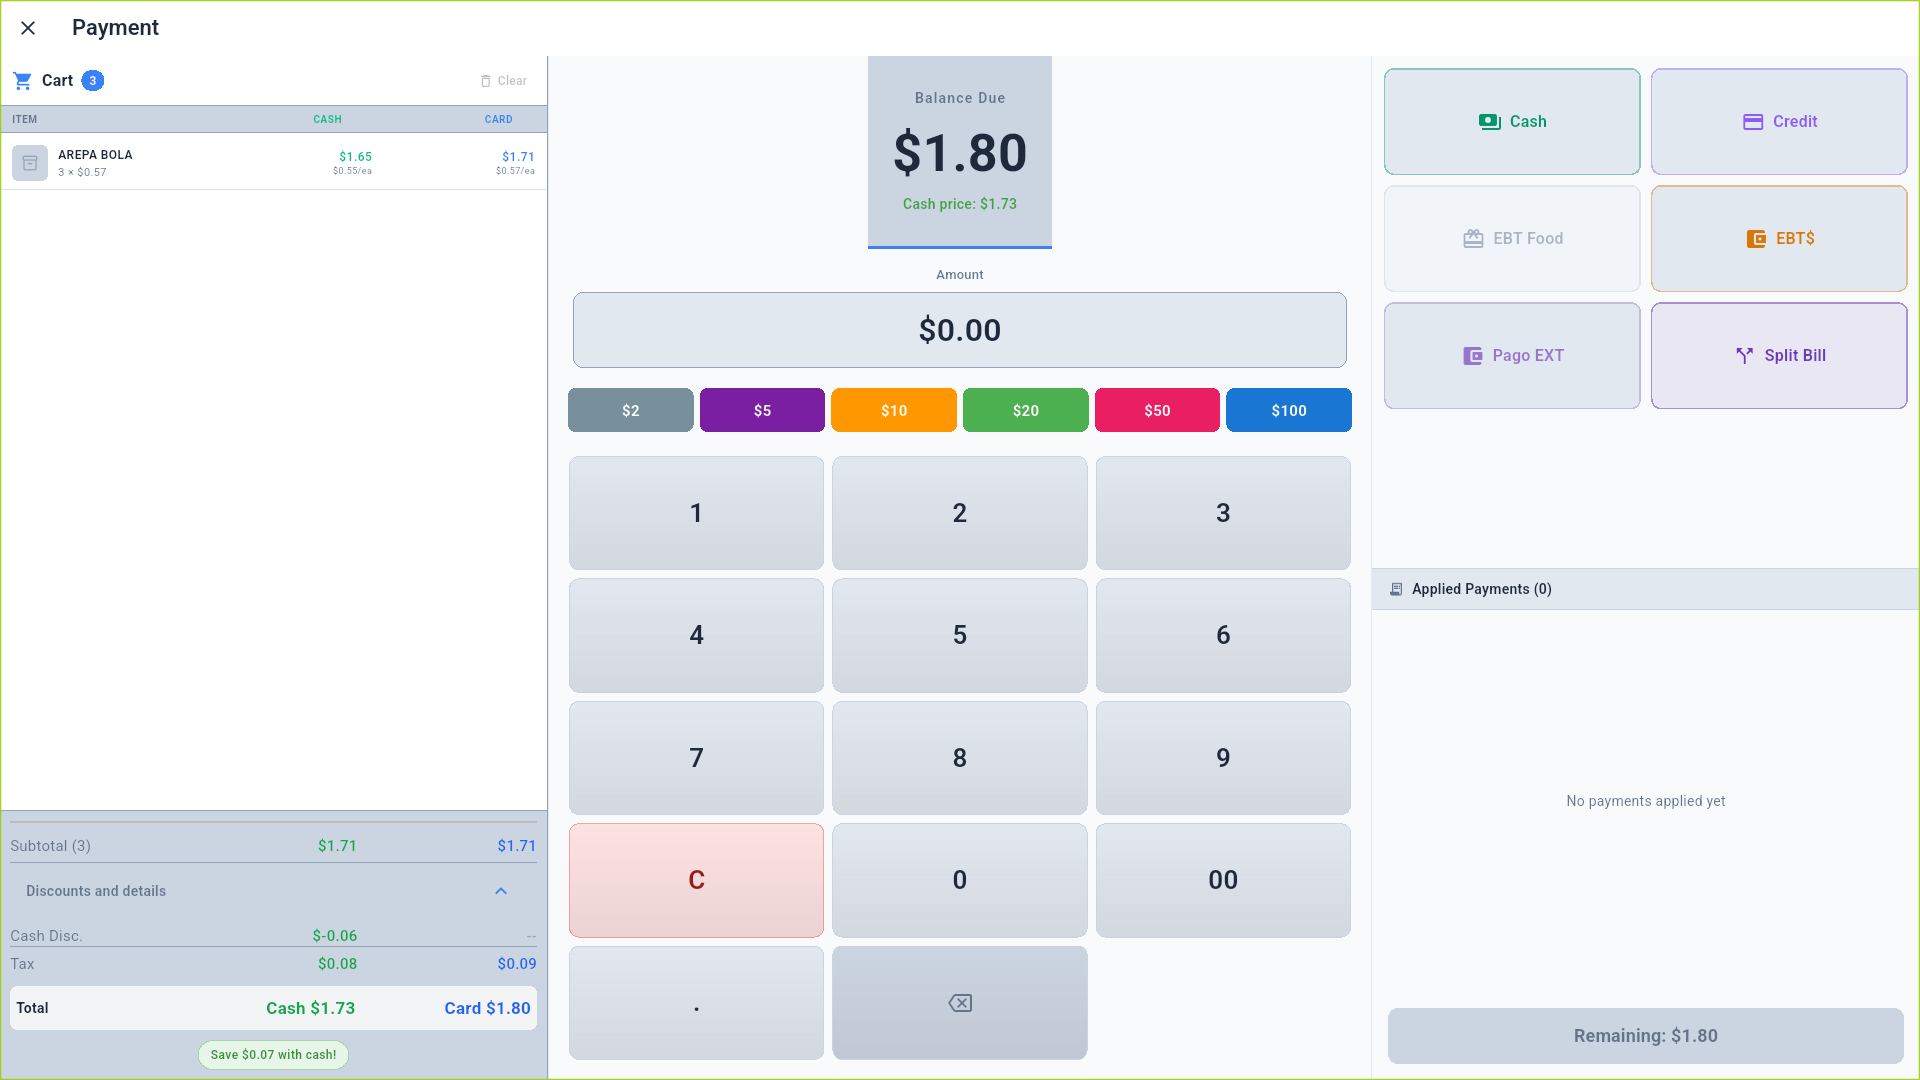
- Balance Due shows the card total, with the cash price underneath.
- Use the quick-bill buttons ($2, $5, $10, $20, $50, $100) or type the amount received.
- Tenders: Cash, Credit, EBT Food (enabled only when the cart has SNAP-eligible items), EBT$ (EBT Cash), Pago EXT (external payment), and Split Bill.
- Applied Payments lists partial payments when combining tenders.
Cash payments compute the change automatically:
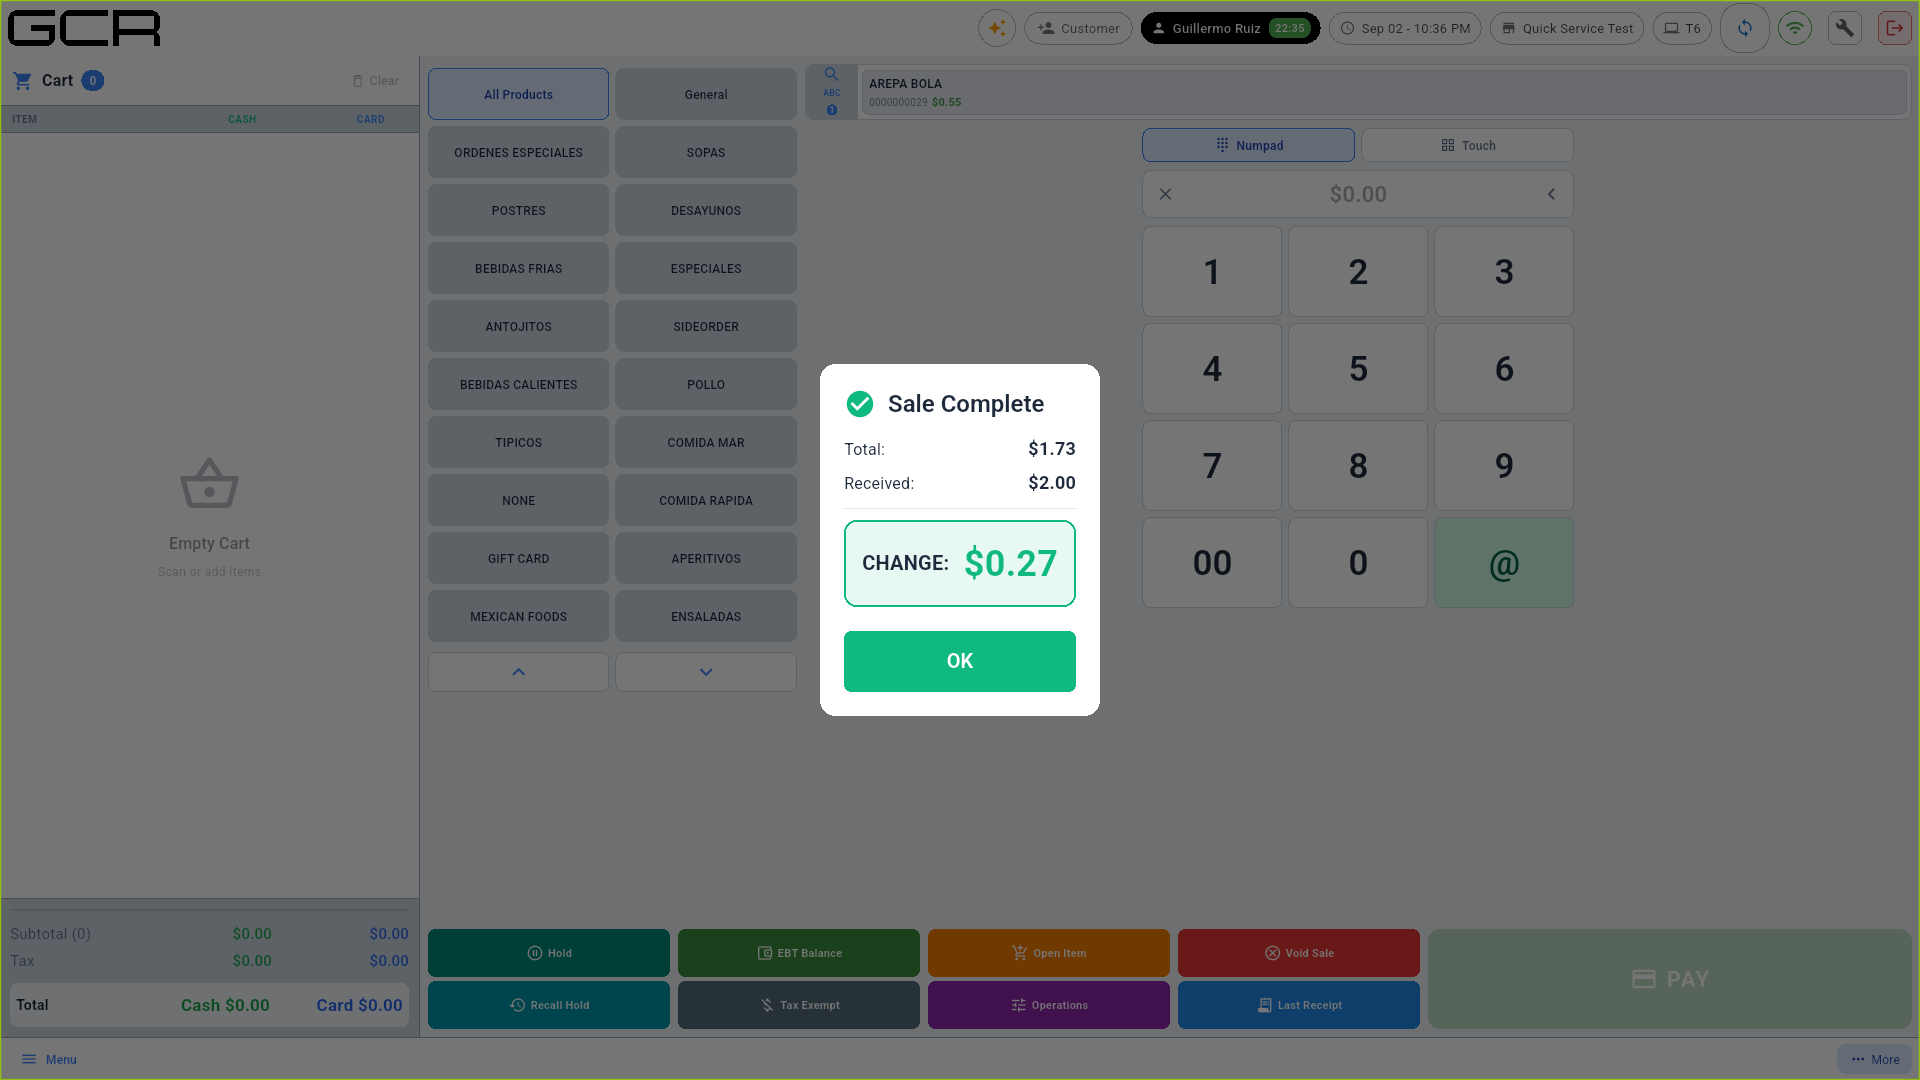
Then the POS asks whether to print the receipt:
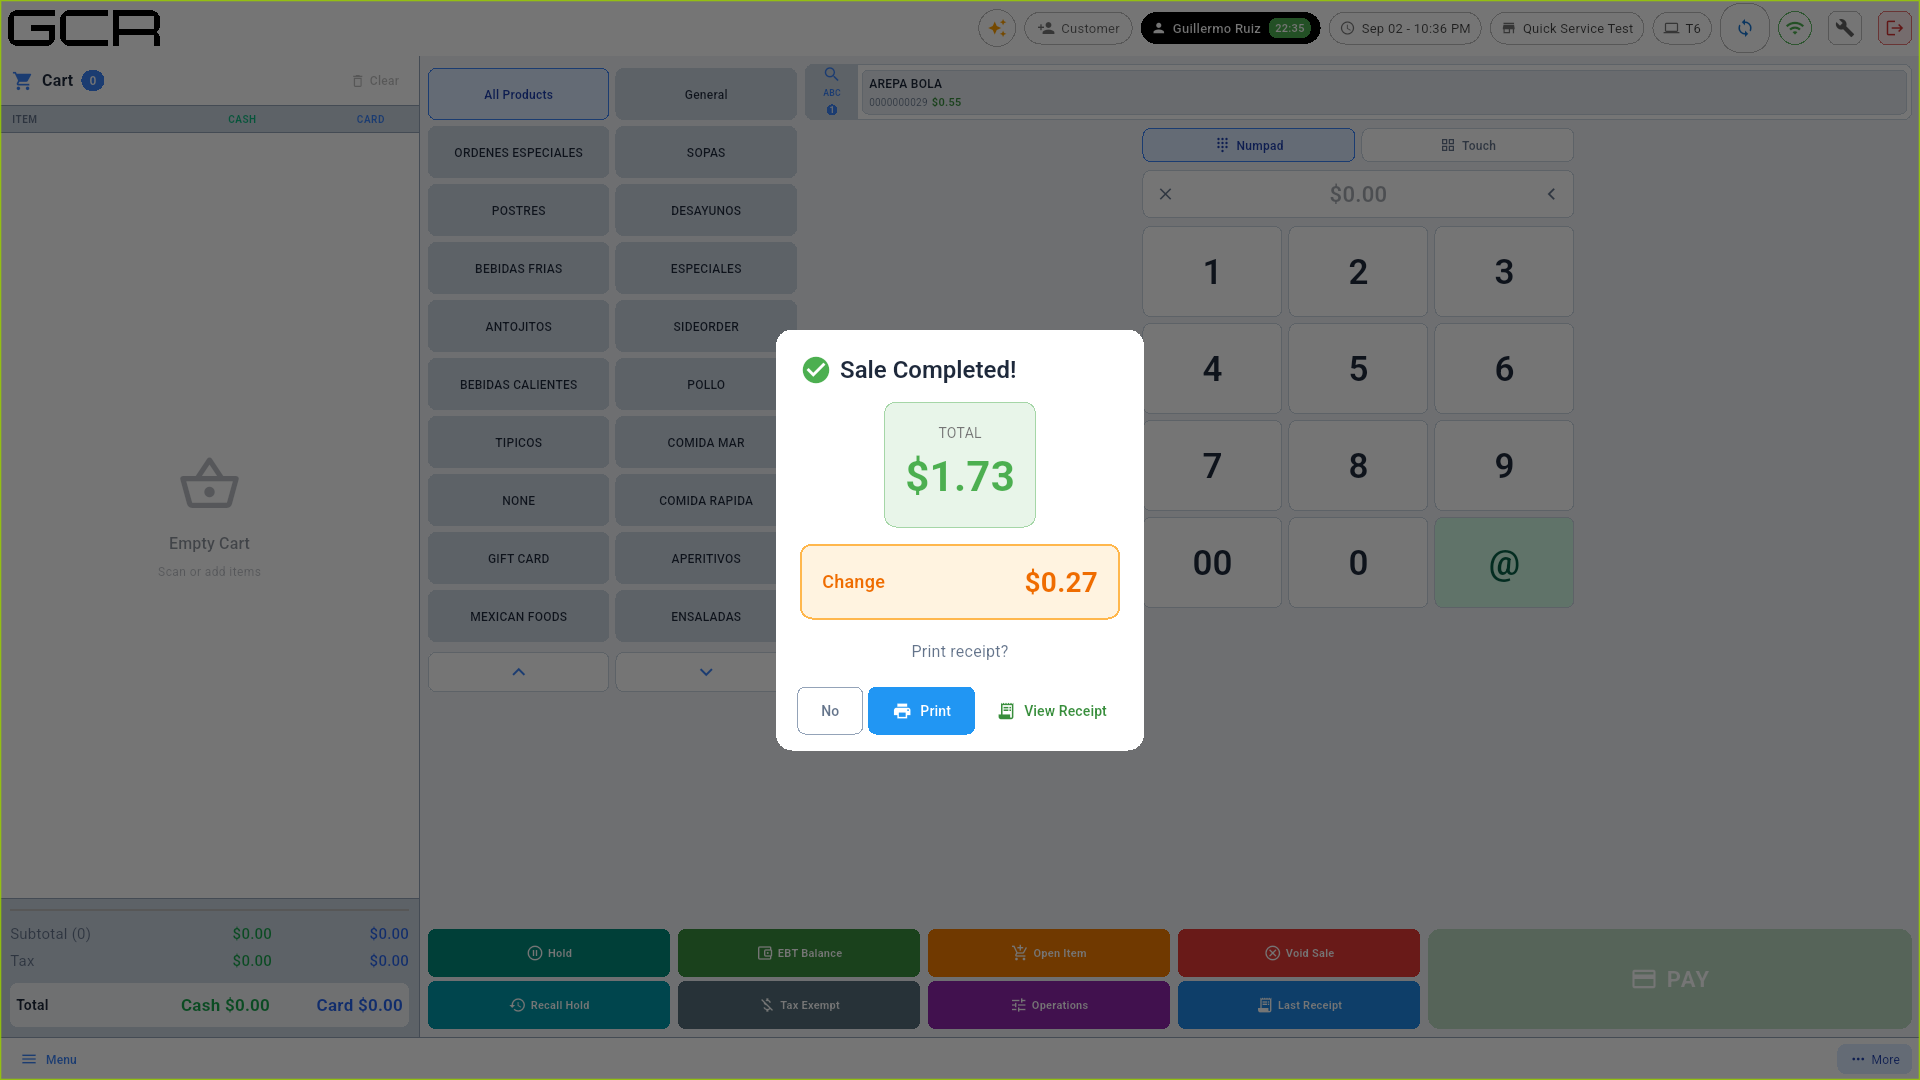
- No — skip printing.
- Print — print on the configured printer.
- View Receipt — show the receipt on screen.
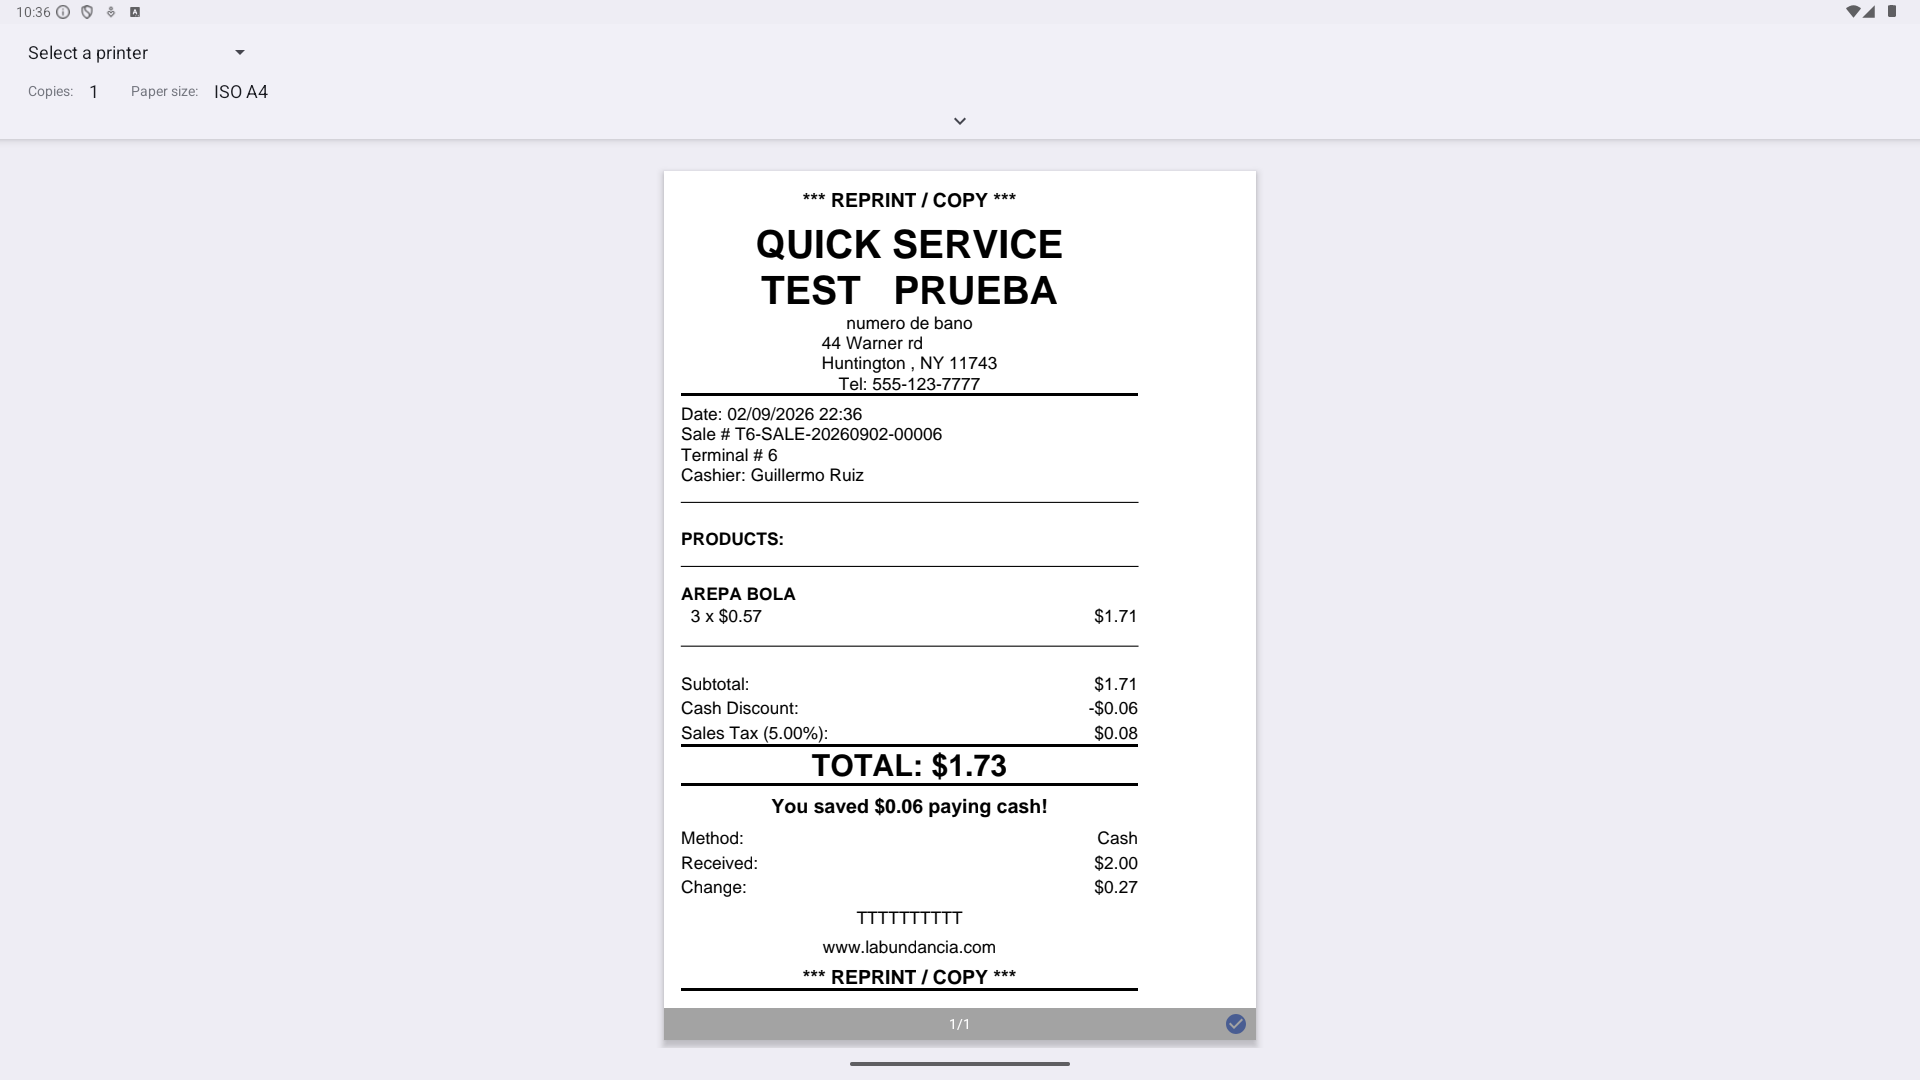
Reprinting the last receipt
Last Receipt reprints the last ticket (marked REPRINT / COPY):
7. EBT (SNAP)
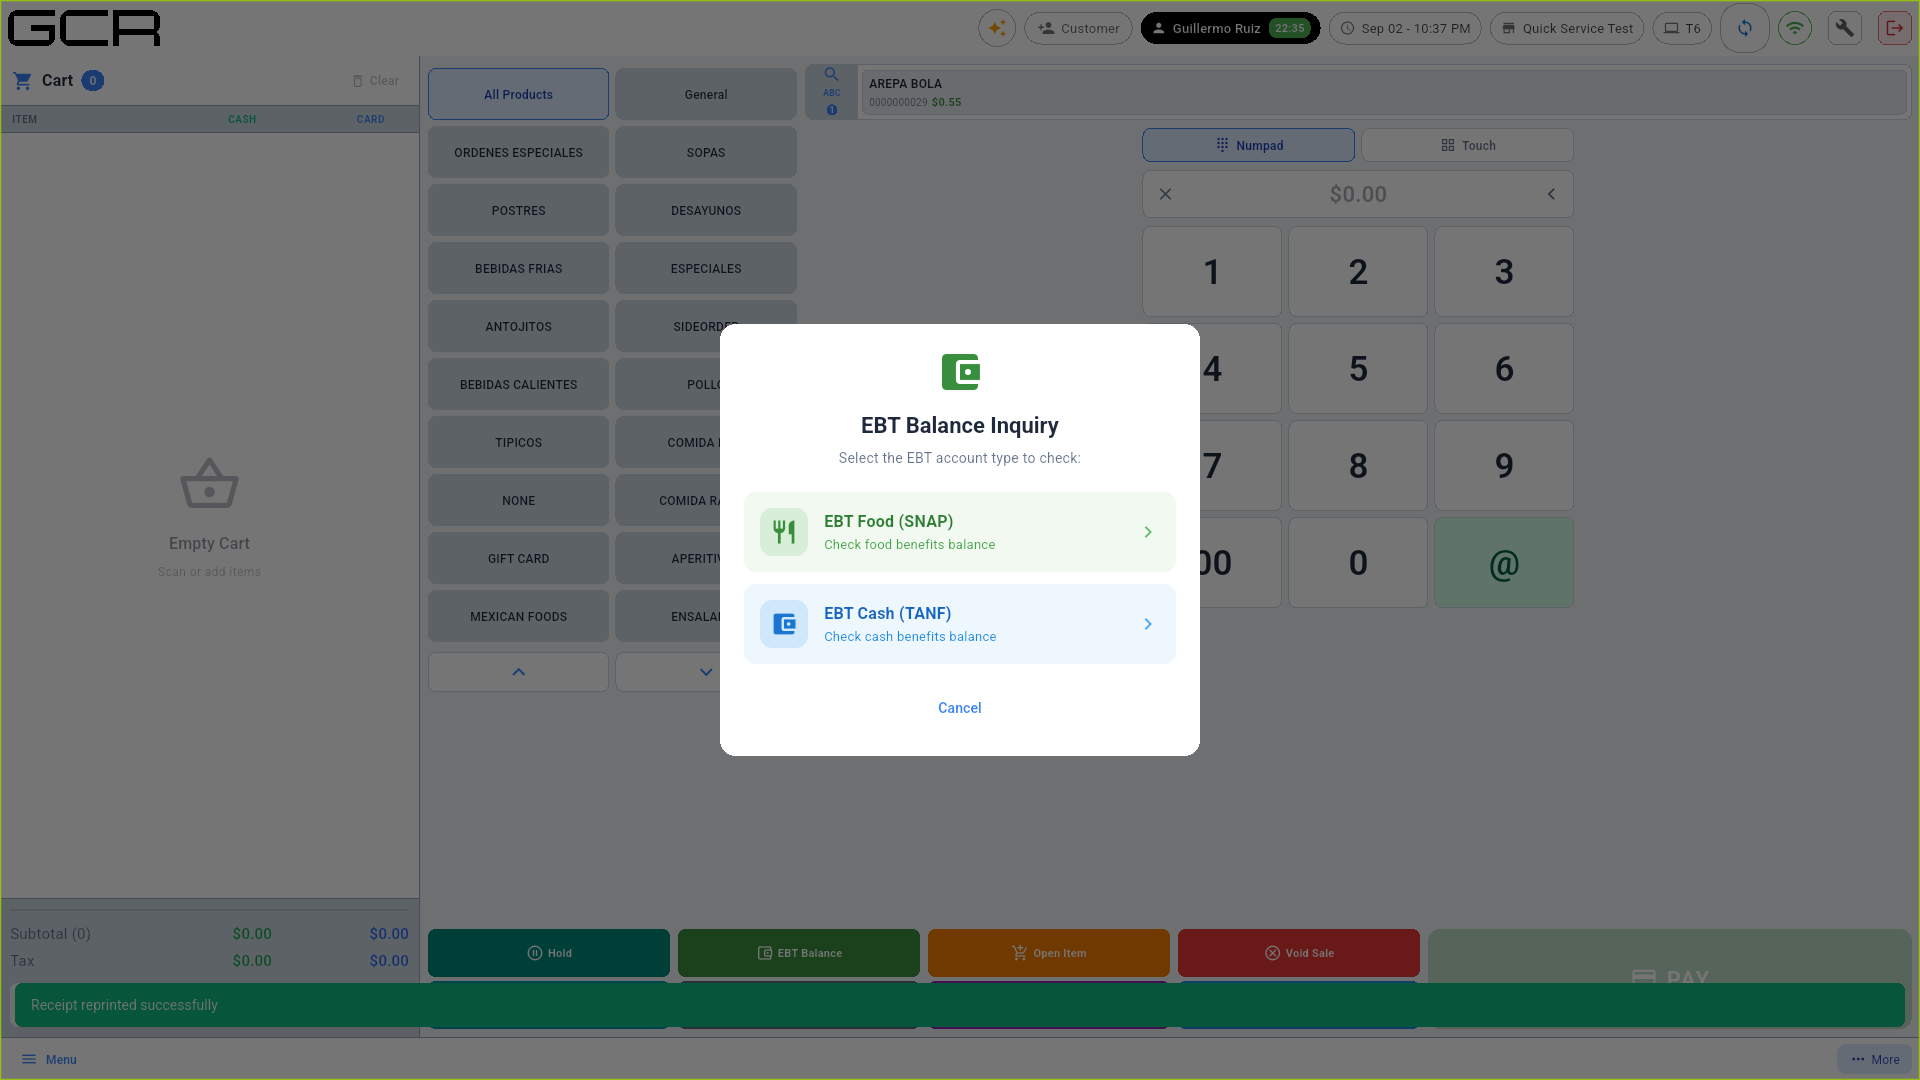
- EBT Balance checks the card balance: EBT Food (SNAP) or EBT Cash (TANF). Requires a configured pinpad.
- On payment, EBT Food activates only when the cart contains SNAP-eligible products (flagged EBT in the catalog) and shows the eligible amount.
- EBT items are charged at the cash price (no surcharge) and are tax-exempt in proportion to the EBT payment.
8. Voids
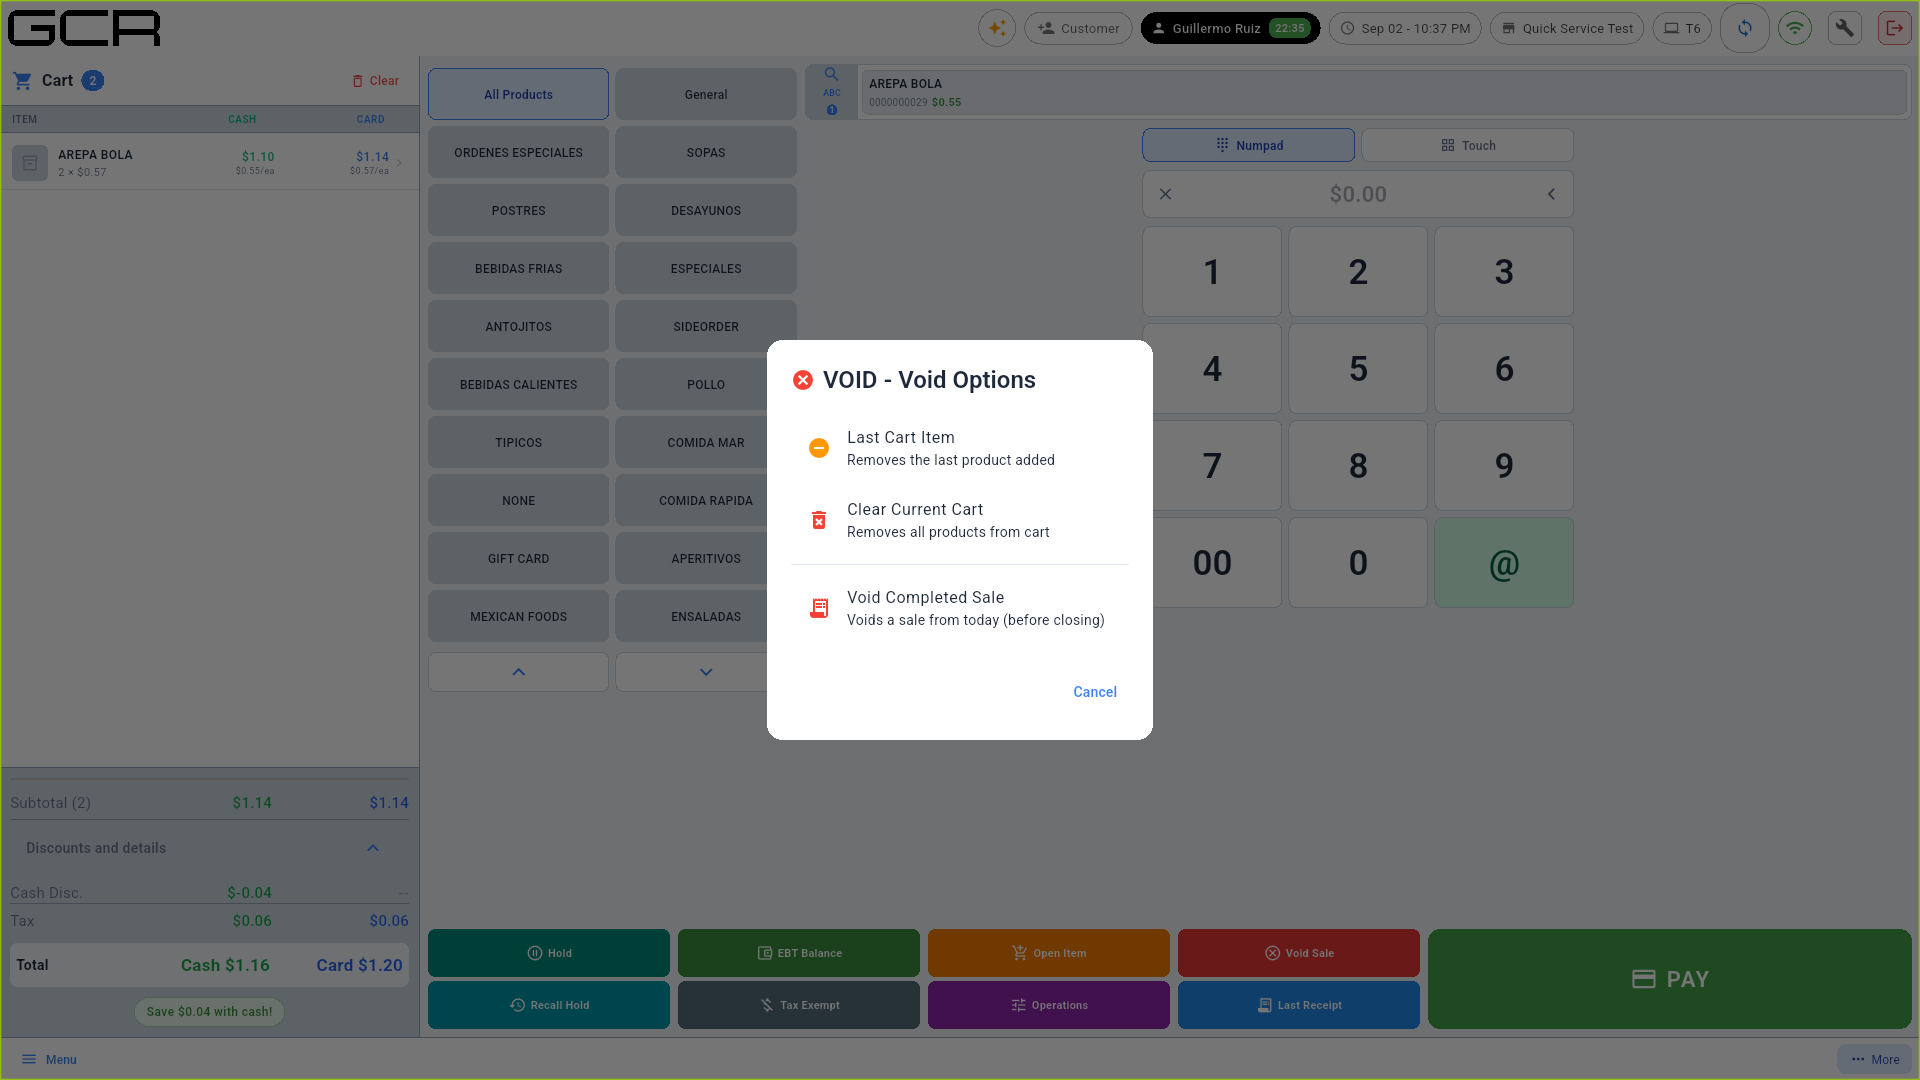
Void Sale offers three options:
- Last Cart Item — removes the last product added.
- Clear Current Cart — empties the whole cart.
- Void Completed Sale — voids an already-paid sale from today (before closing). It is recorded on the Z report as a void.
Refunds for previous days are done through Operations → Refunds.
9. Cart discounts and gratuity
The purple Operations button opens the cart-discount dialog: preset special discounts (e.g. Government 5%, Senior 20%, Veteran 8%, Employee 15%), a manual discount by percent or amount, and a Gratuity tab. Role permission required.
10. Administrative features
From the side menu: Products, Time Clock, Customers, Tips, Back Office, X Report (with an open shift), Z Report (register closing) and WiFi Connectivity. All of them, plus Settings (payments, hardware, scale, language, cloud, backup, license), are covered in the Back Office & Settings manual.