GCR POS — Quick Service Mode
Operating guide for quick-service / counter restaurants: direct sales (Quick Order), To-Go and Delivery orders, optional tables, kitchen sending and open checks.
Administrative features (reports, inventory, users, Settings) are covered in the Back Office & Settings manual.
1. Logging in
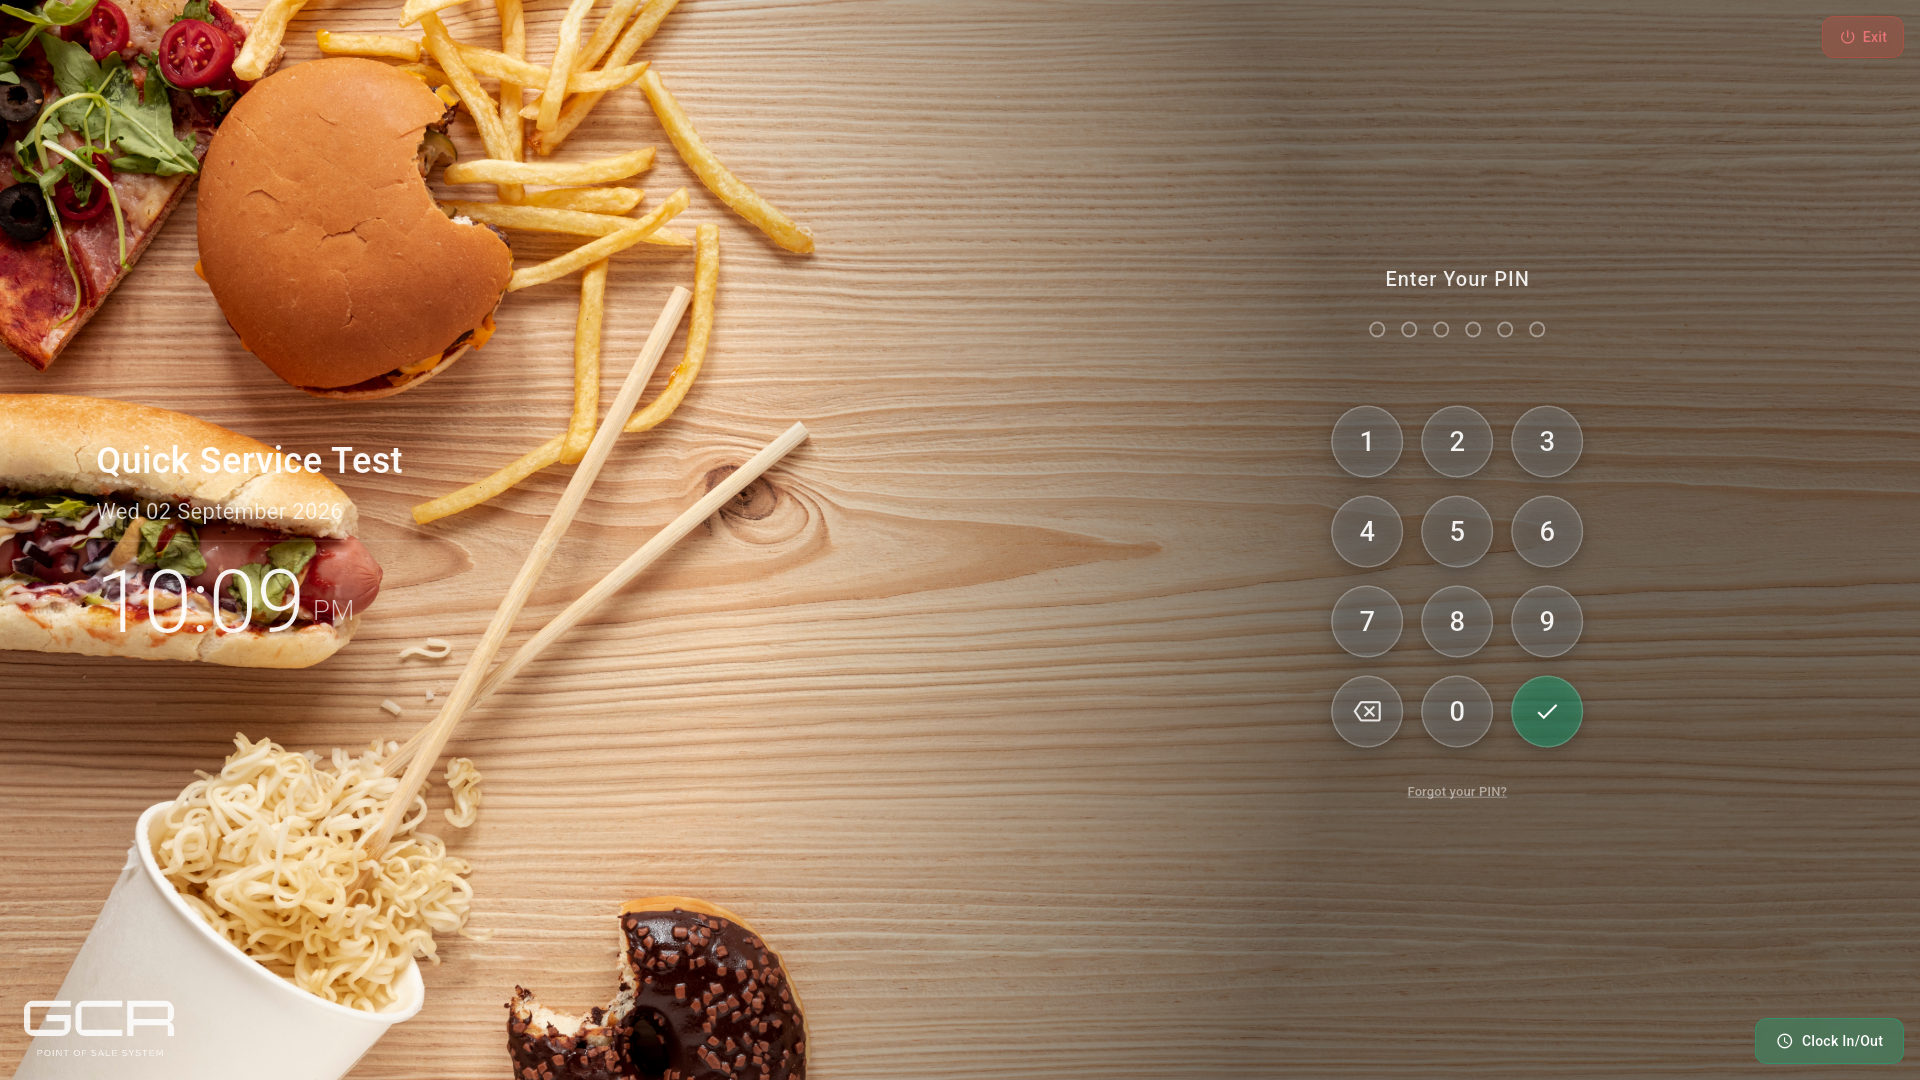
Type your PIN and confirm. Clock In/Out punches the time clock without entering sales. In Quick Service every employee signs in with a PIN (cash shifts are bound to the authenticated cashier).
2. Home screen
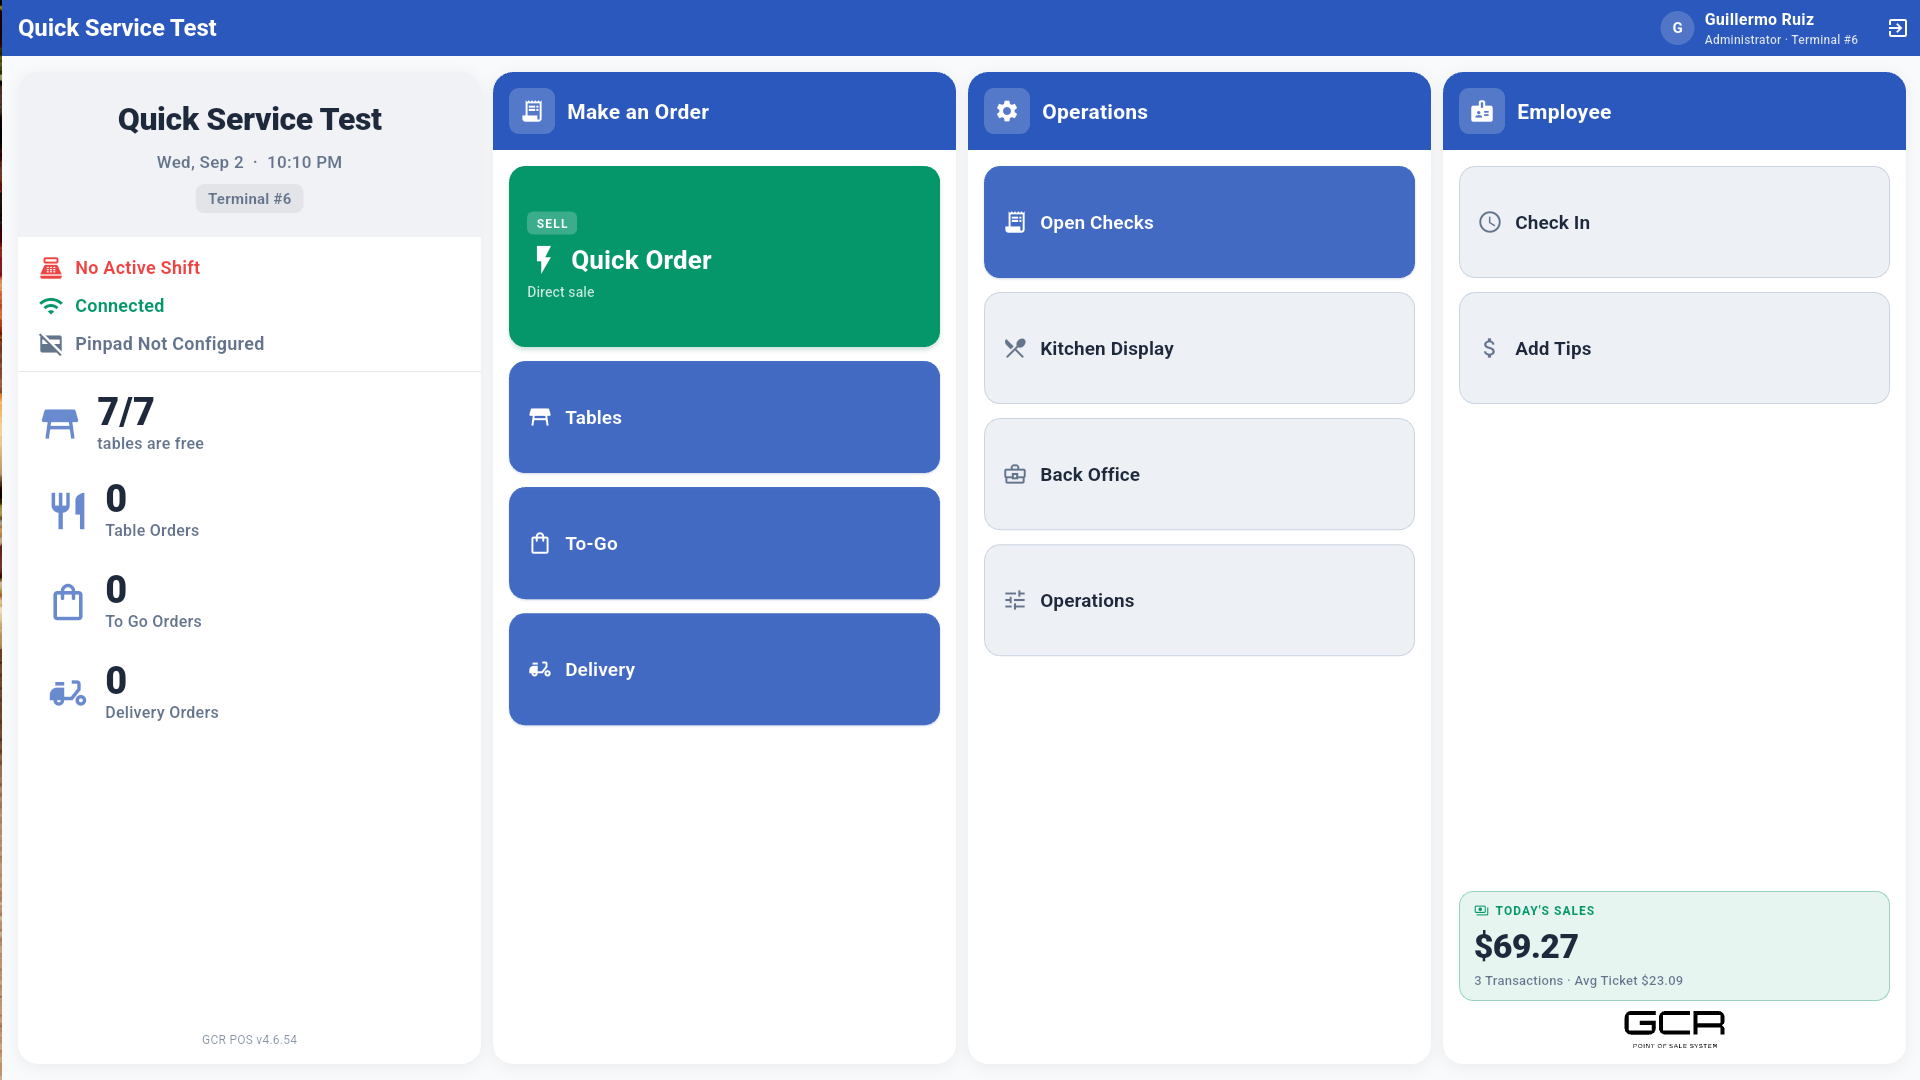
Three columns:
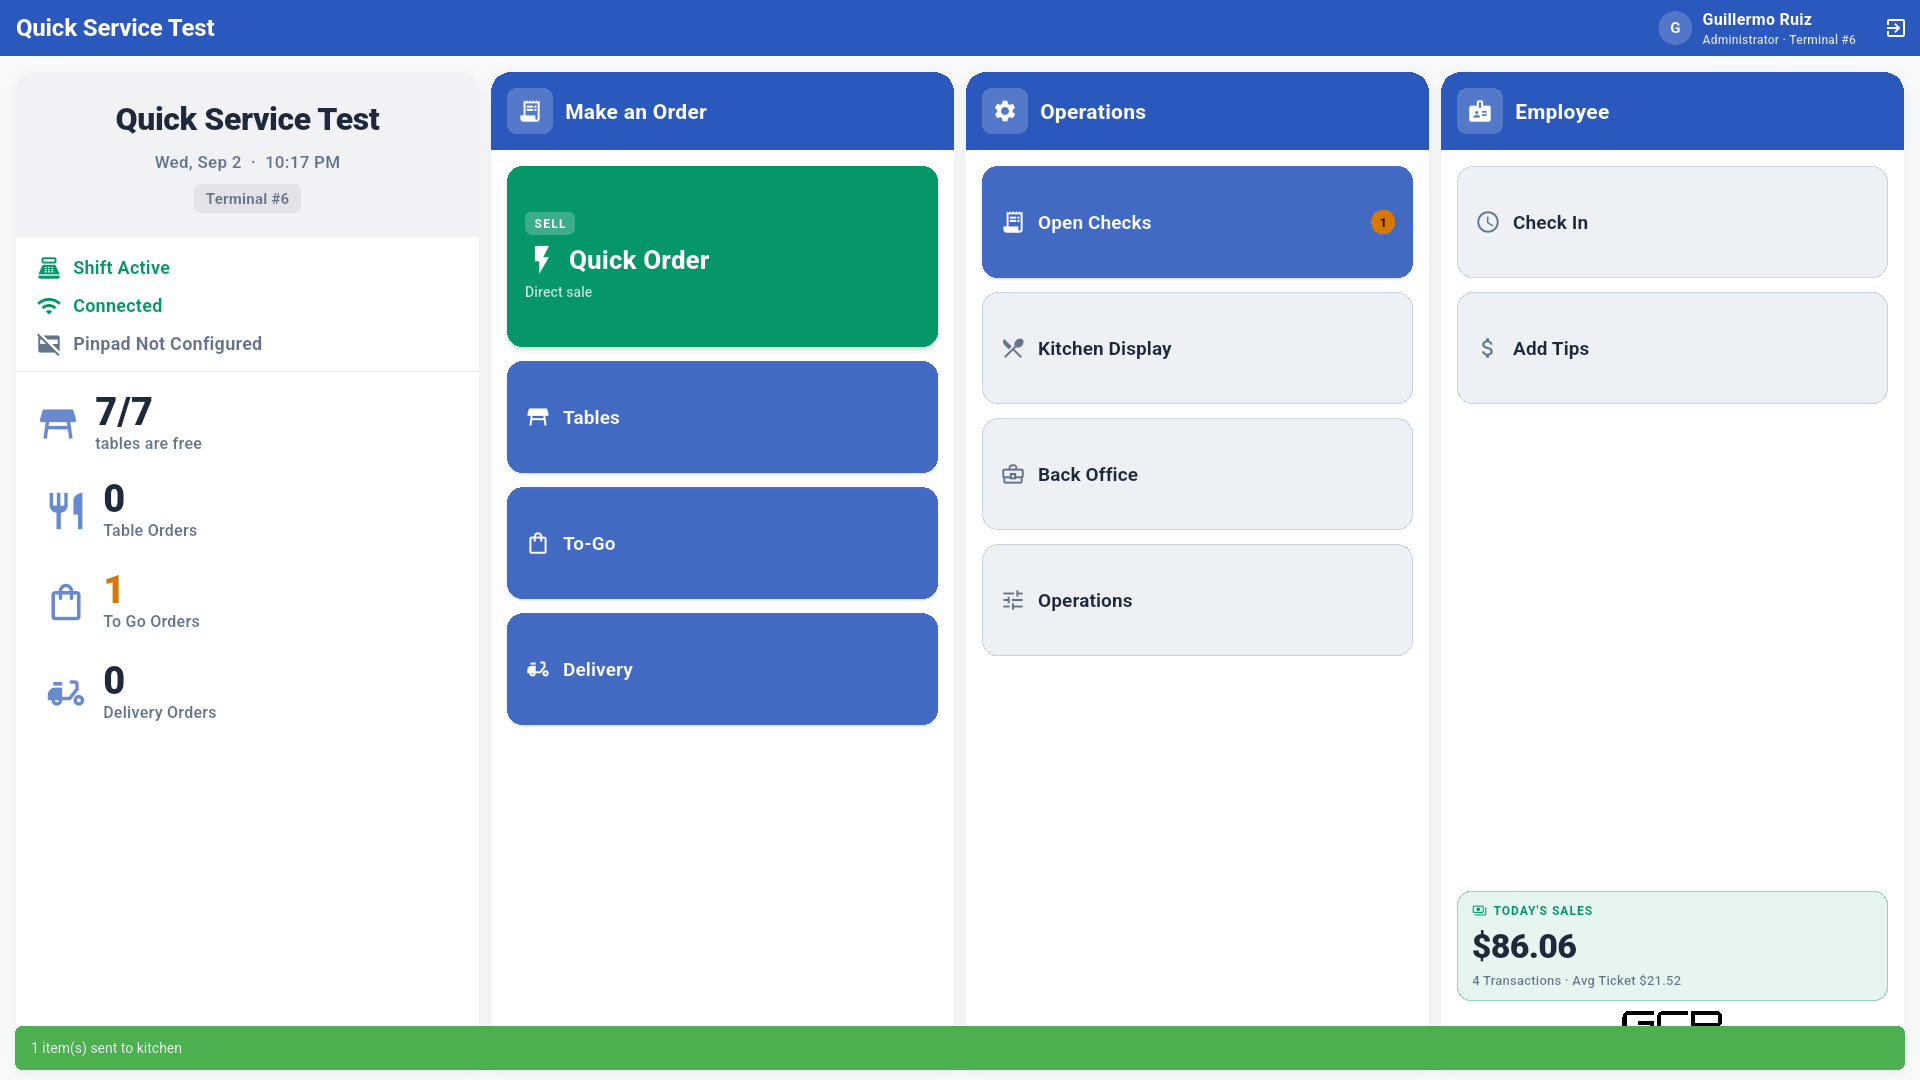
- Make an Order: Quick Order (direct sale, primary button), Tables, To-Go, and Delivery.
- Operations: Open Checks (unpaid checks, with a counter), Kitchen Display, Back Office, and Operations (register).
- Employee: Check In (time clock) and Add Tips.
The left panel shows terminal status: shift (Shift Active / No Active Shift), connection, pinpad, free tables and order counters. Bottom right: today's sales.
3. Direct sale (Quick Order)
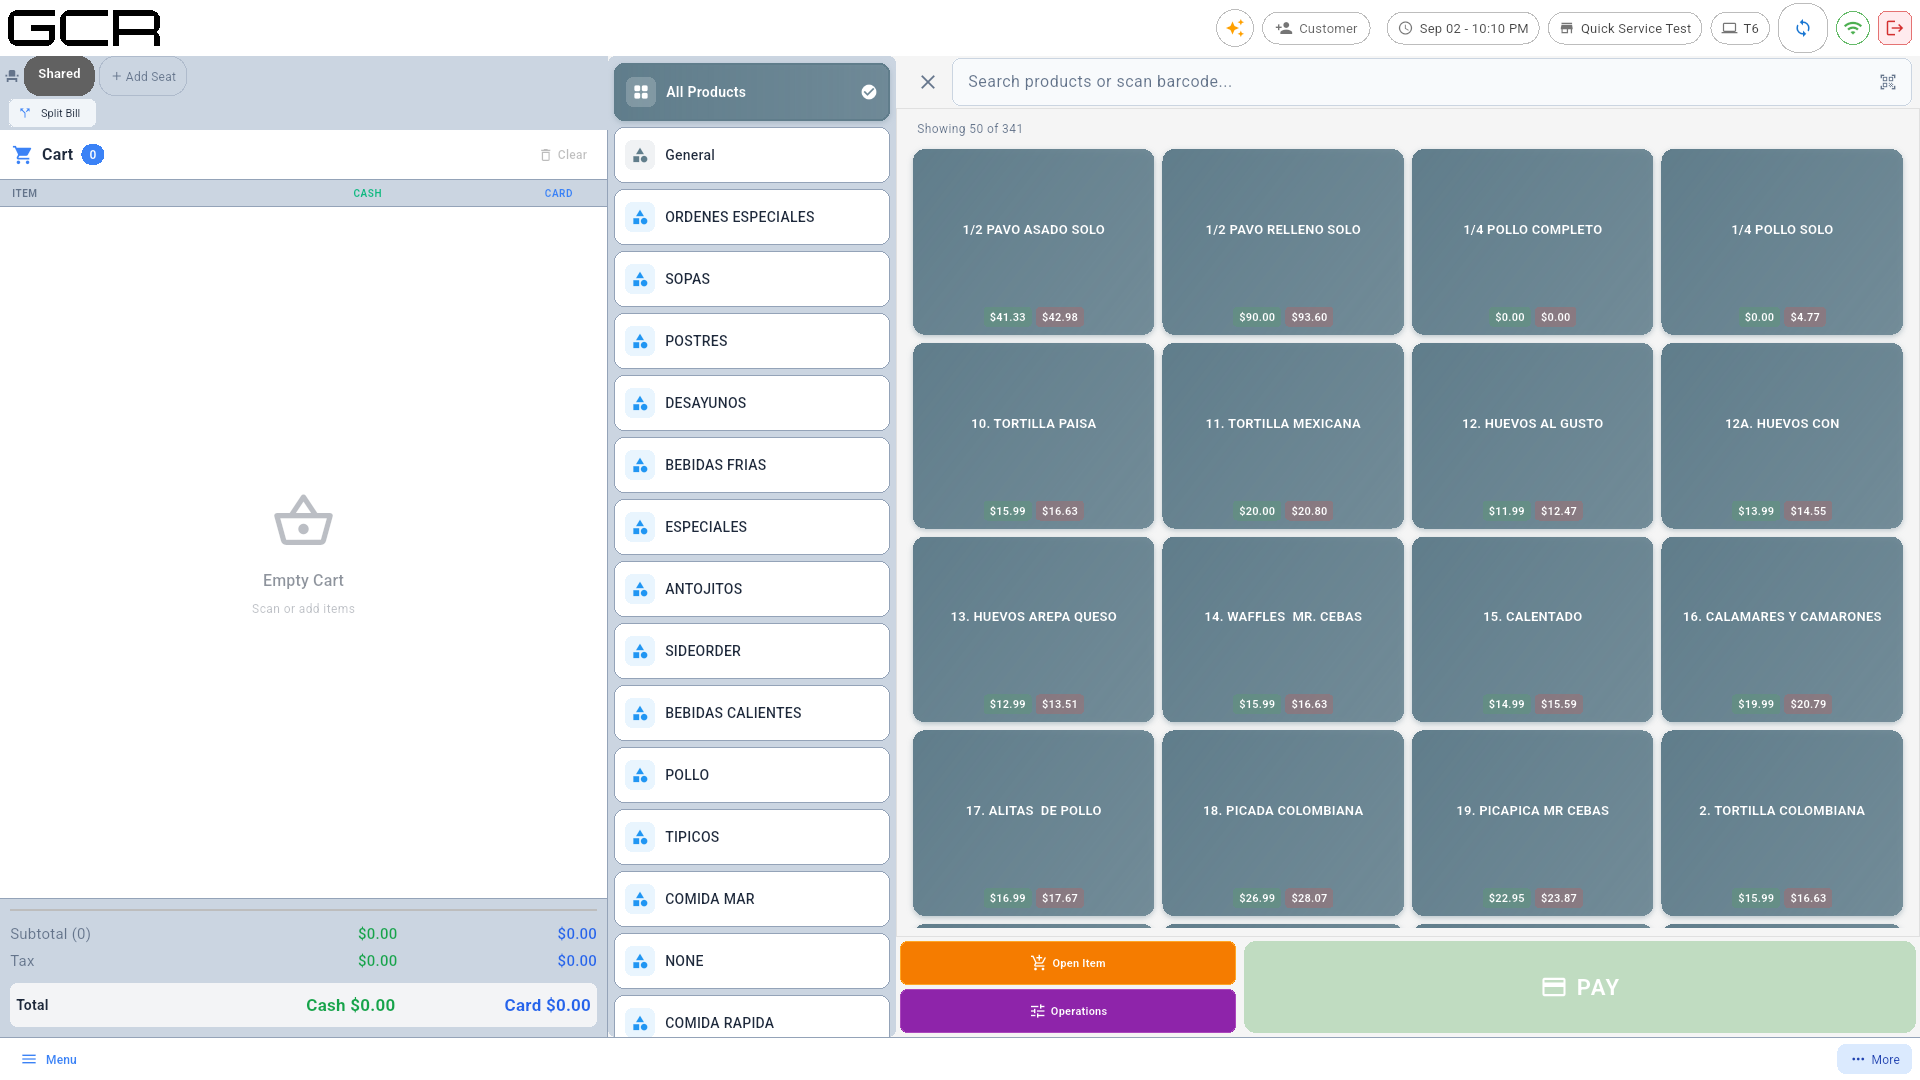
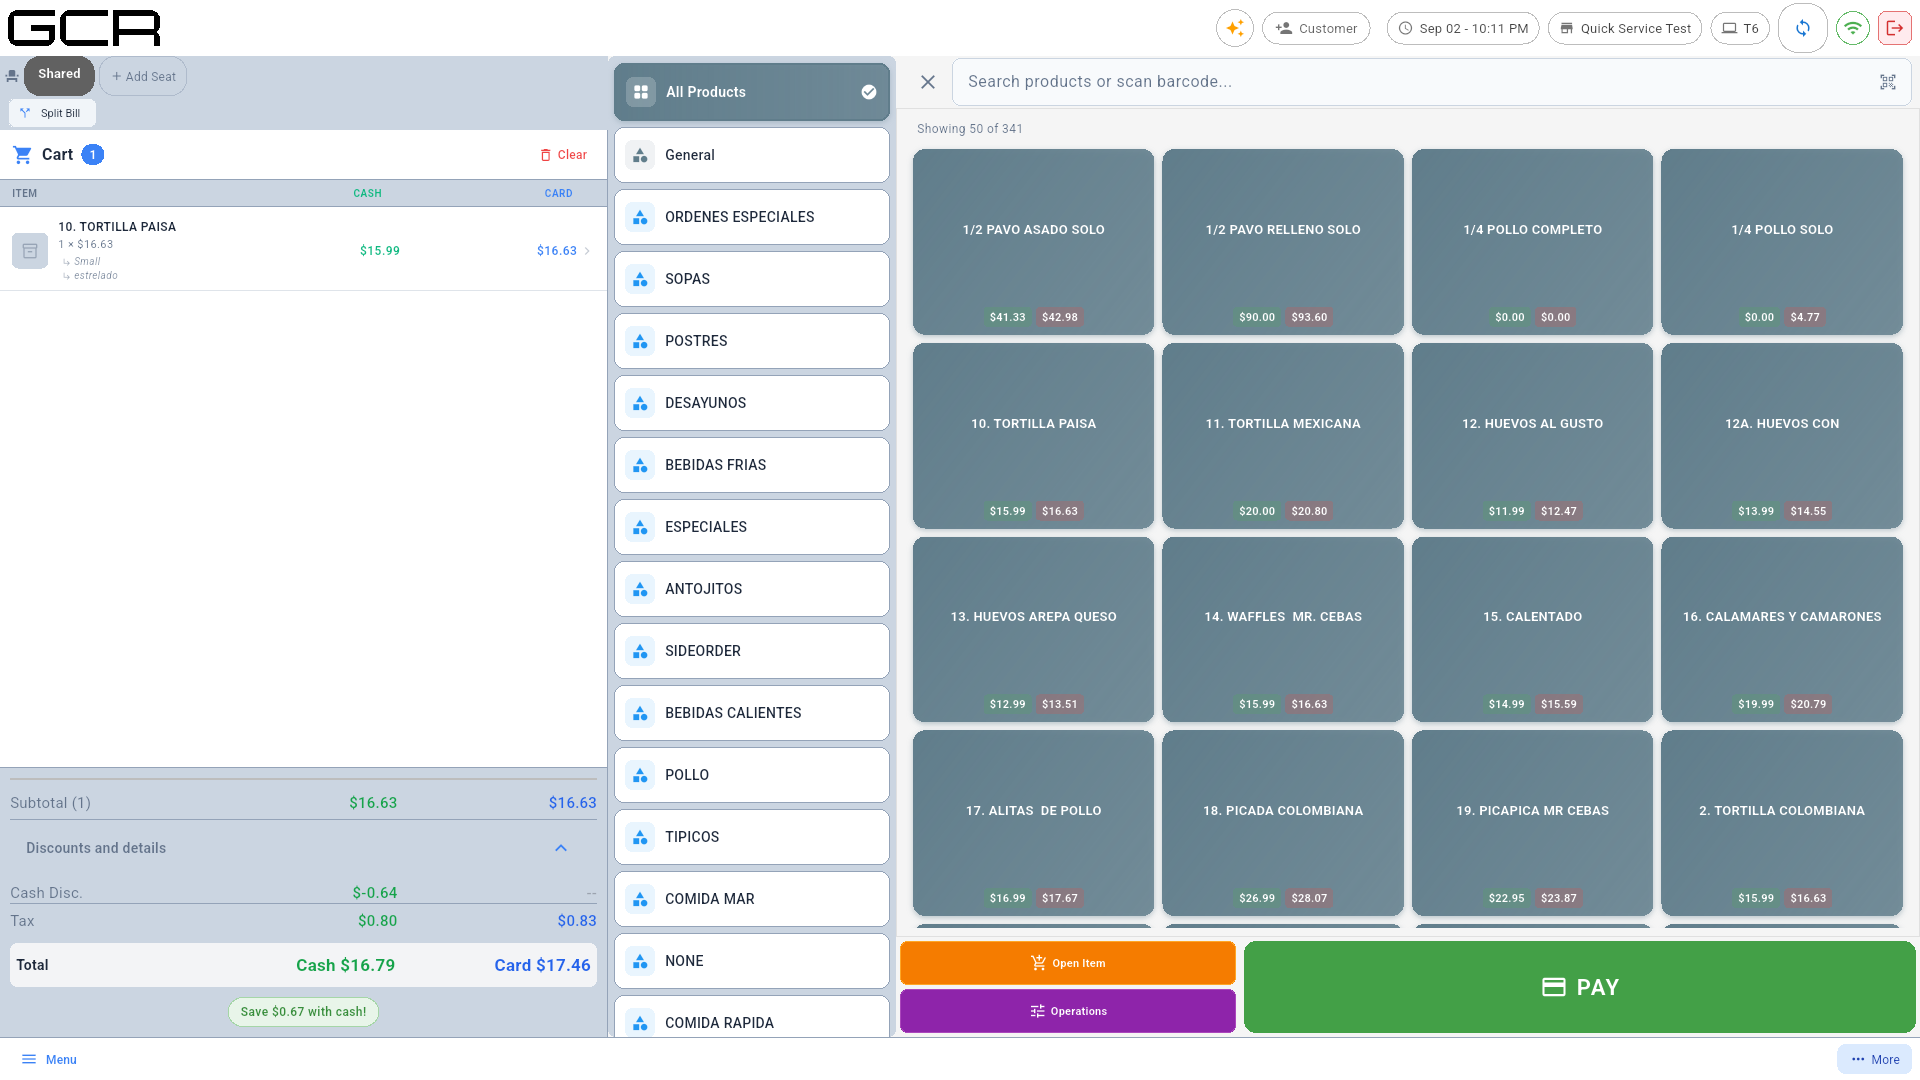
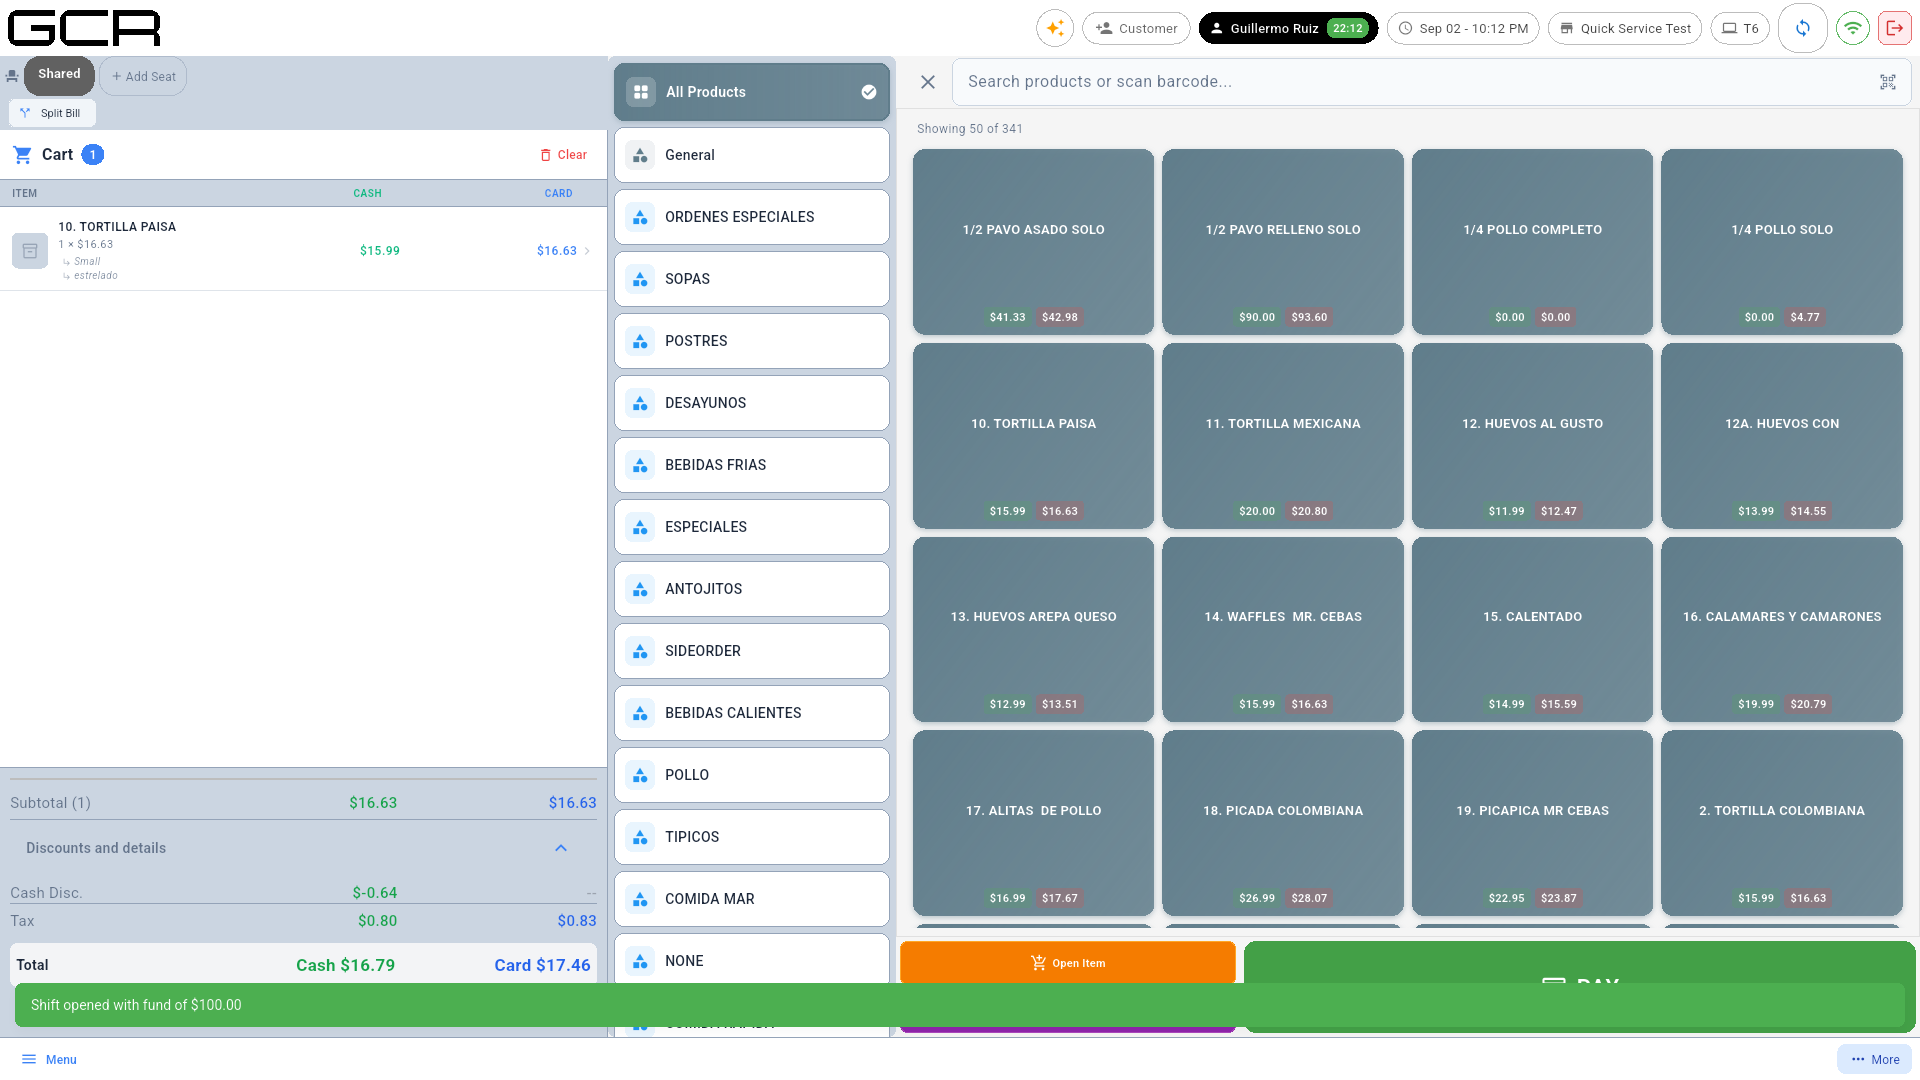
- Left: the cart with CASH/CARD prices; Shared / +Add Seat tabs and Split Bill for seat splitting.
- Center: categories. Right: products with dual pricing.
- Search bar for name or barcode. With a USB scanner, scanning adds the product straight to the cart (quantity 1; tap the cart line to change it).
- Buttons: Open Item (free-price item), Operations (discounts/gratuity) and PAY.
3.1 Modifiers
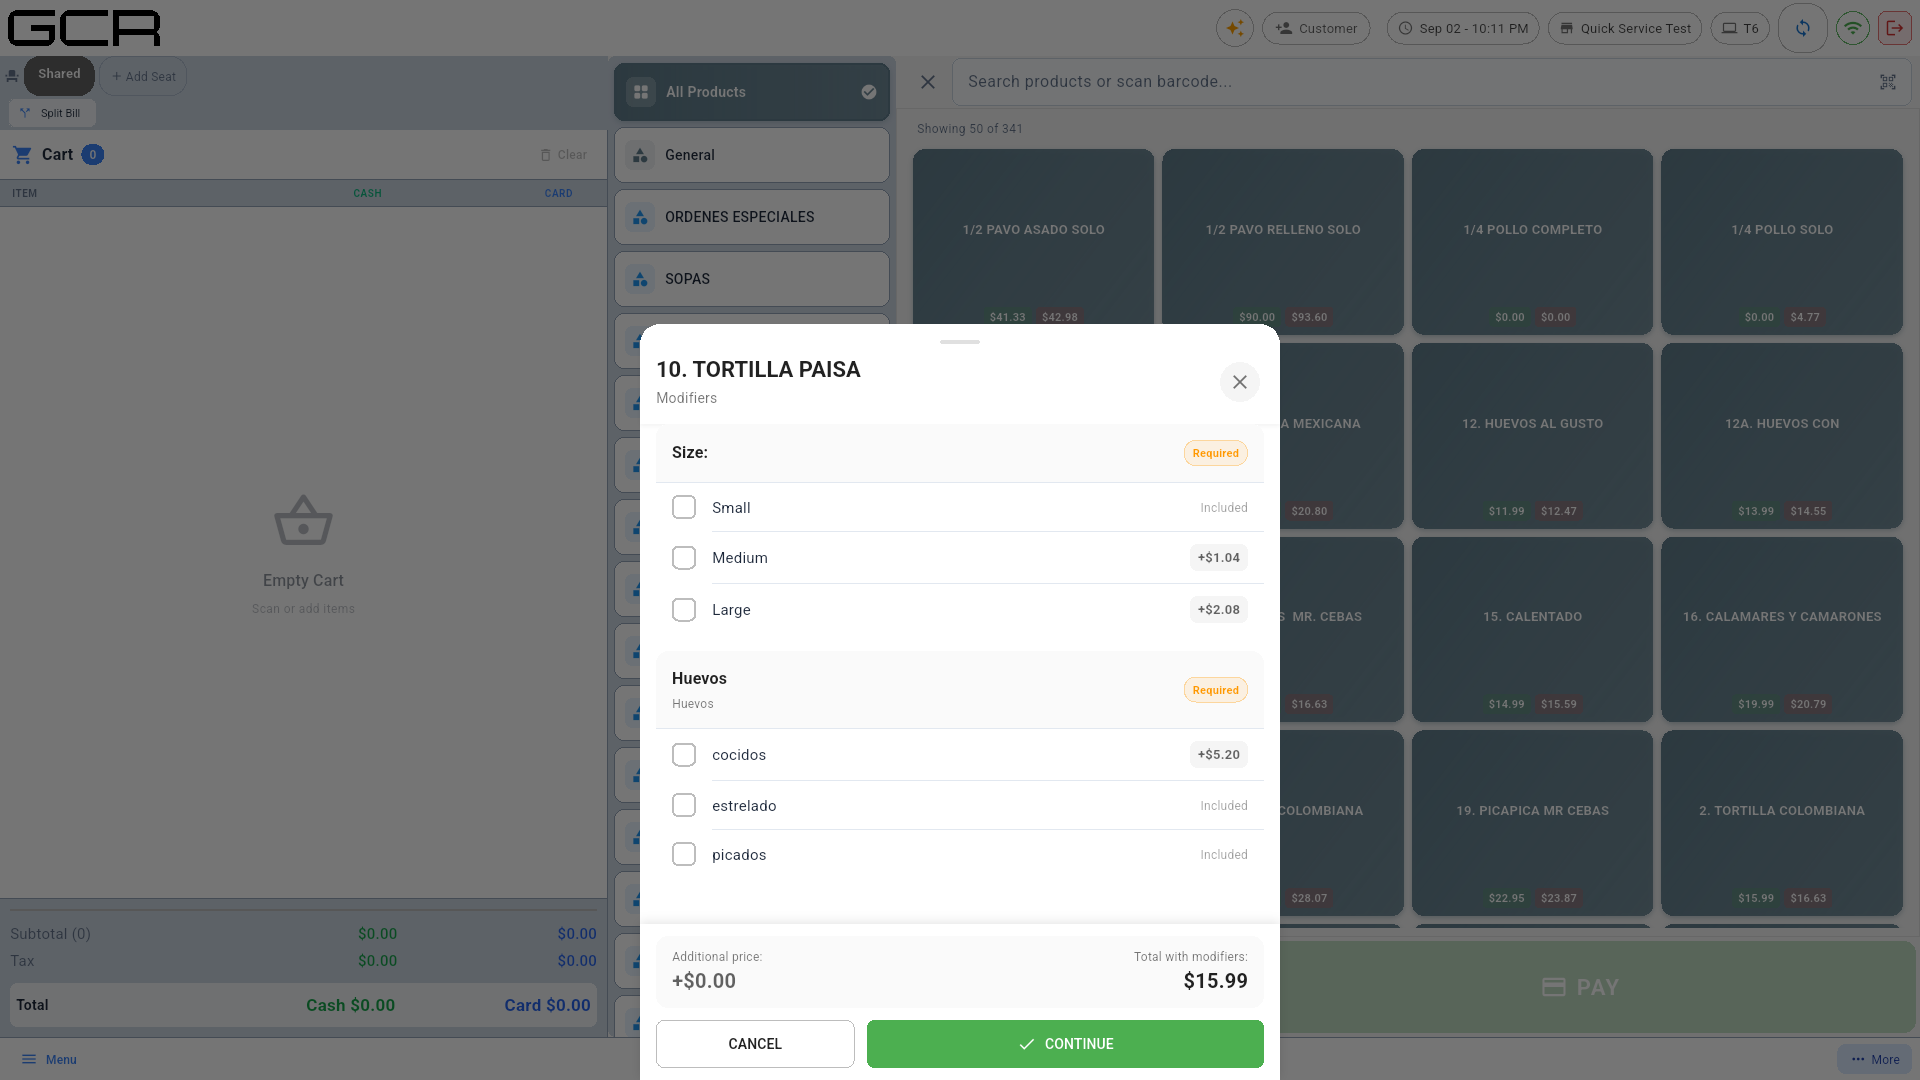
If a product has modifiers (size, cooking point, extras), the dialog opens when you tap it. Required groups are mandatory; "Included" options are free and others add a charge (+$). Continue adds the item to the cart.
3.2 Shift required
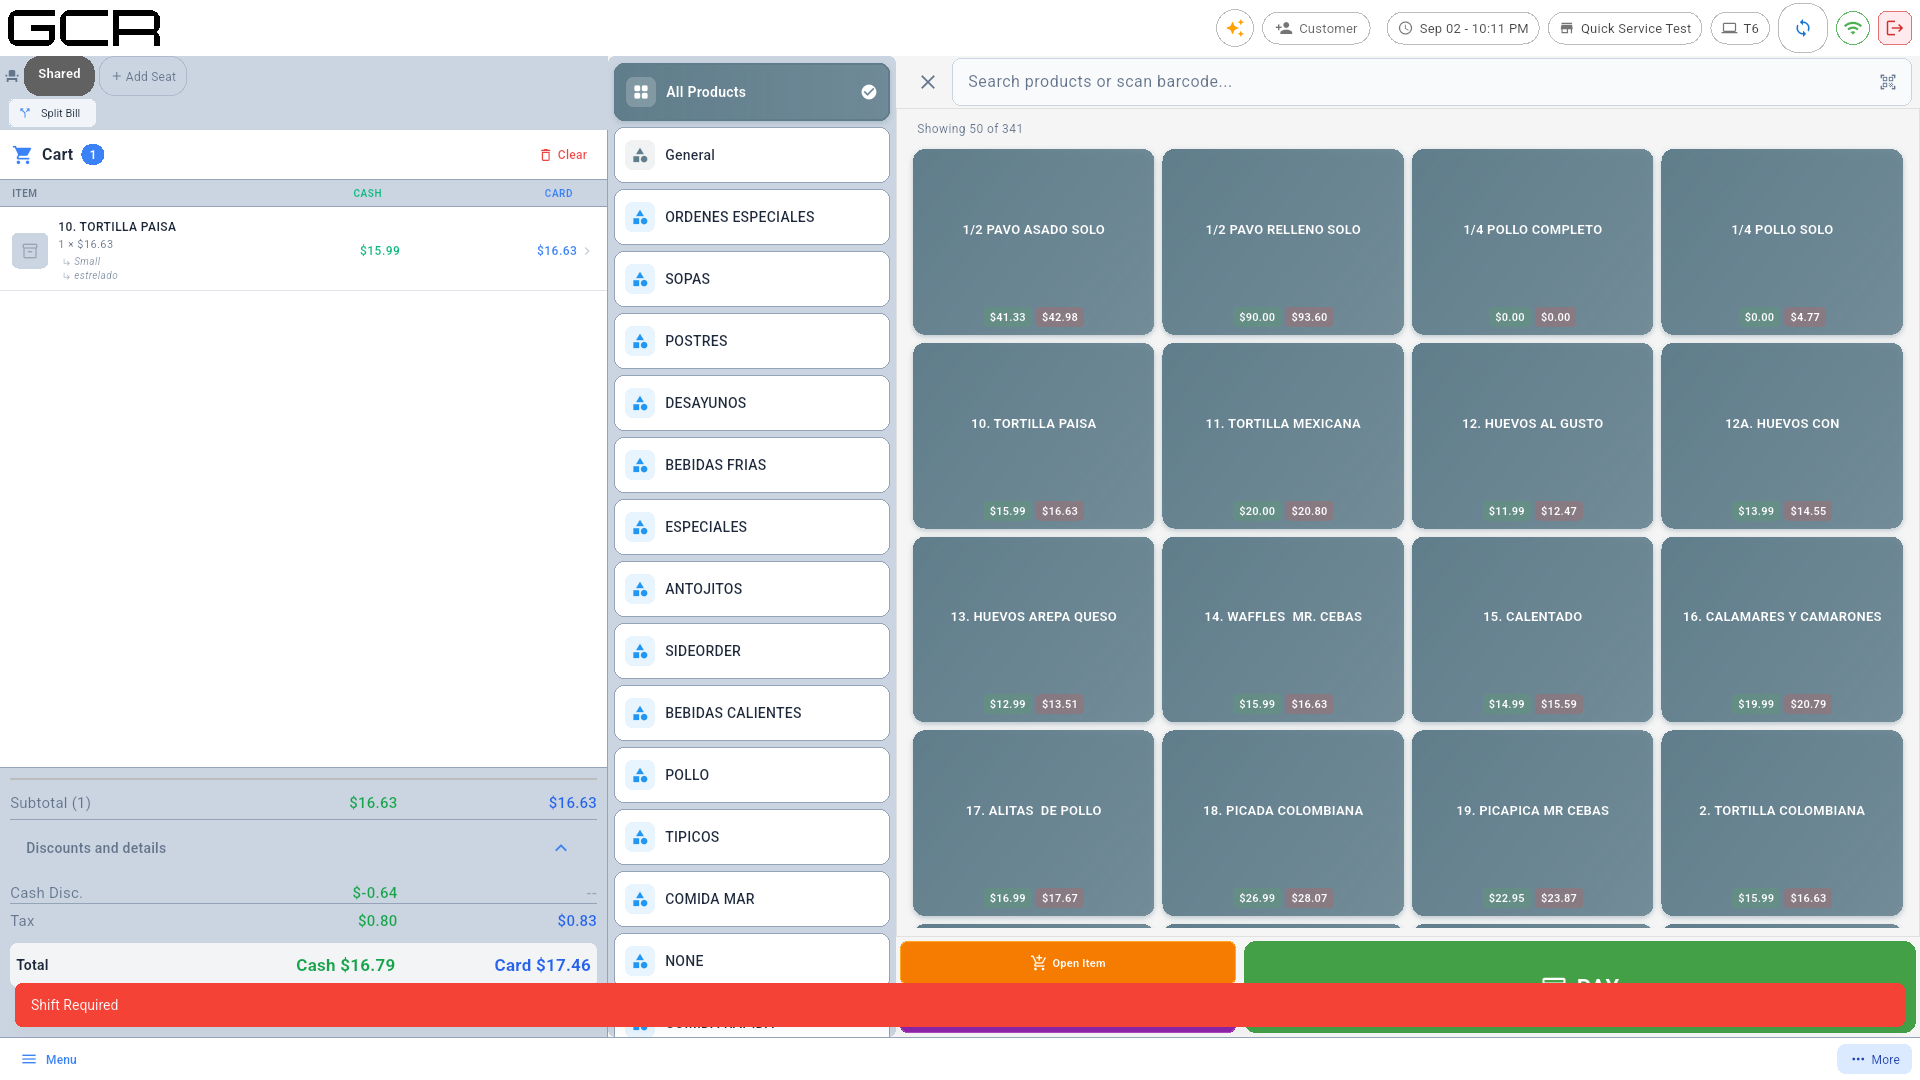
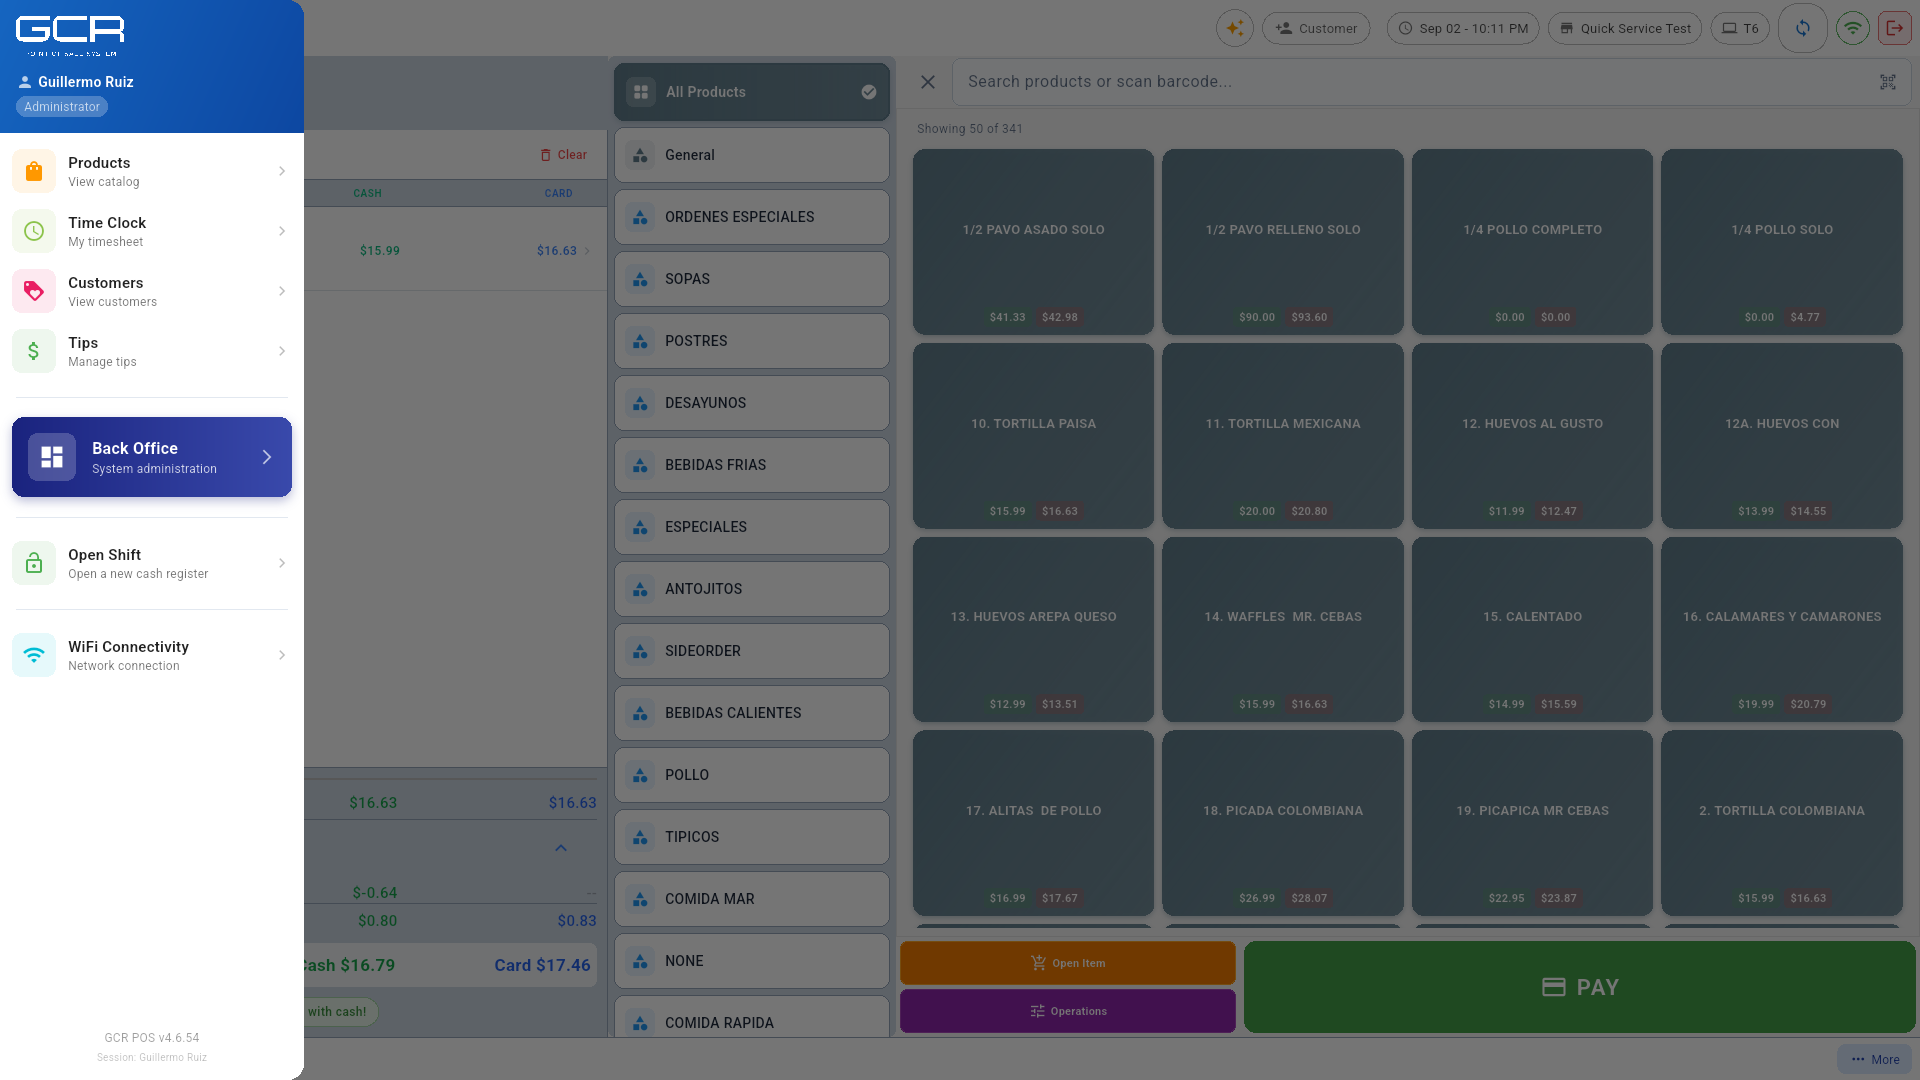
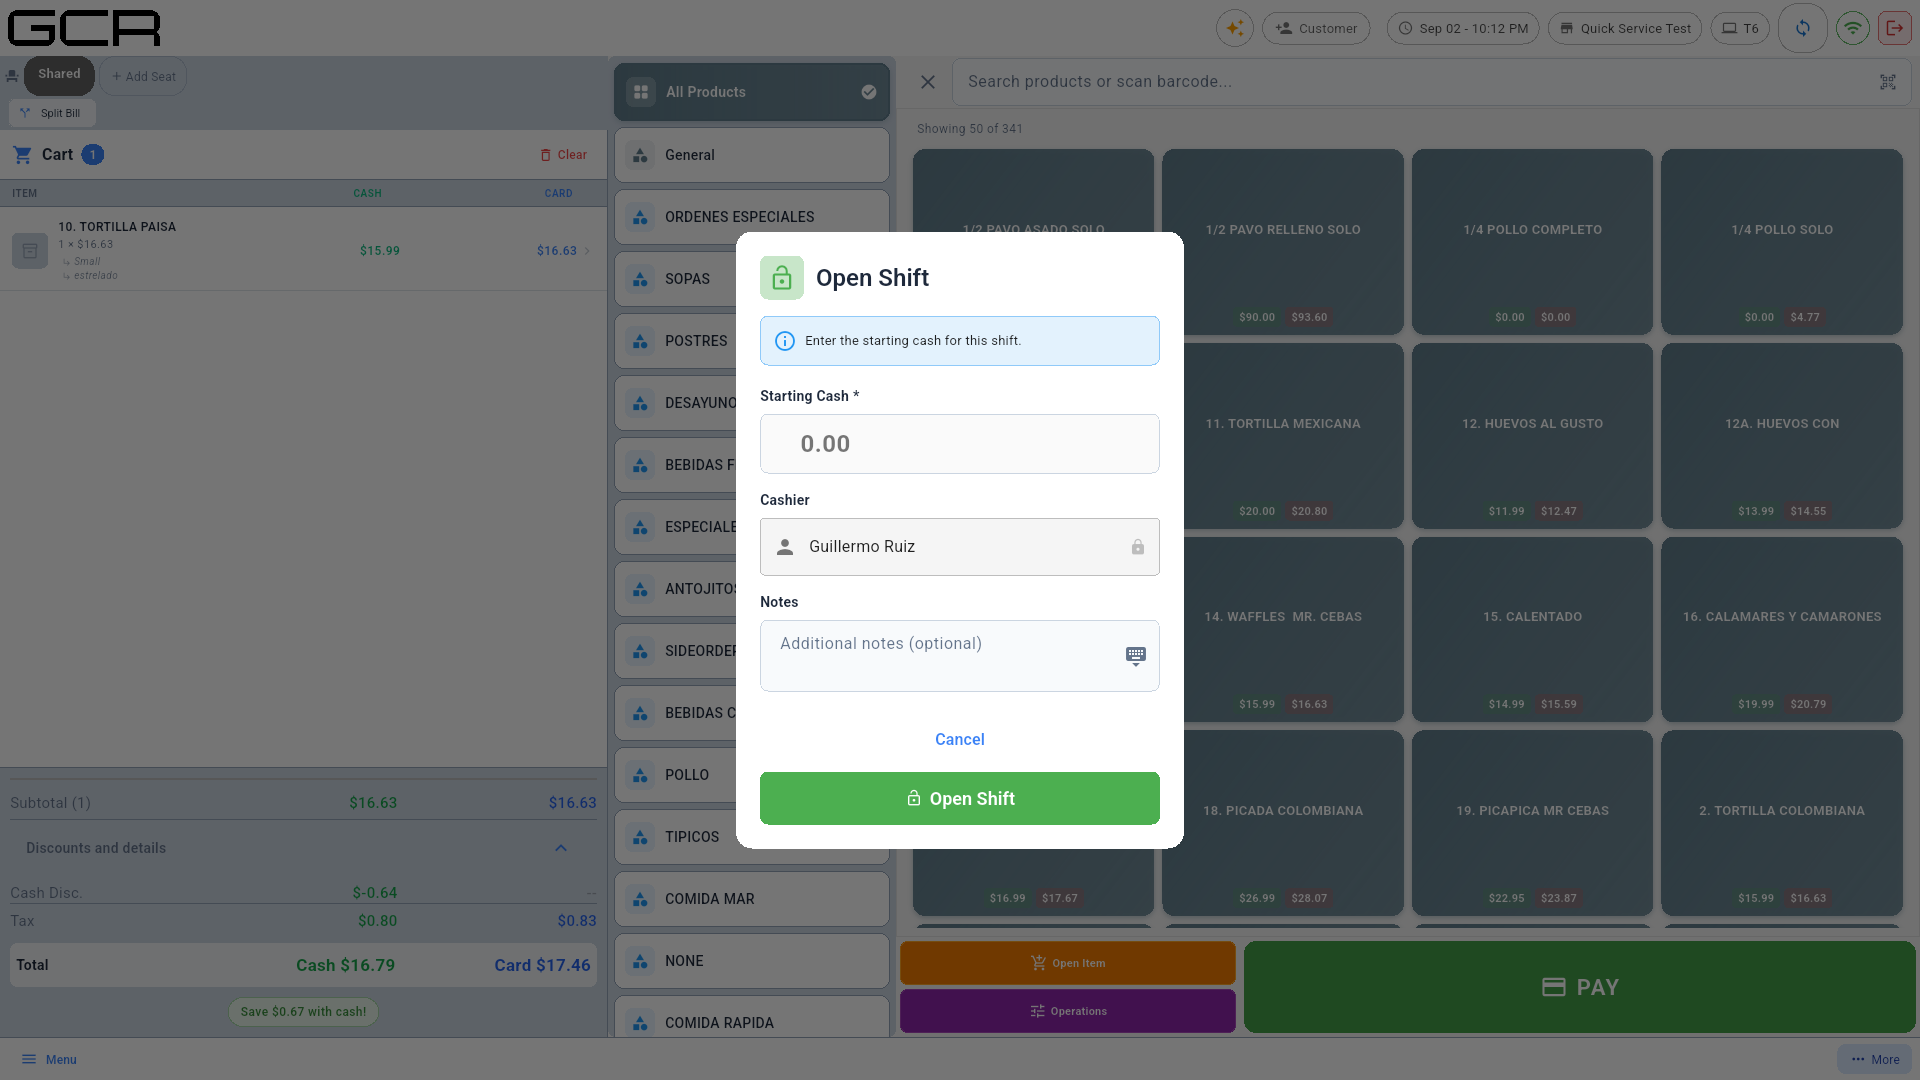
If no register is open, paying shows "Shift Required". Open the side menu → Open Shift, enter the starting cash and confirm:
4. Charging
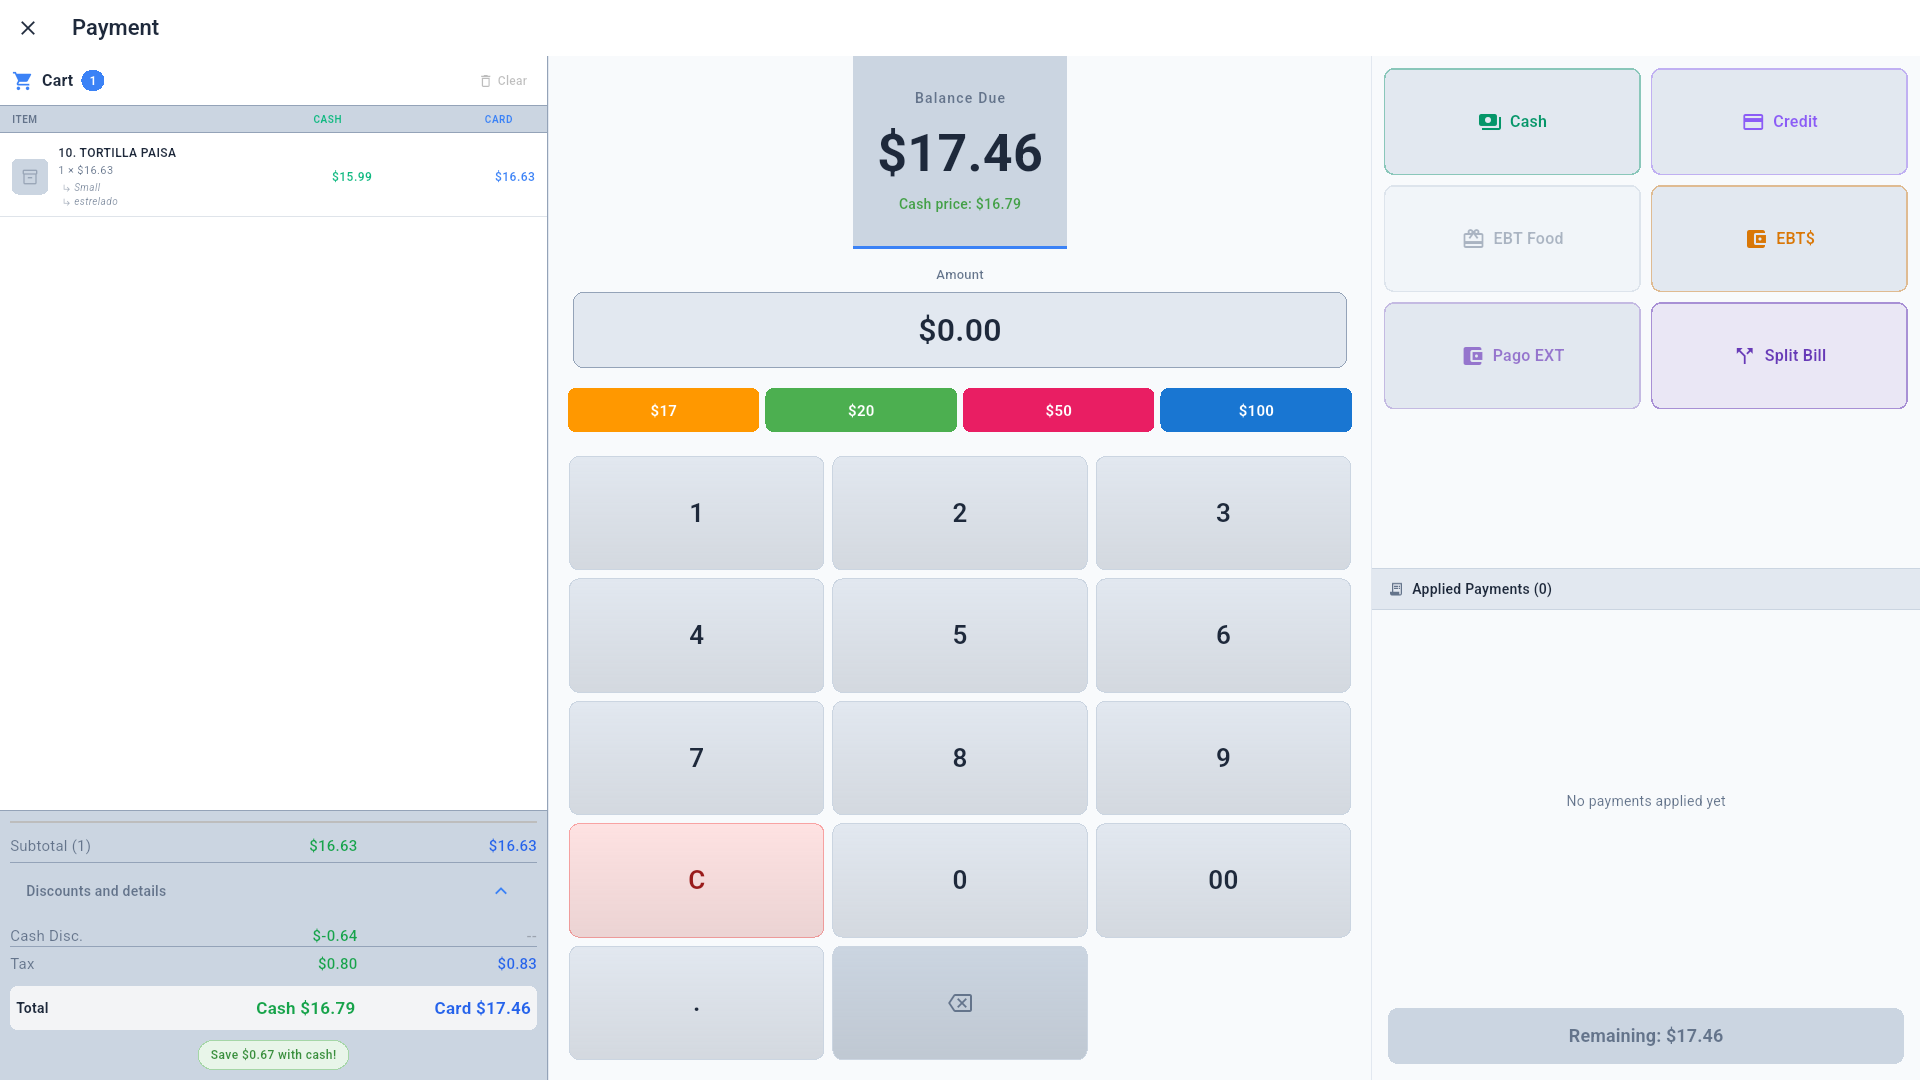
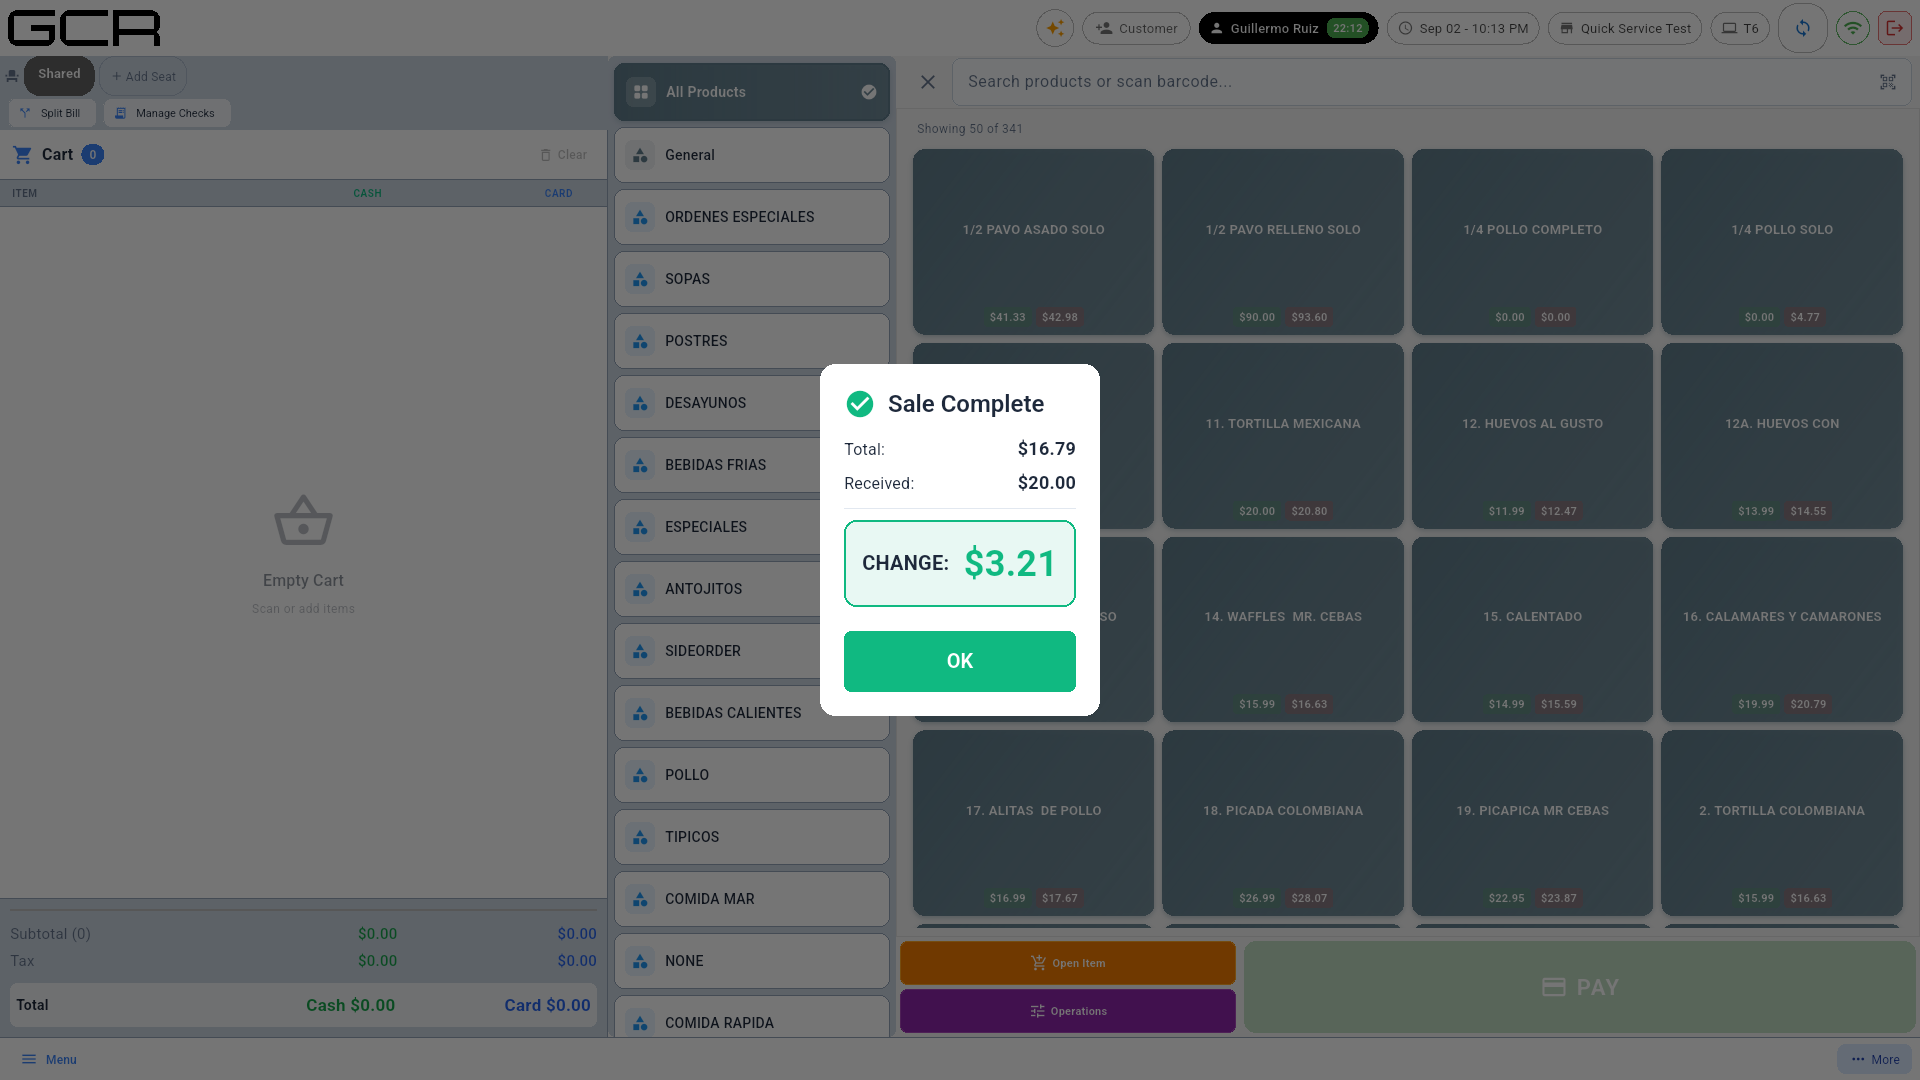
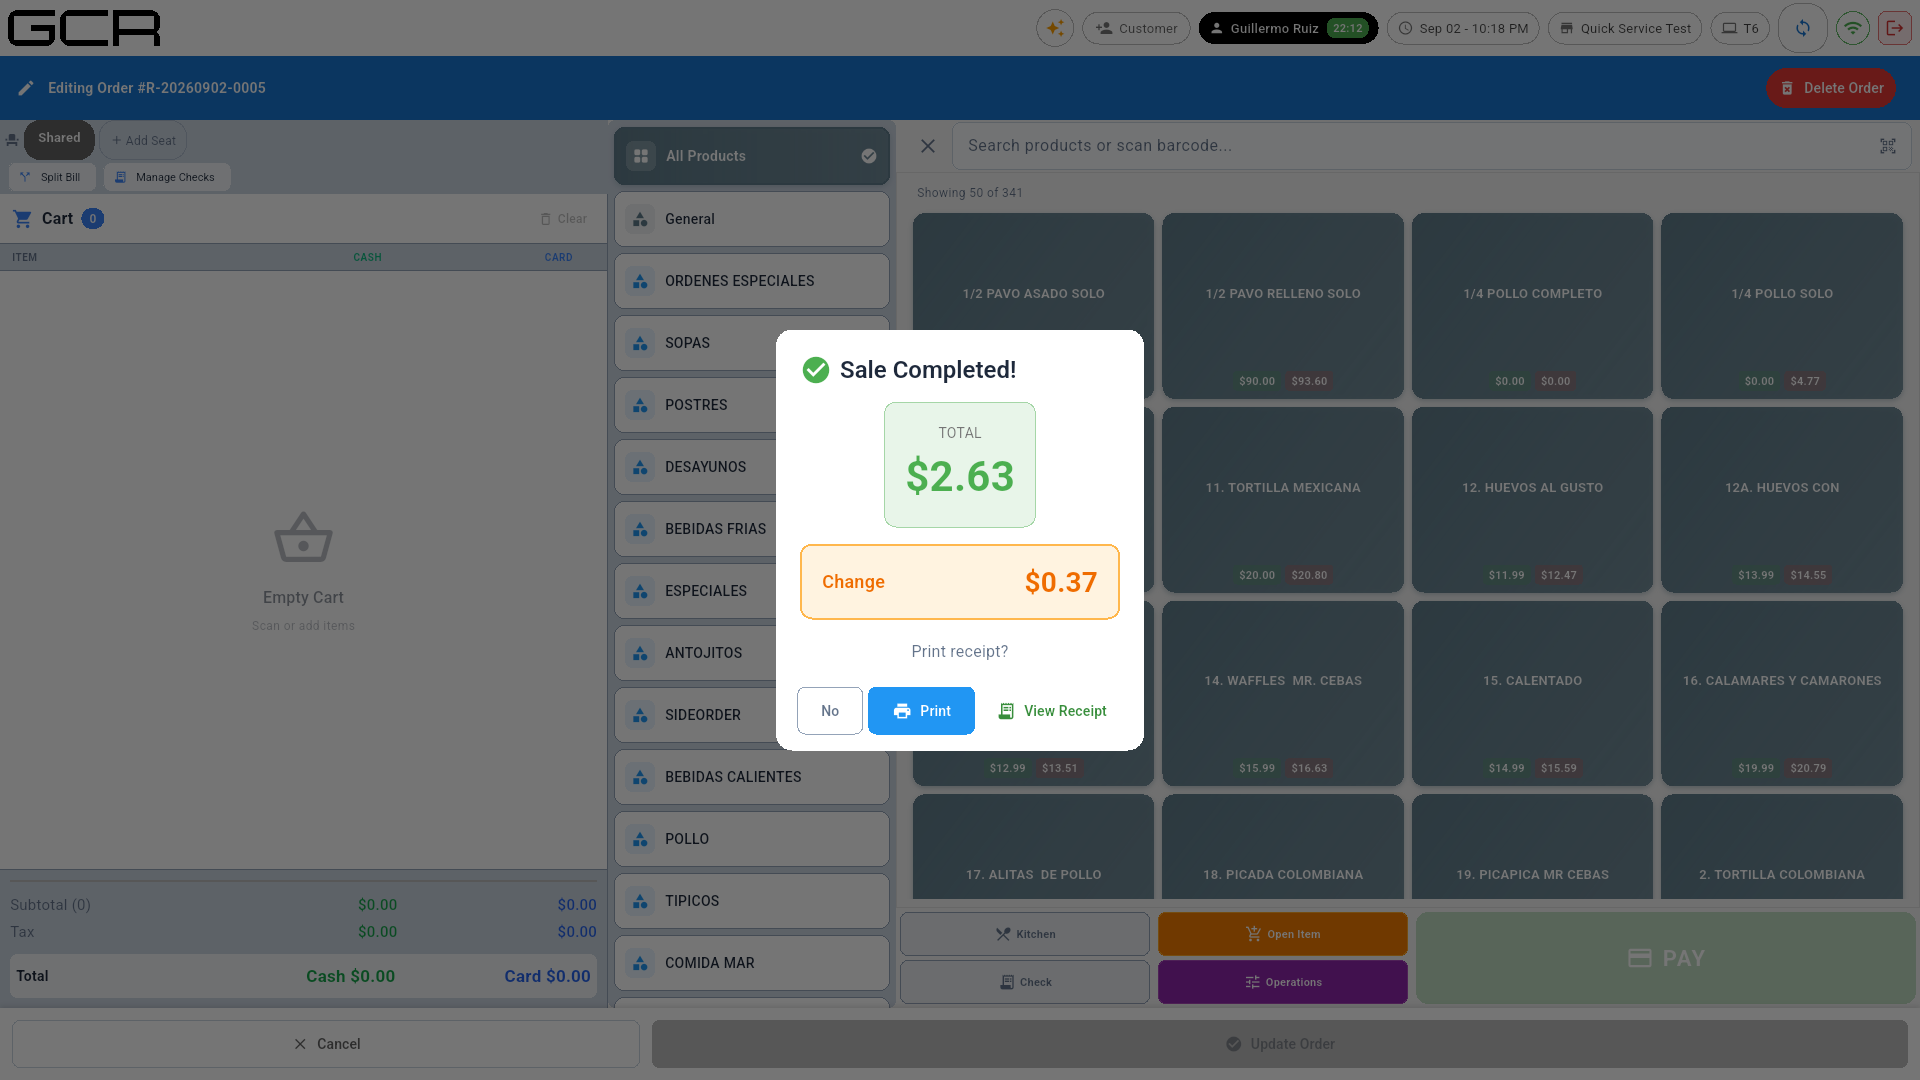
Quick bill buttons, keypad, and tenders Cash / Credit / EBT Food / EBT$ / Pago EXT / Split Bill. Cash payments show the change:
After paying, the POS can ask whether the order was already delivered:
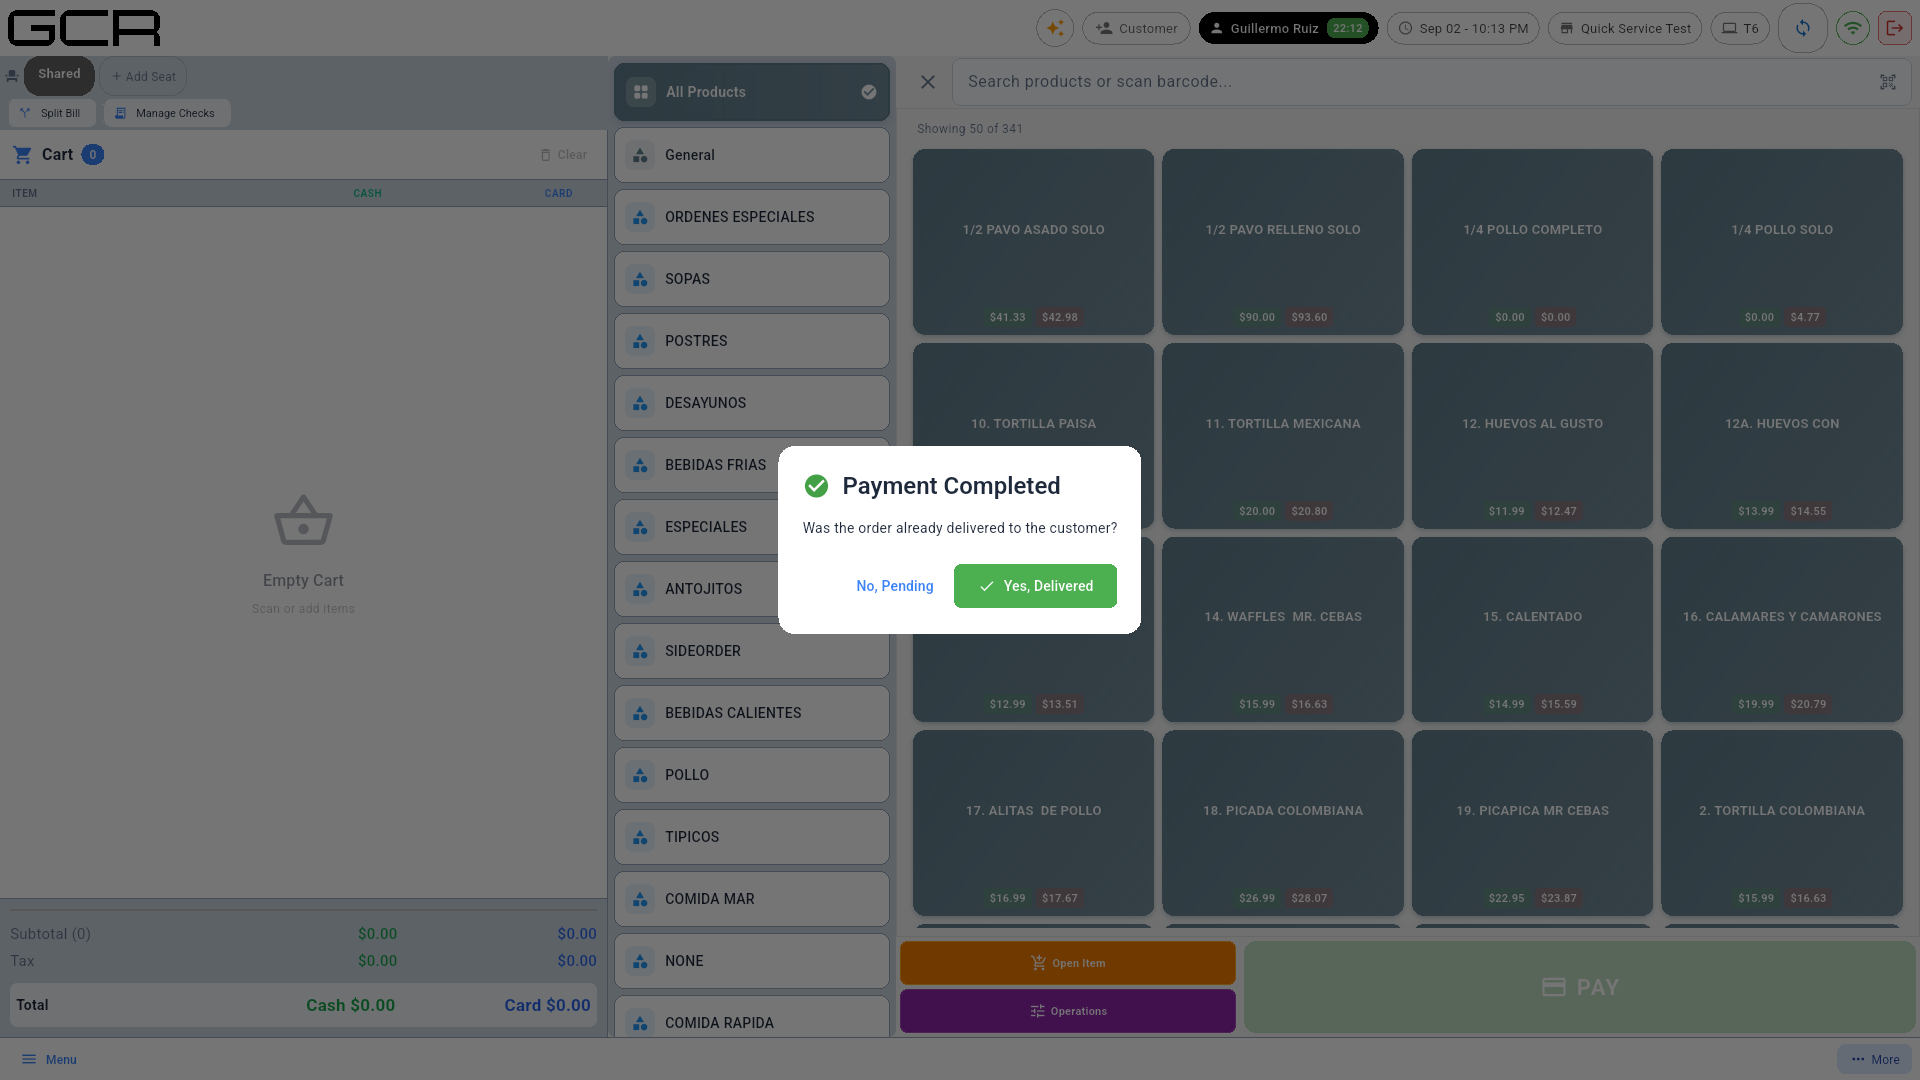
- Yes, Delivered — the order is completed.
- No, Pending — the order stays active in the kitchen (Kitchen Display) until completed.
The question is configured per order type. In the Merchant Portal → Settings → Restaurant, the "Was the order delivered?" after payment card has one toggle for Quick orders, one for To-go orders and one for Delivery orders. All three ship on. Turned off, the POS goes straight back to the home screen after payment and the ticket stays with the kitchen — the same as answering "No, Pending", never an automatic completion. Use it where the cashier takes the money and someone else hands the order over.
5. Kitchen Display
From home → Kitchen Display. Every order is a card with its status and timer:
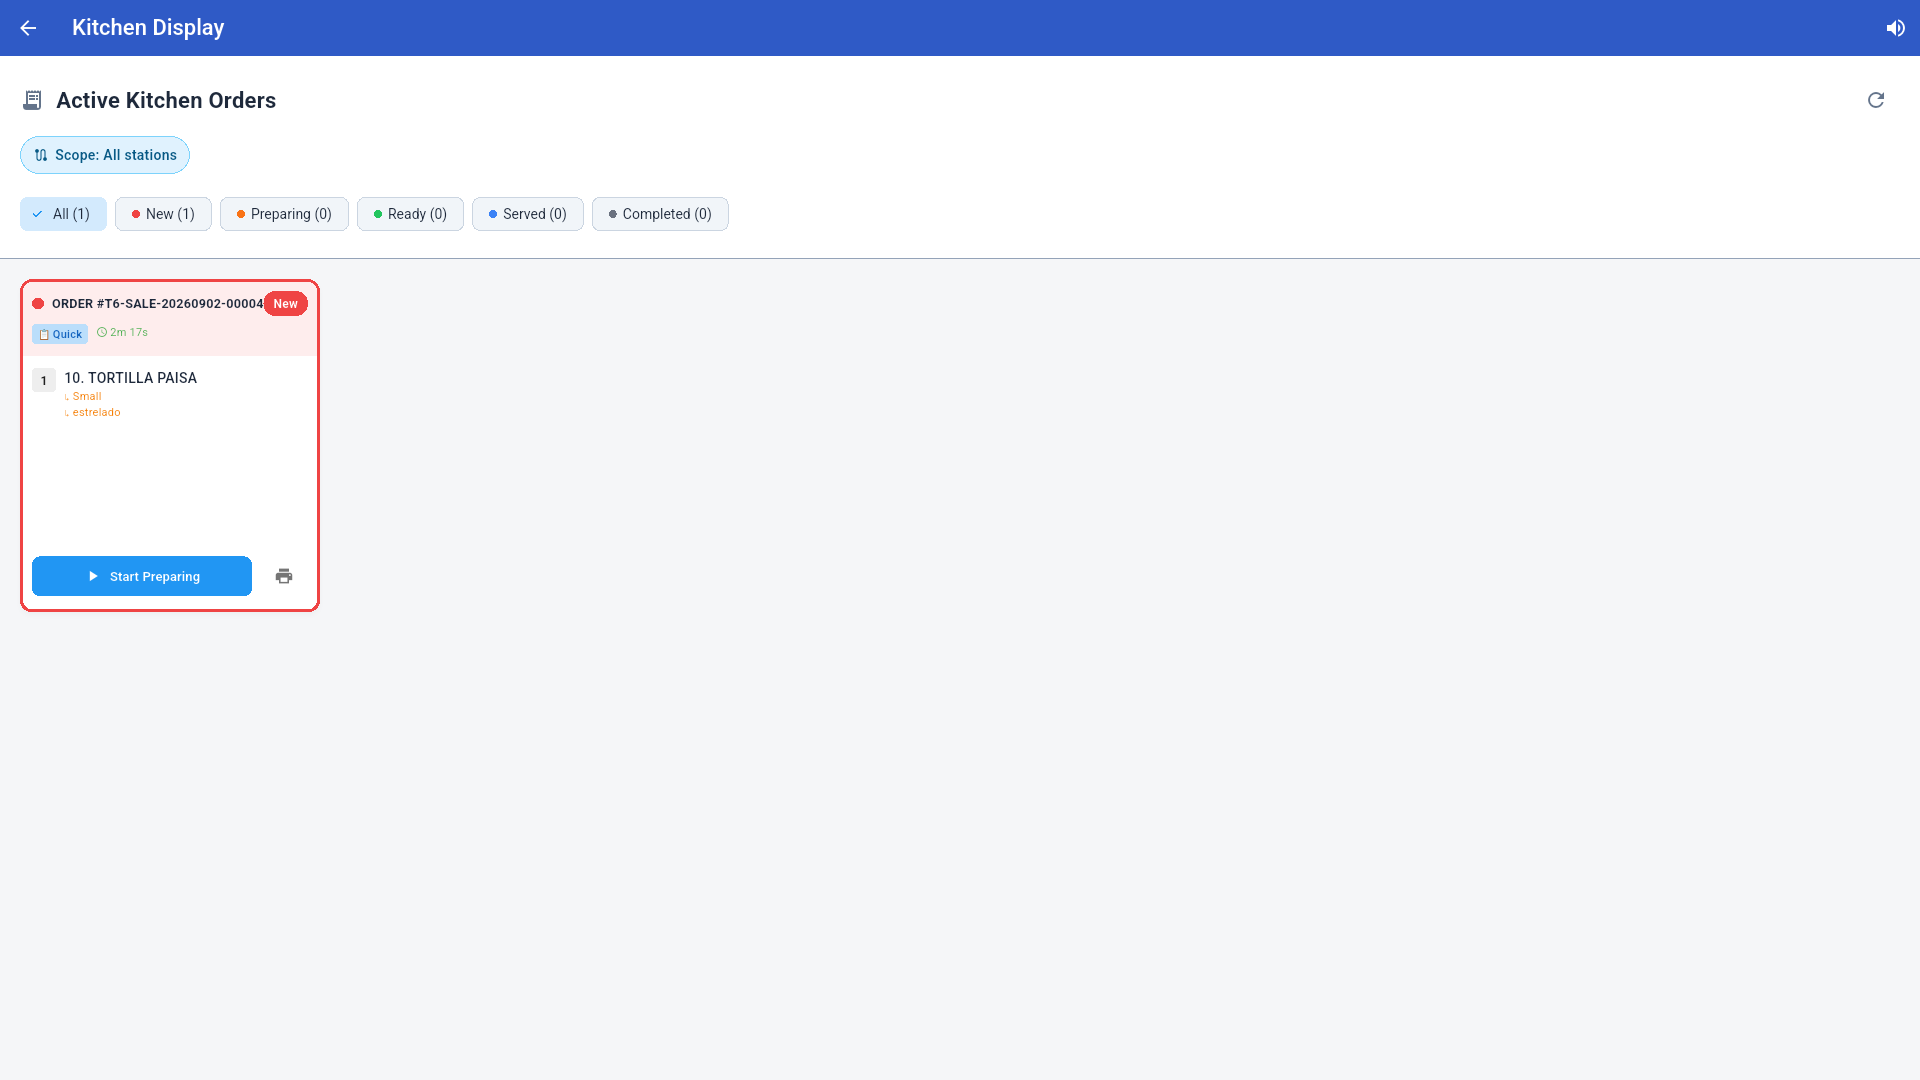
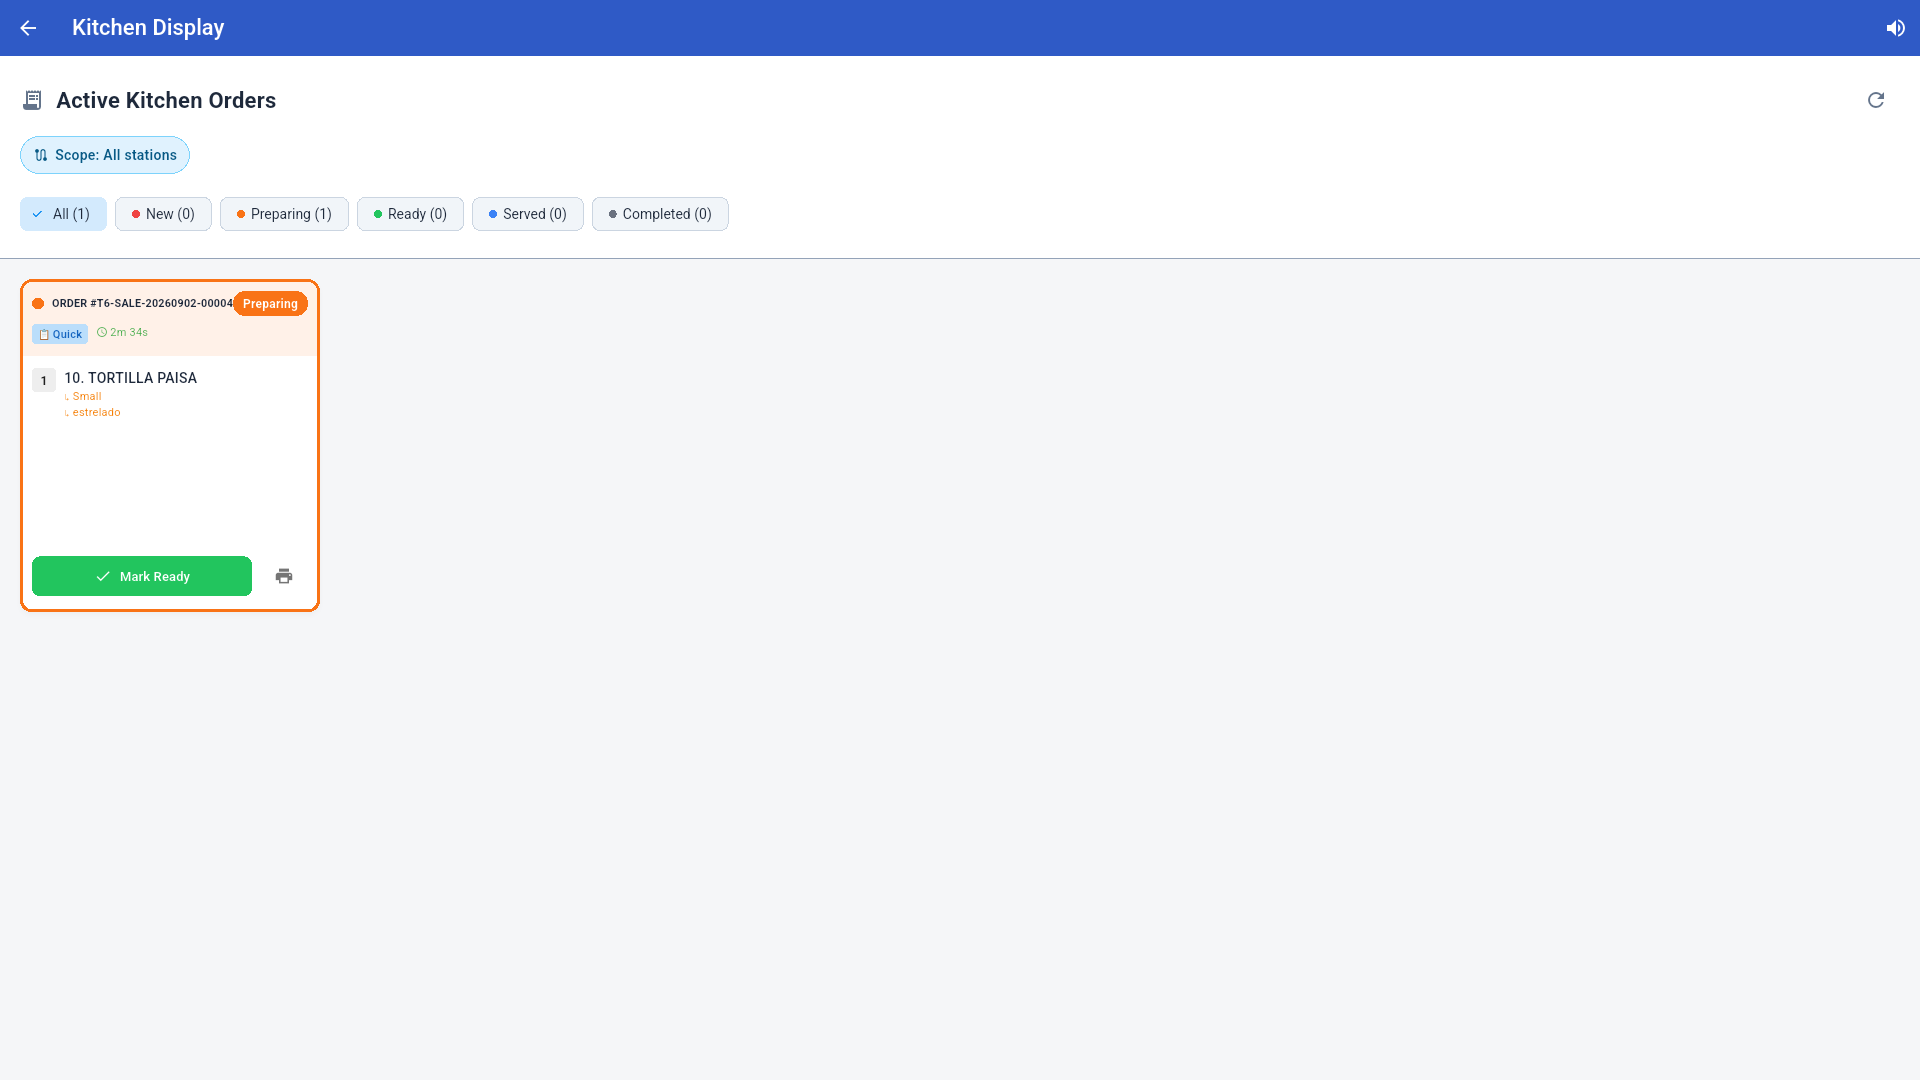
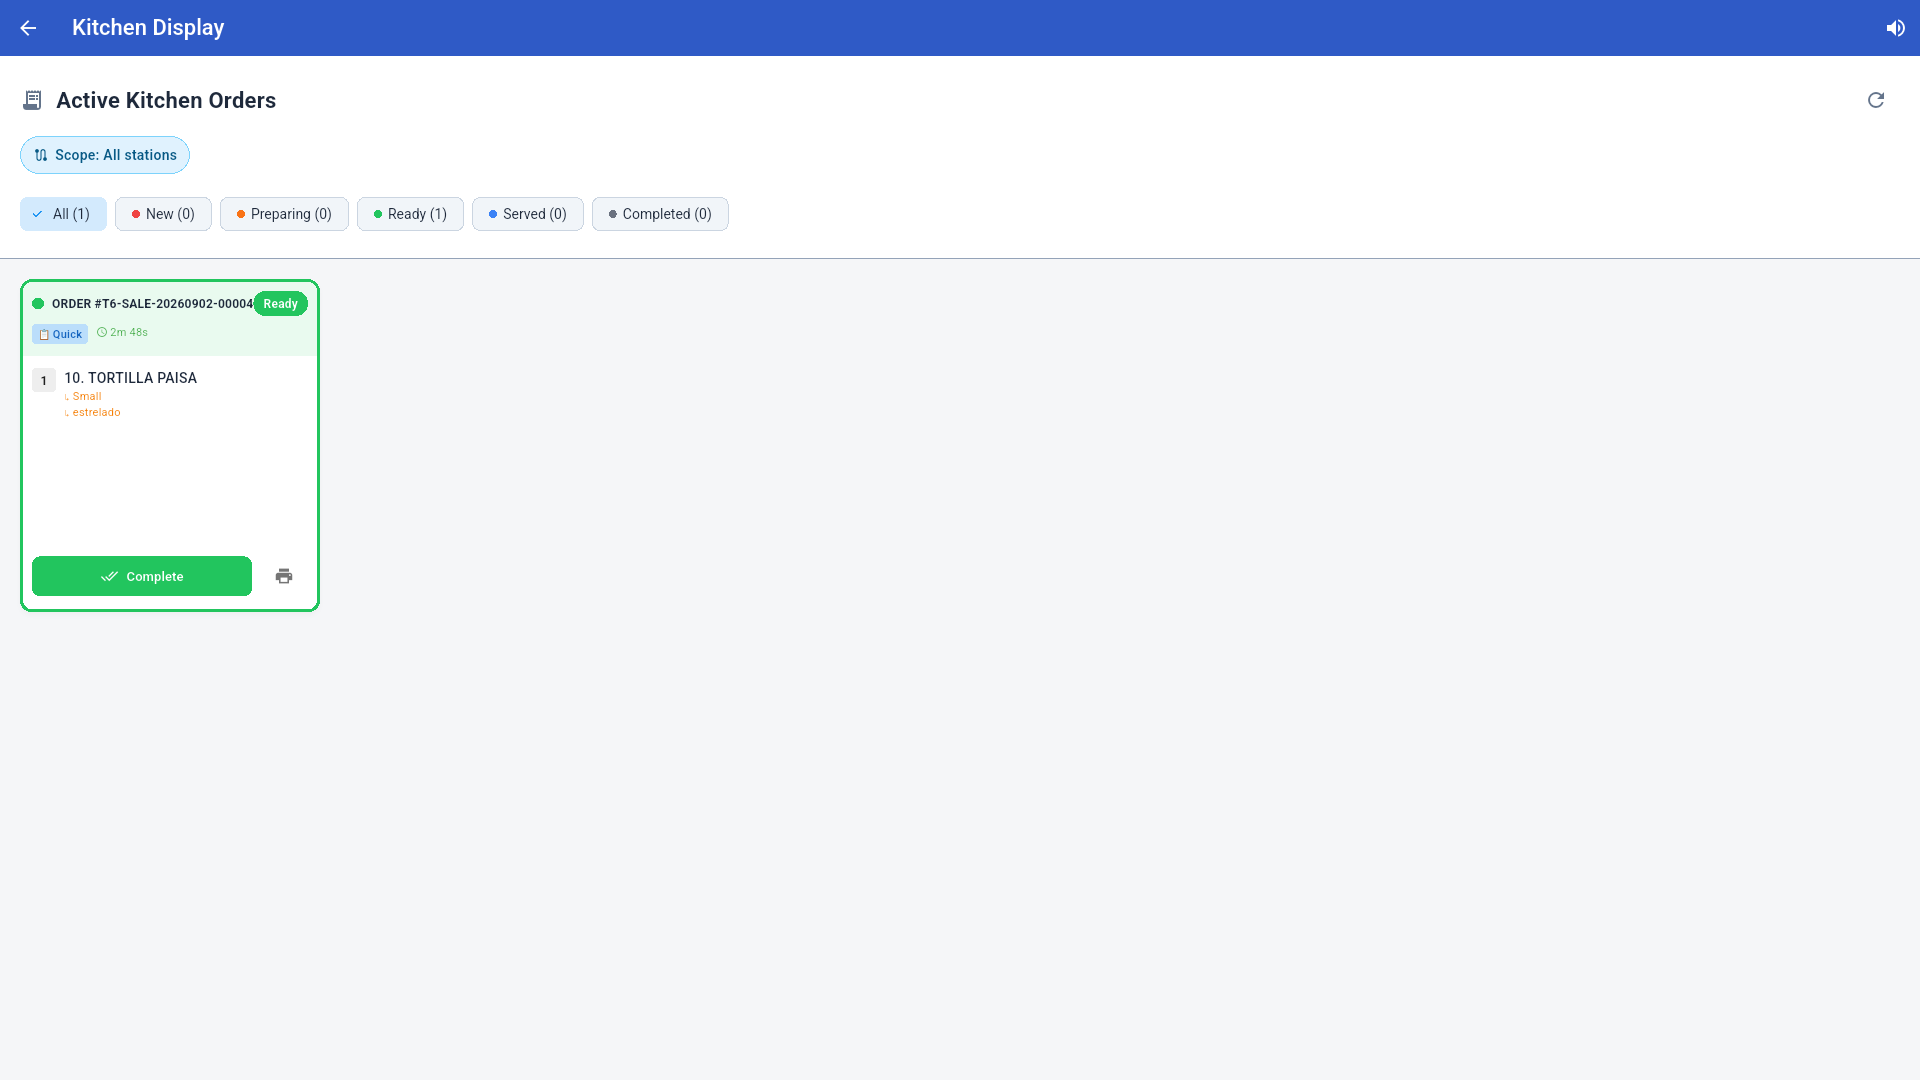
Flow: New → Start Preparing → Mark Ready → Complete. The top filters (All / New / Preparing / Ready / Served / Completed) and the per-station Scope organize the view. The printer icon reprints the kitchen ticket.
To run a dedicated device as a kitchen screen, see the Kitchen Display Station manual.
6. Tables, To-Go and Delivery
6.1 Tables
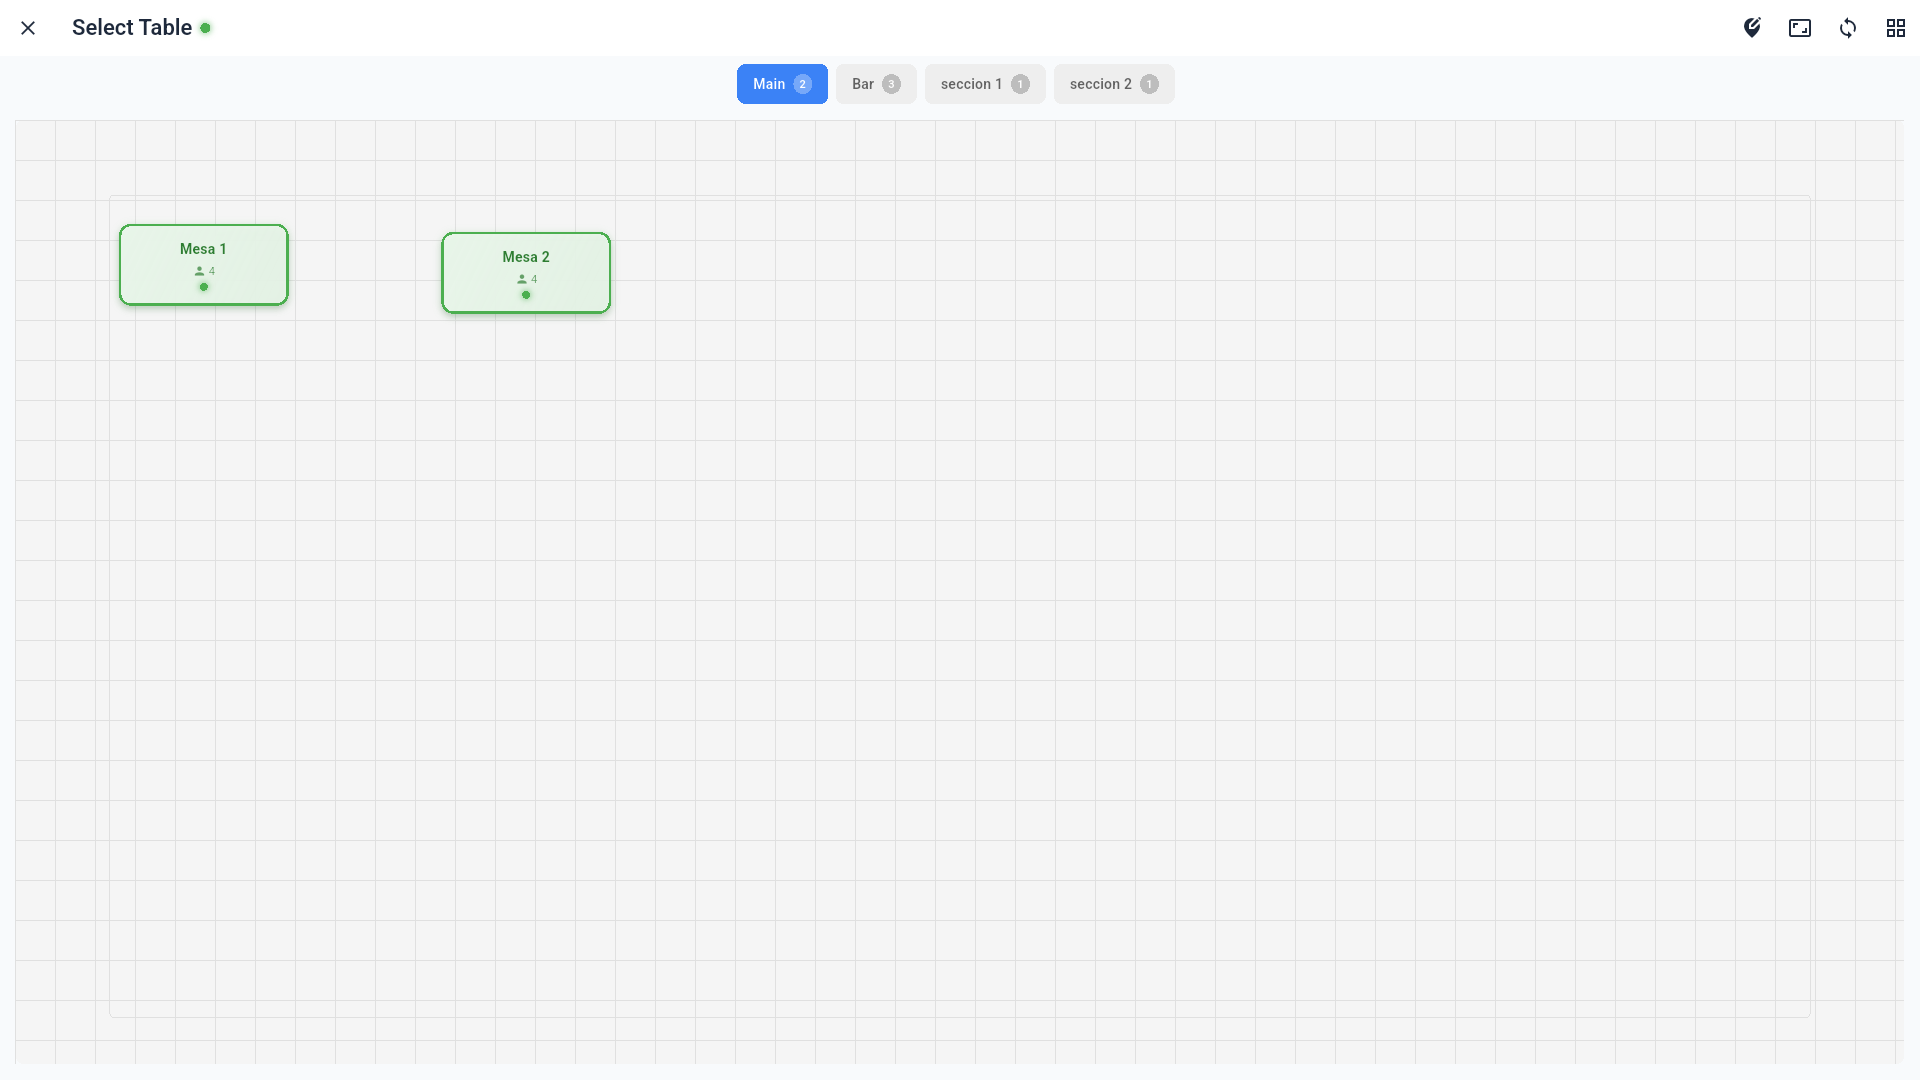
Tables opens the floor plan by section (Main, Bar…). Green = free. The full table/seat/split-bill flow is documented in the Full Restaurant manual (it works the same in Quick Service).
6.2 To-Go
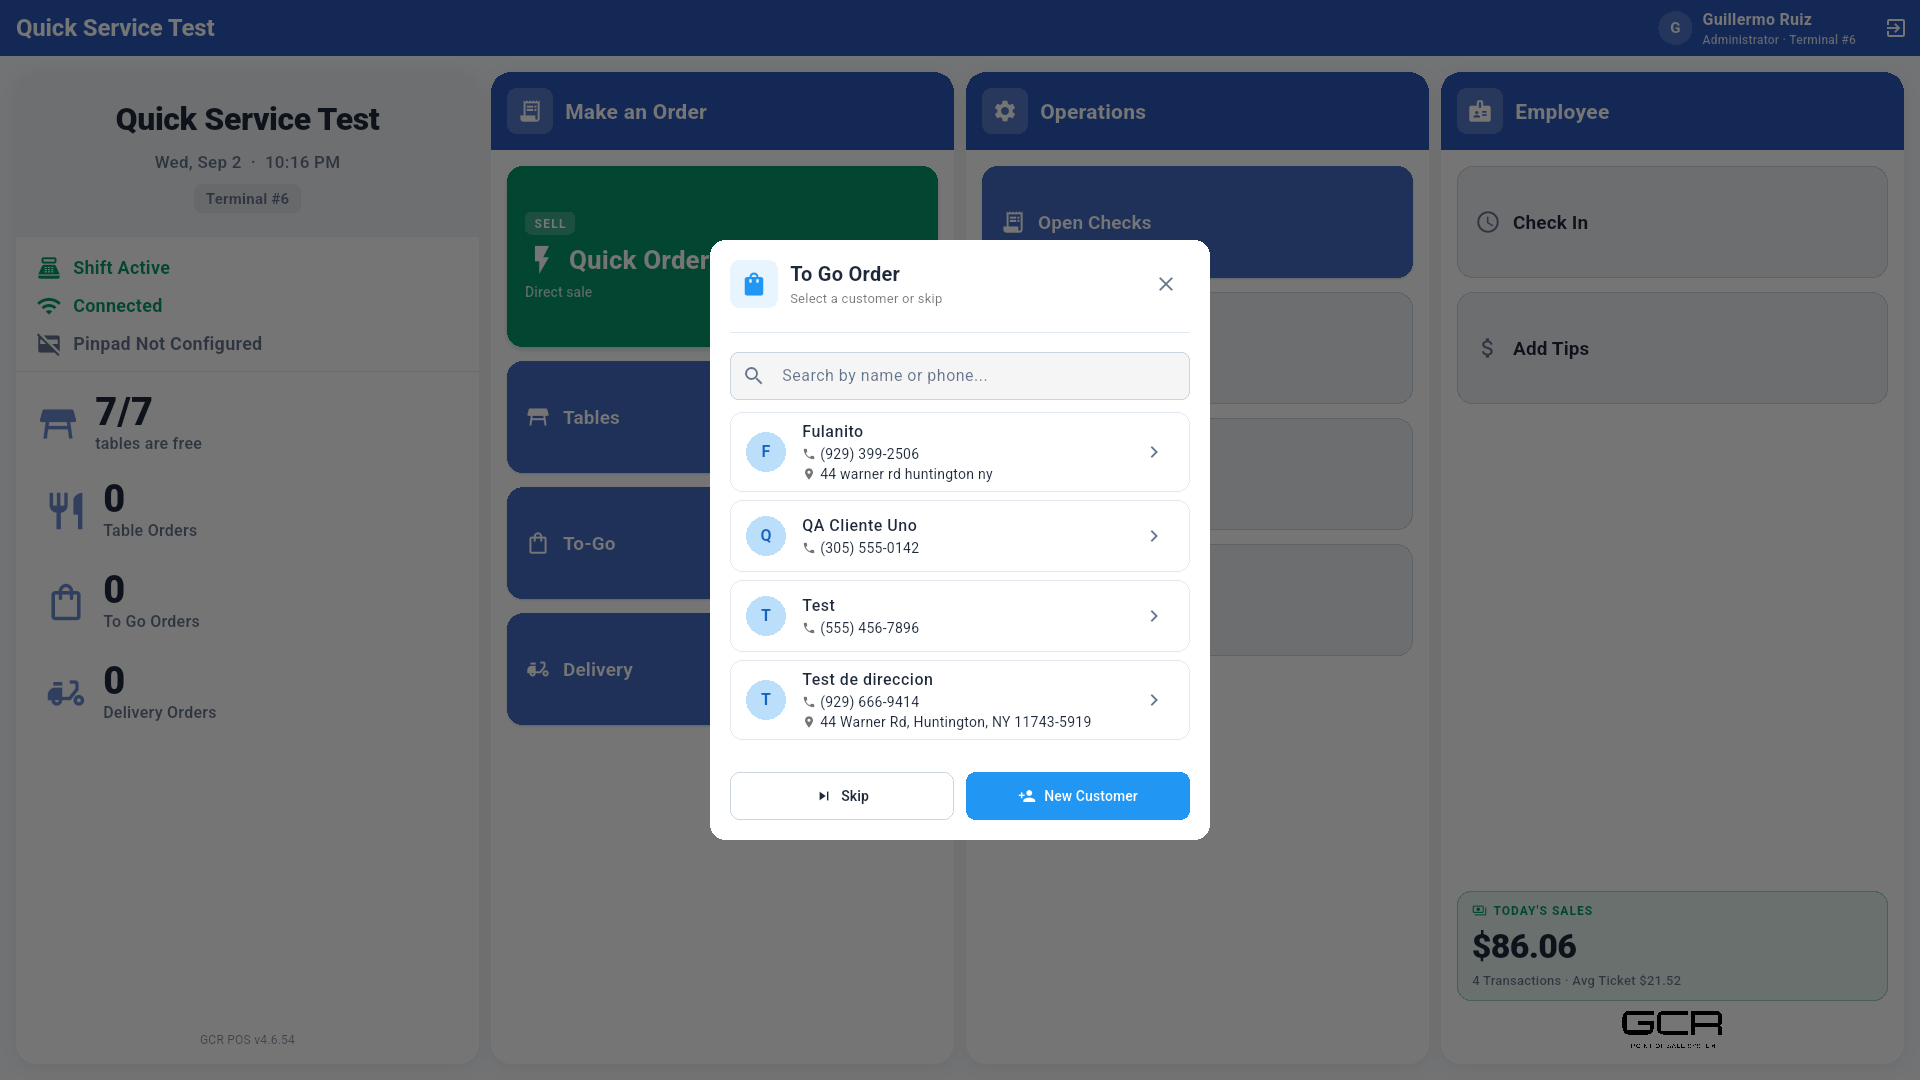
To-Go asks for a customer (search by name/phone, create a new one, or Skip). Then the order screen opens with two extra buttons:
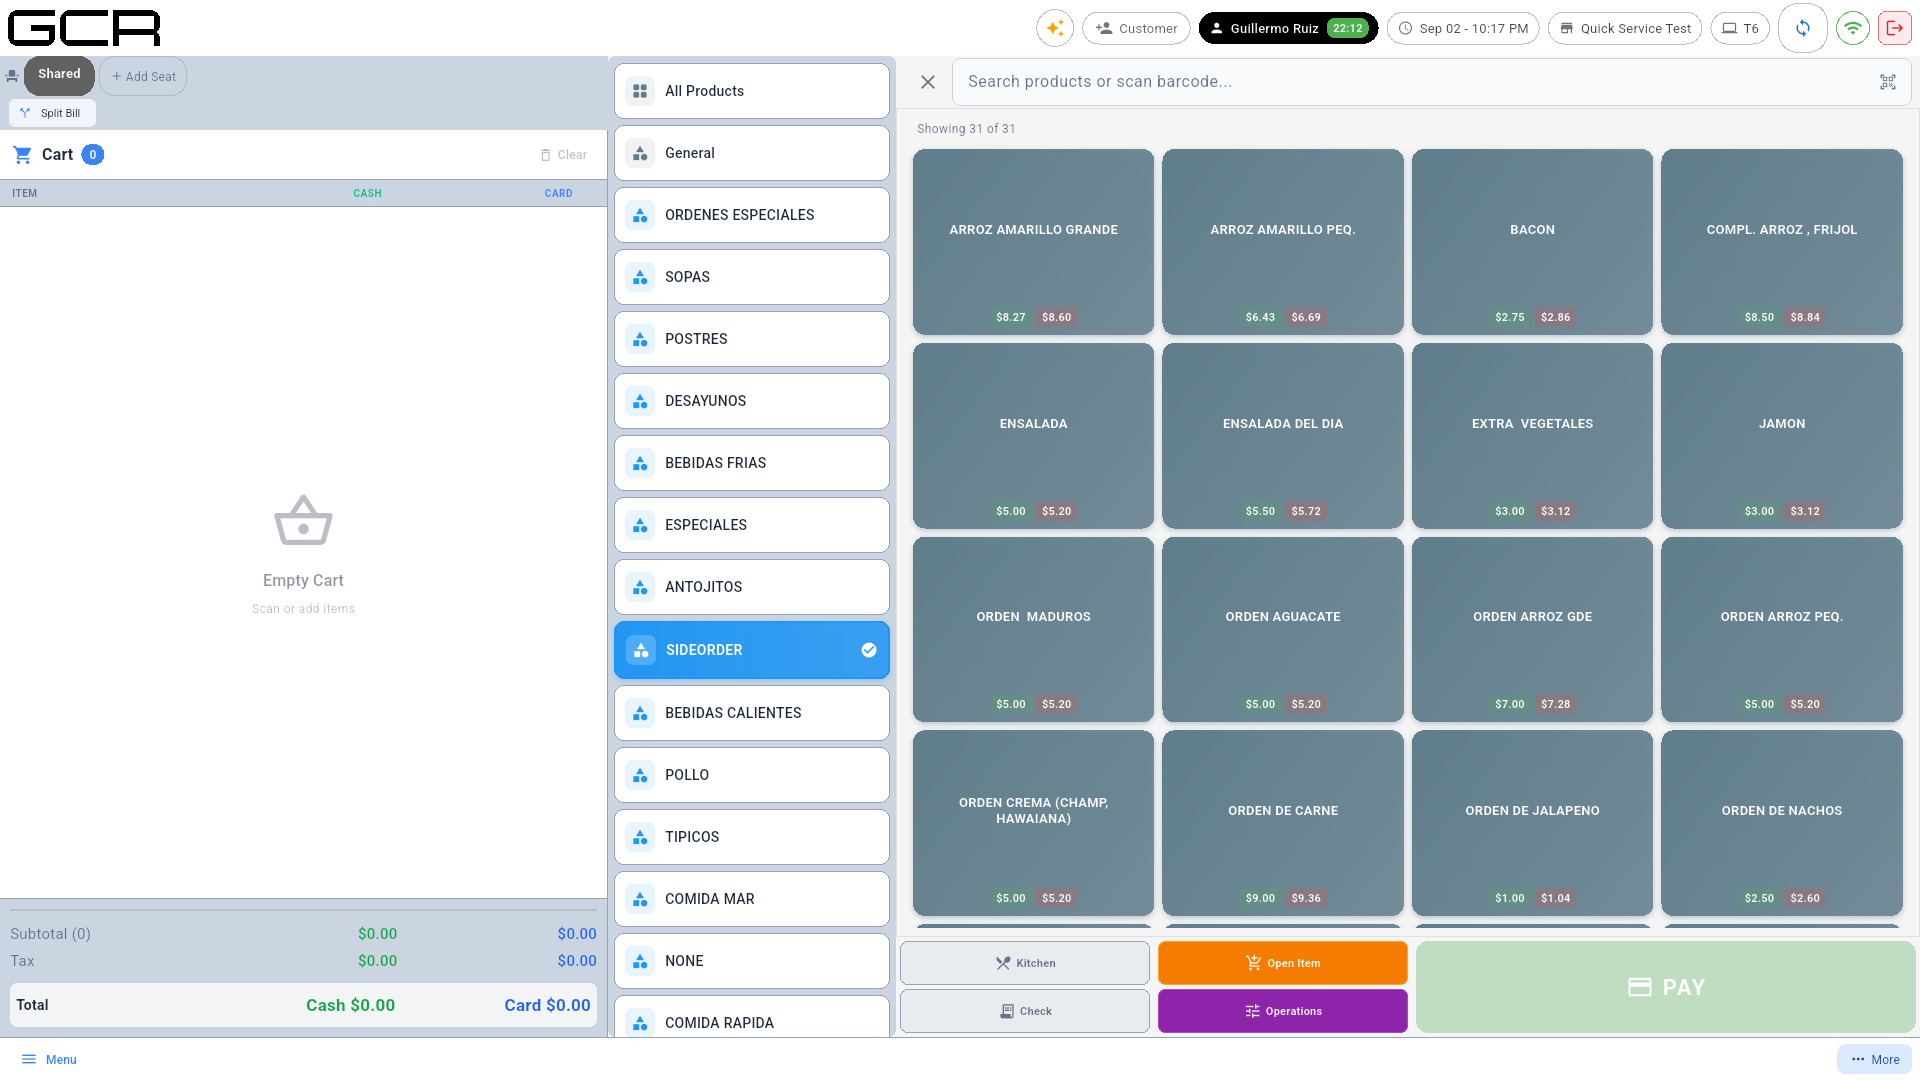
- Kitchen — sends the items to the kitchen and keeps the check open to be paid later.
- Check — prints the pre-check.
6.3 Delivery
Same as To-Go but tagged Delivery (with the customer's address).
Who is taking it out. When the order is handed over from Open Checks (Deliver / Picked Up button), the POS can ask which employee is taking it, and that name prints on the delivery slip that travels with the bag. Turn it on in the portal → Settings → Restaurant → the "Was the order delivered?" after payment card → Ask who is delivering toggle (ships off; it is for stores with their own drivers).
- The list holds the employees whose role grants the Deliver Orders permission (the Driver role ships with it; in a small store just tick the box on the cashier's role). Managed in the portal → Employees → Roles & Permissions.
- Skip prints the slip without the driver line; dismissing the dialog cancels the handoff.
- It is never asked on pickup orders the customer collects at the counter, even though they ride as delivery.
- It works offline: the list is read from the terminal's local database.
7. Open Checks
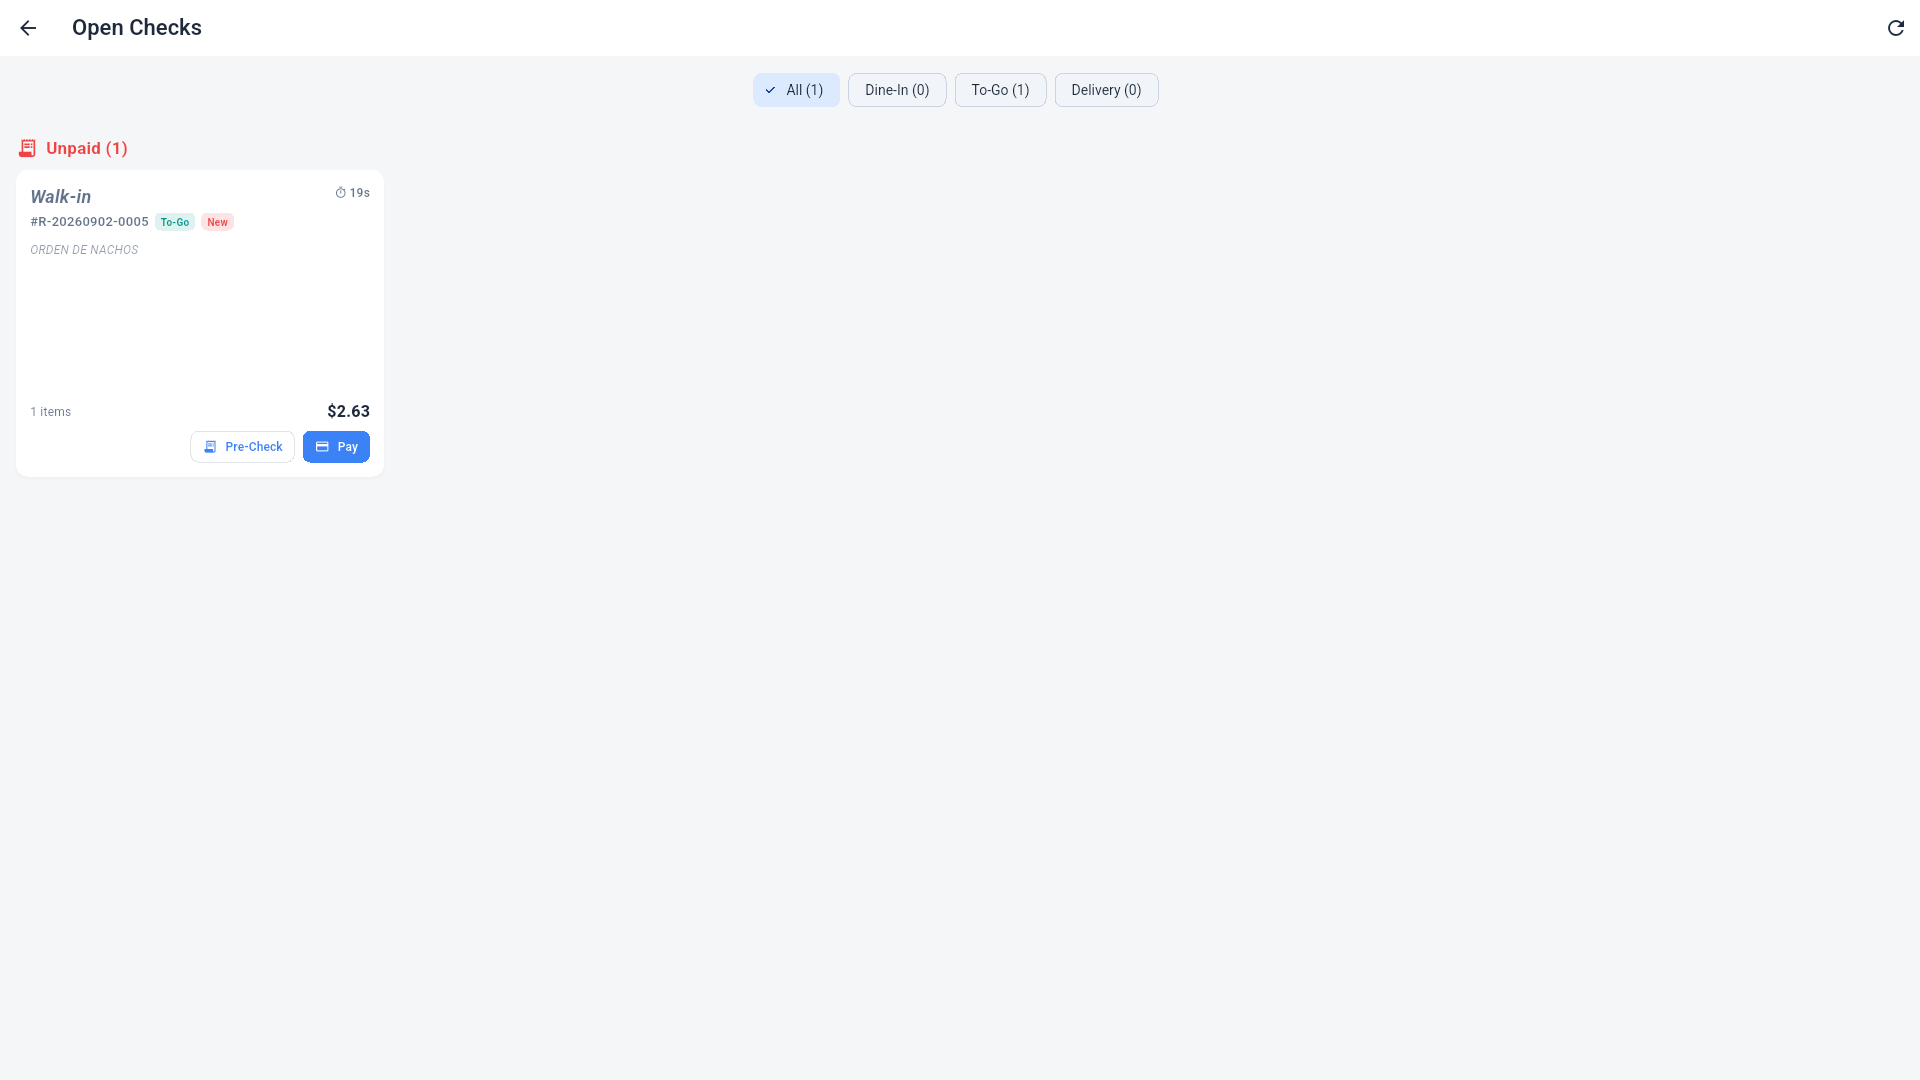
Lists unpaid checks with All / Dine-In / To-Go / Delivery filters. Each card shows customer, number, type, items and total:
- Pre-Check — prints the pre-check.
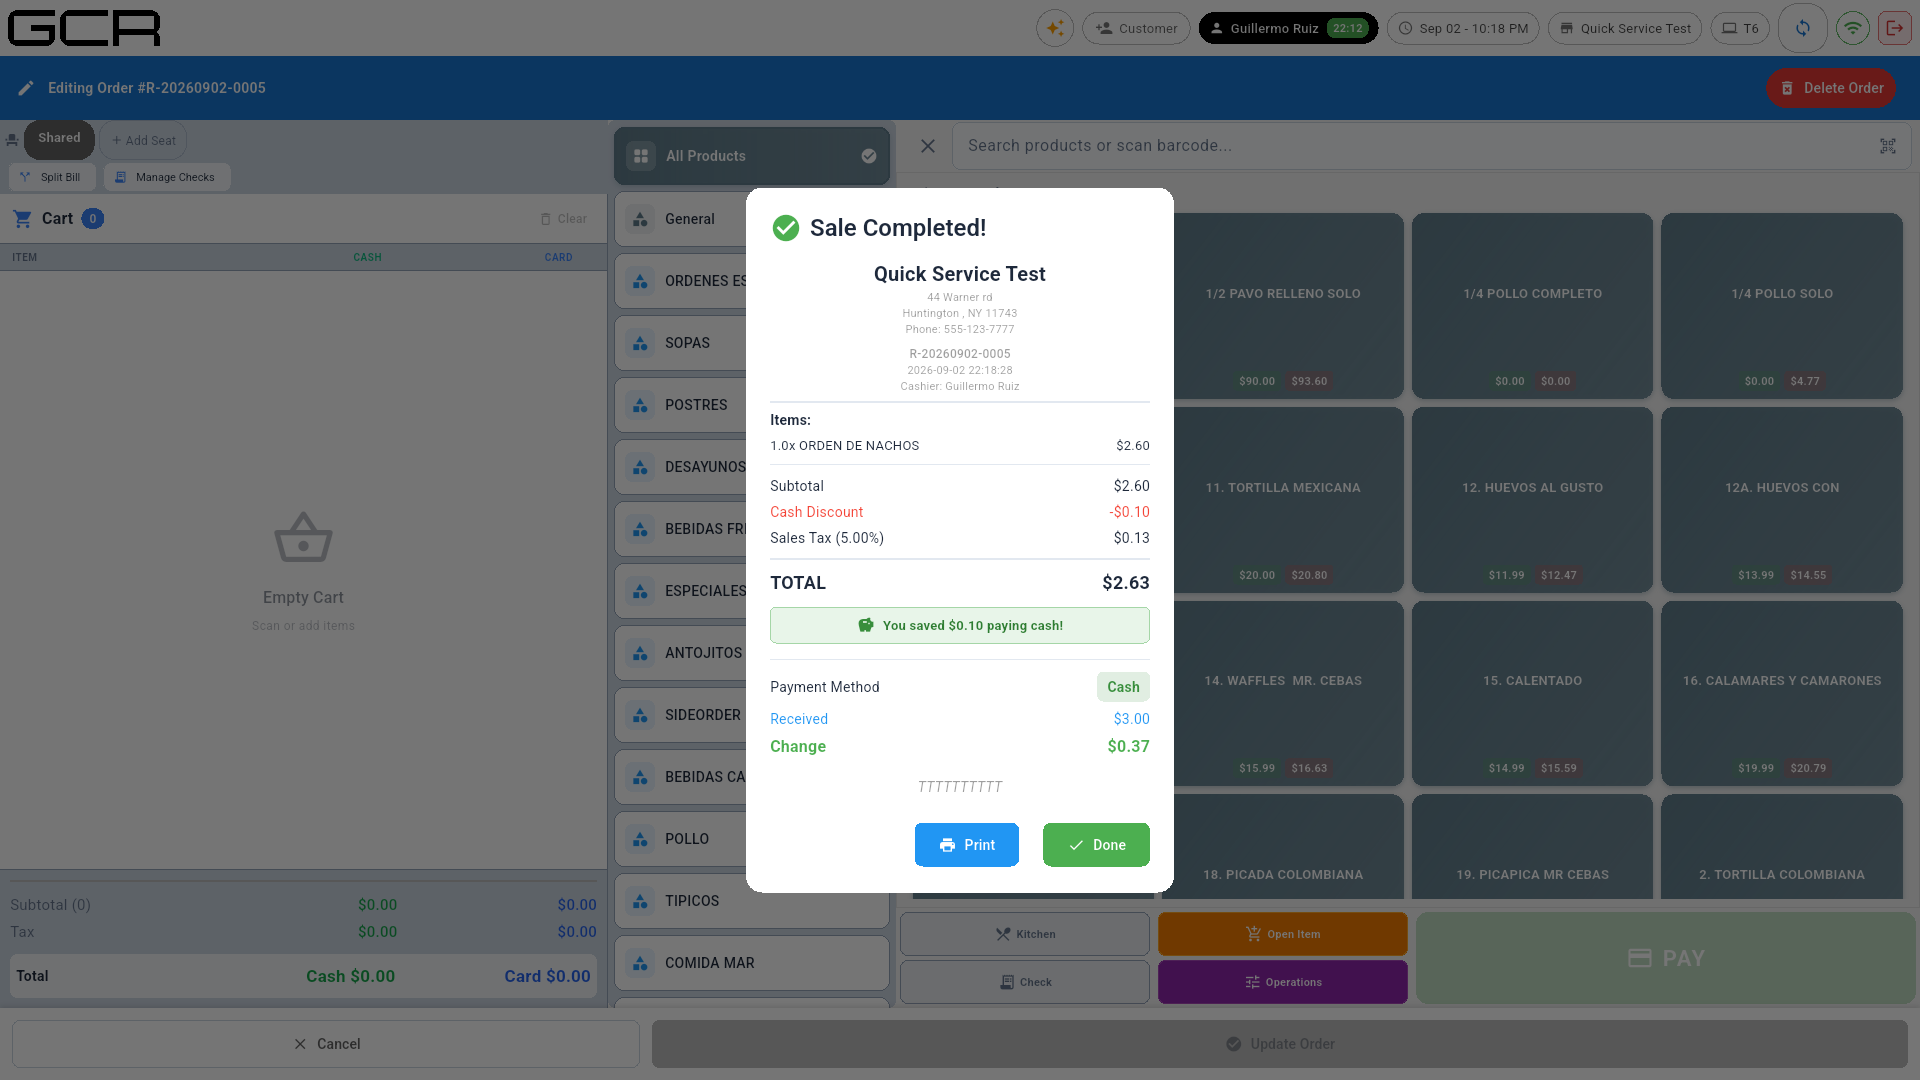
- Pay — opens payment. When the payment completes:
8. Discounts, X/Z and other operations
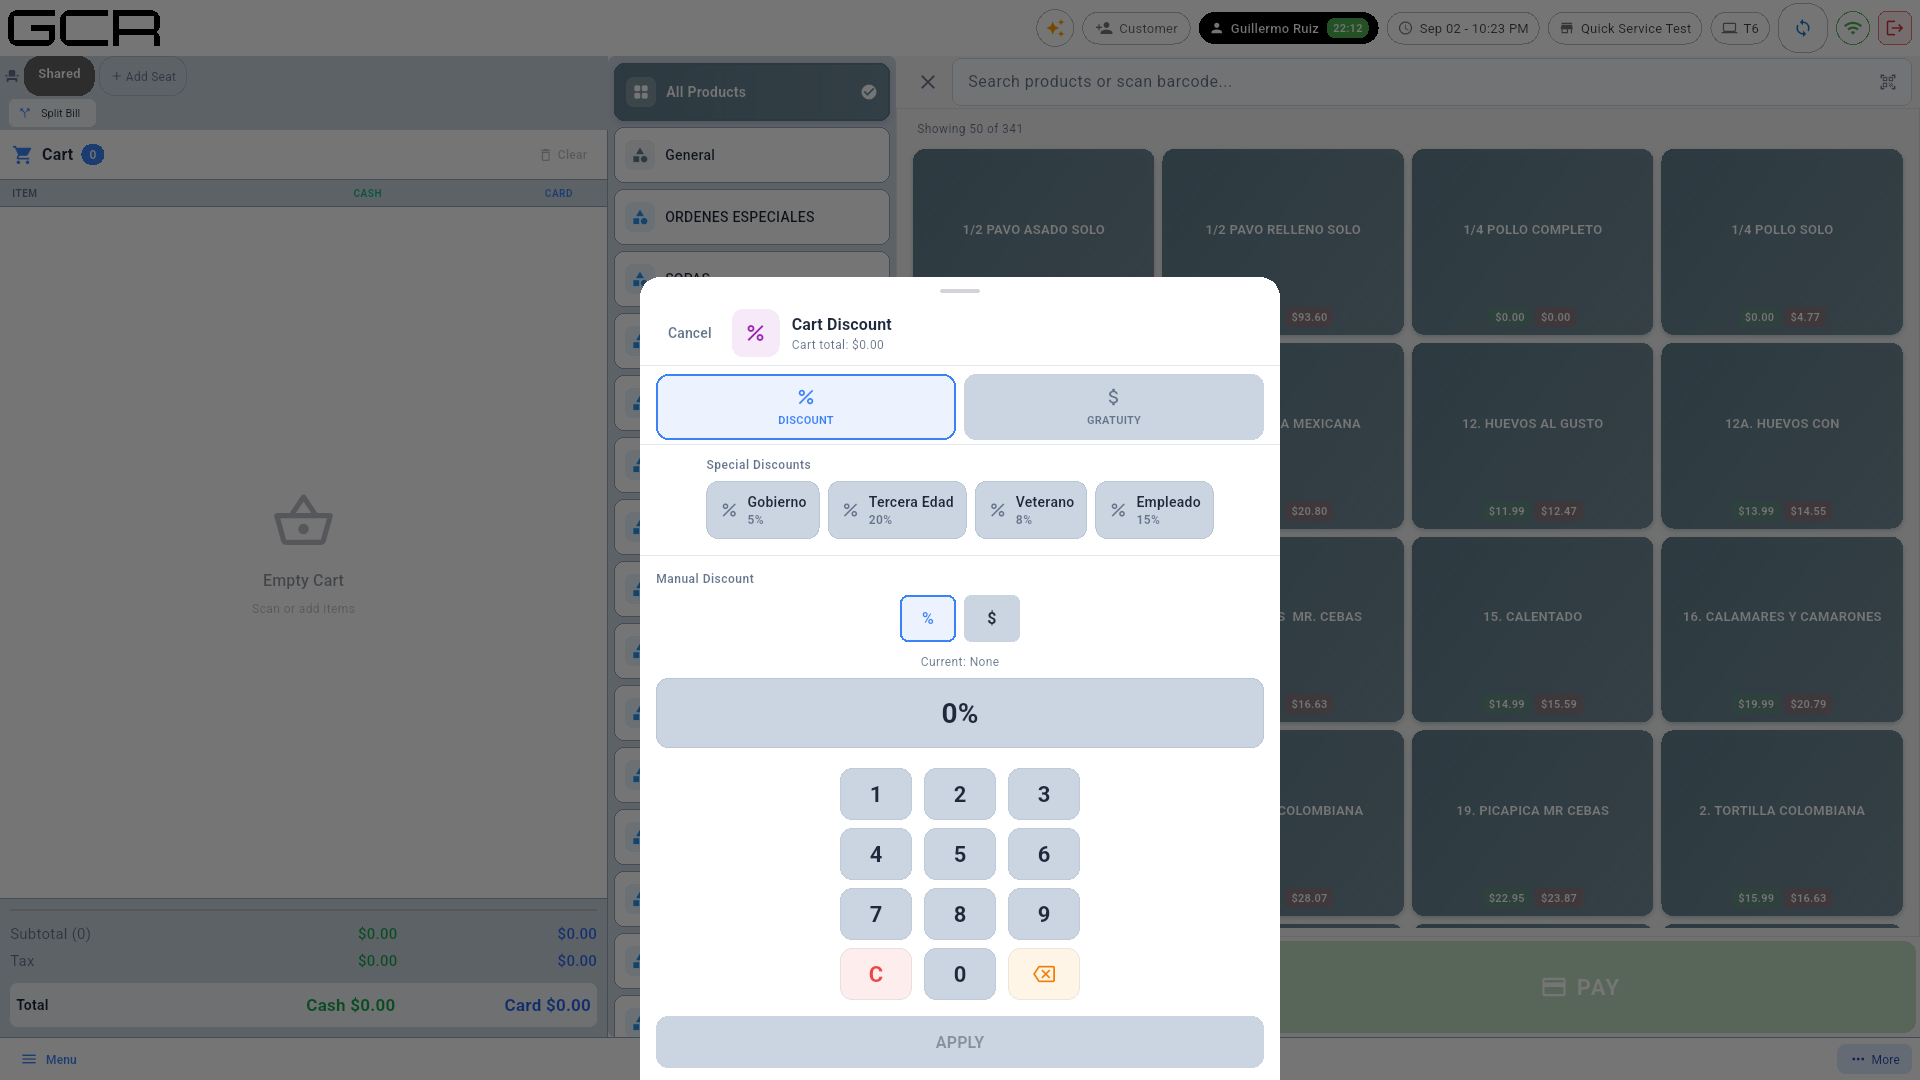
- The purple Operations button inside an order = cart discounts and gratuity (presets + manual):
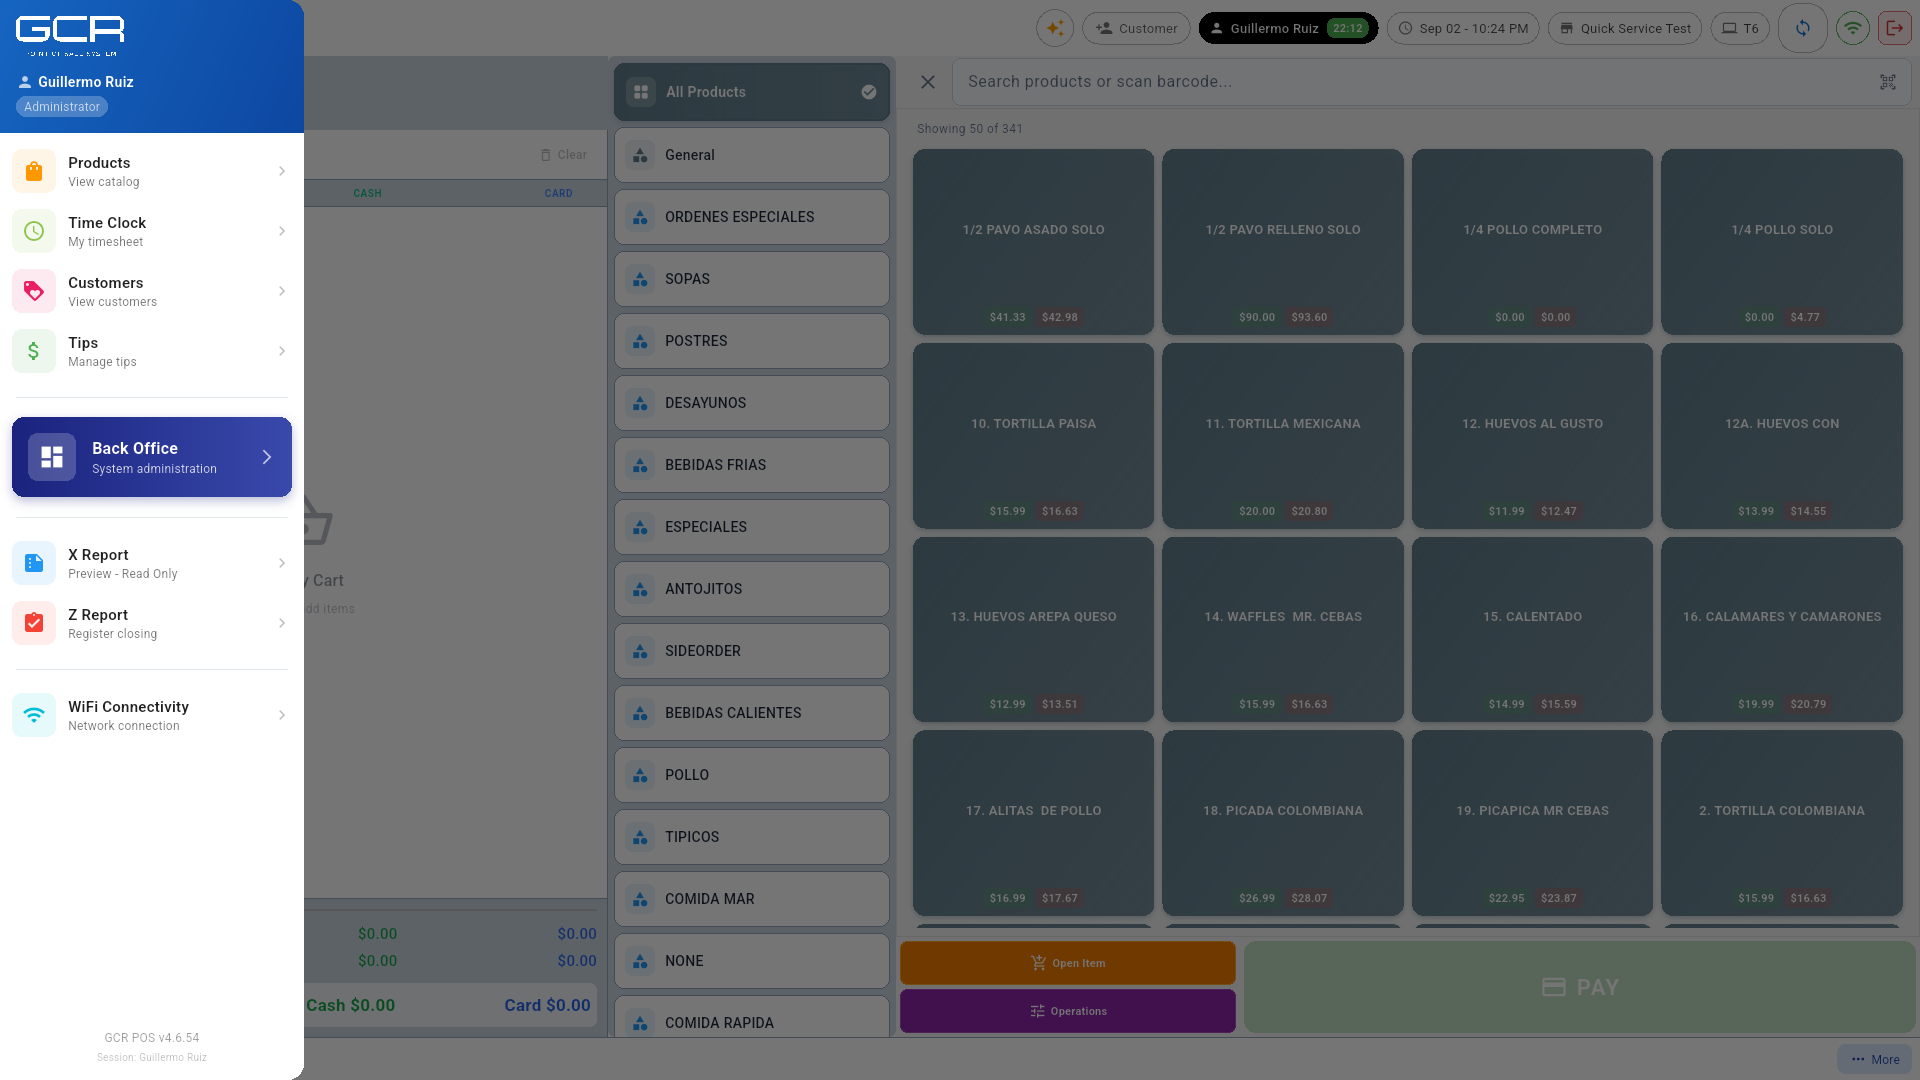
- With an open shift, the side menu shows X Report (preview) and Z Report (register closing):
- The step-by-step Z closing, Operations (voids, refunds, paid in/out, settle), Back Office and Settings are covered in the Back Office & Settings manual.
9. Time clock and tips
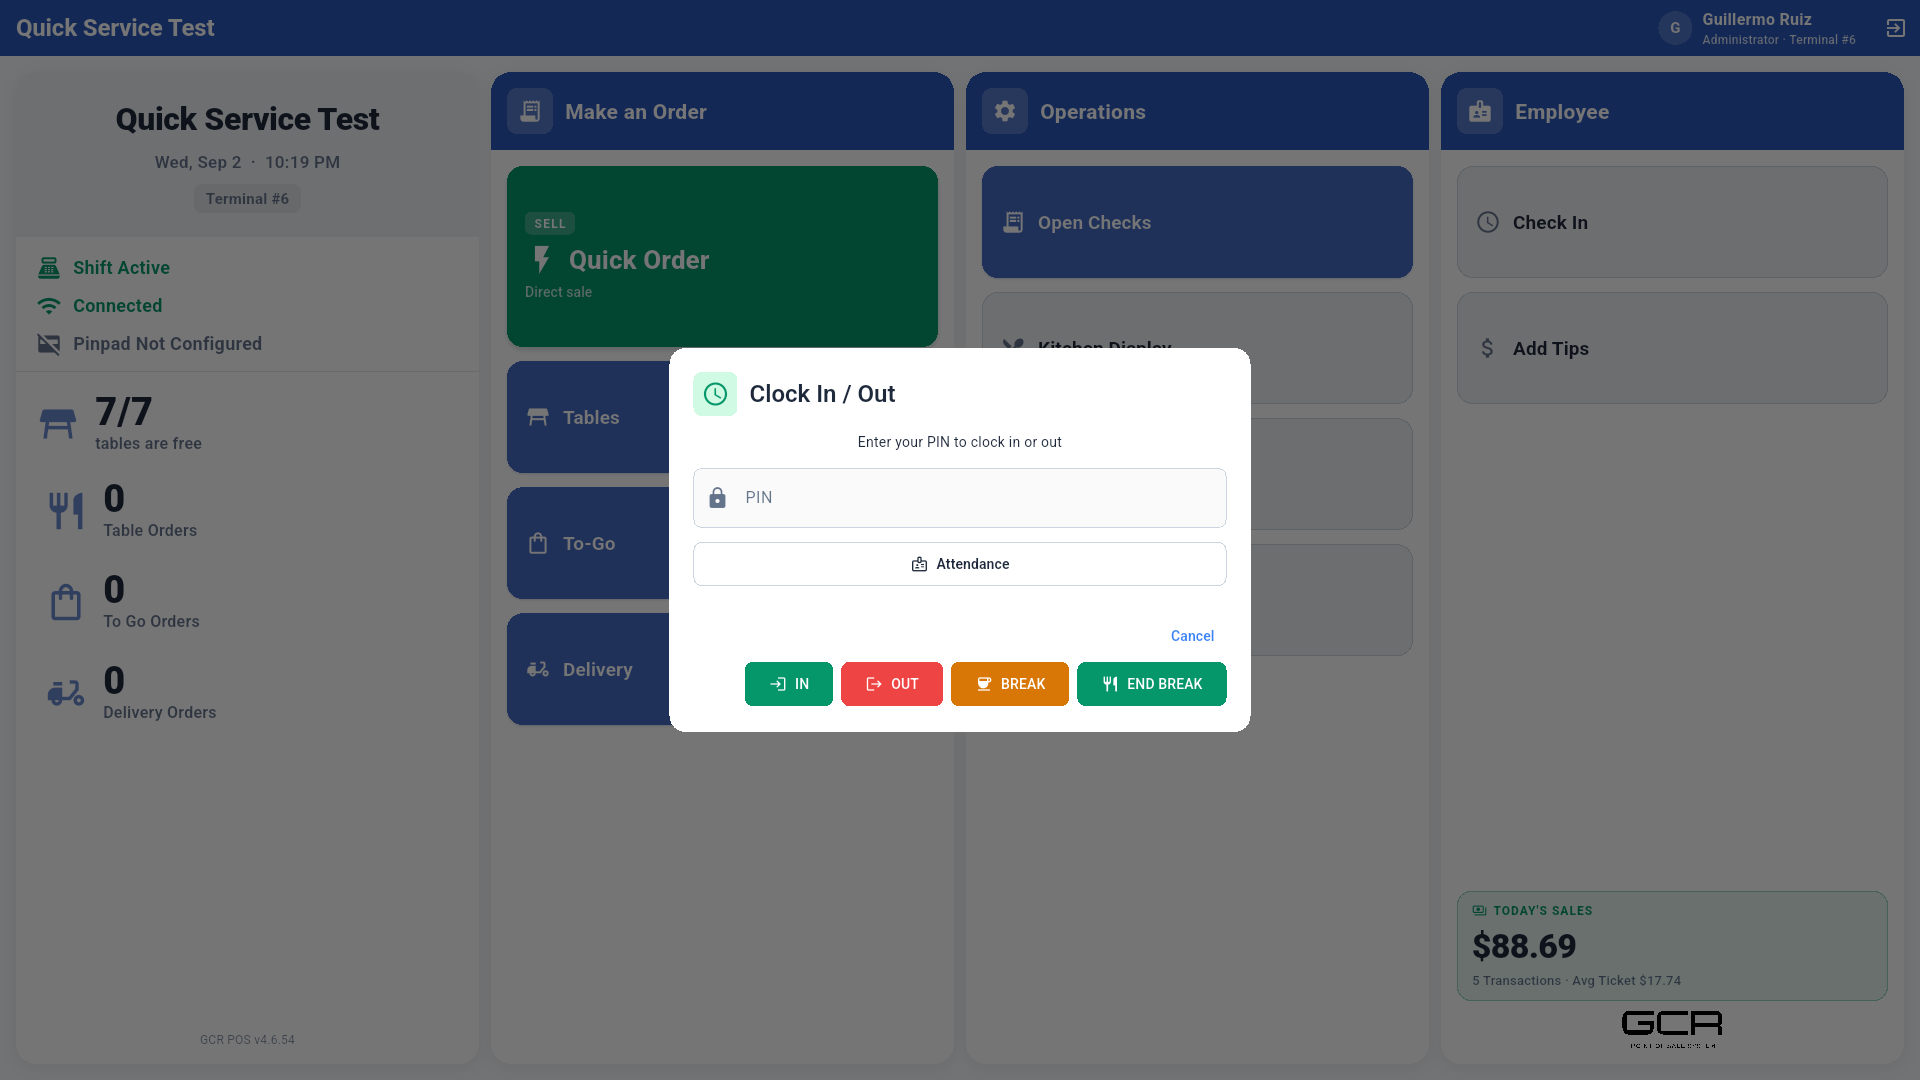
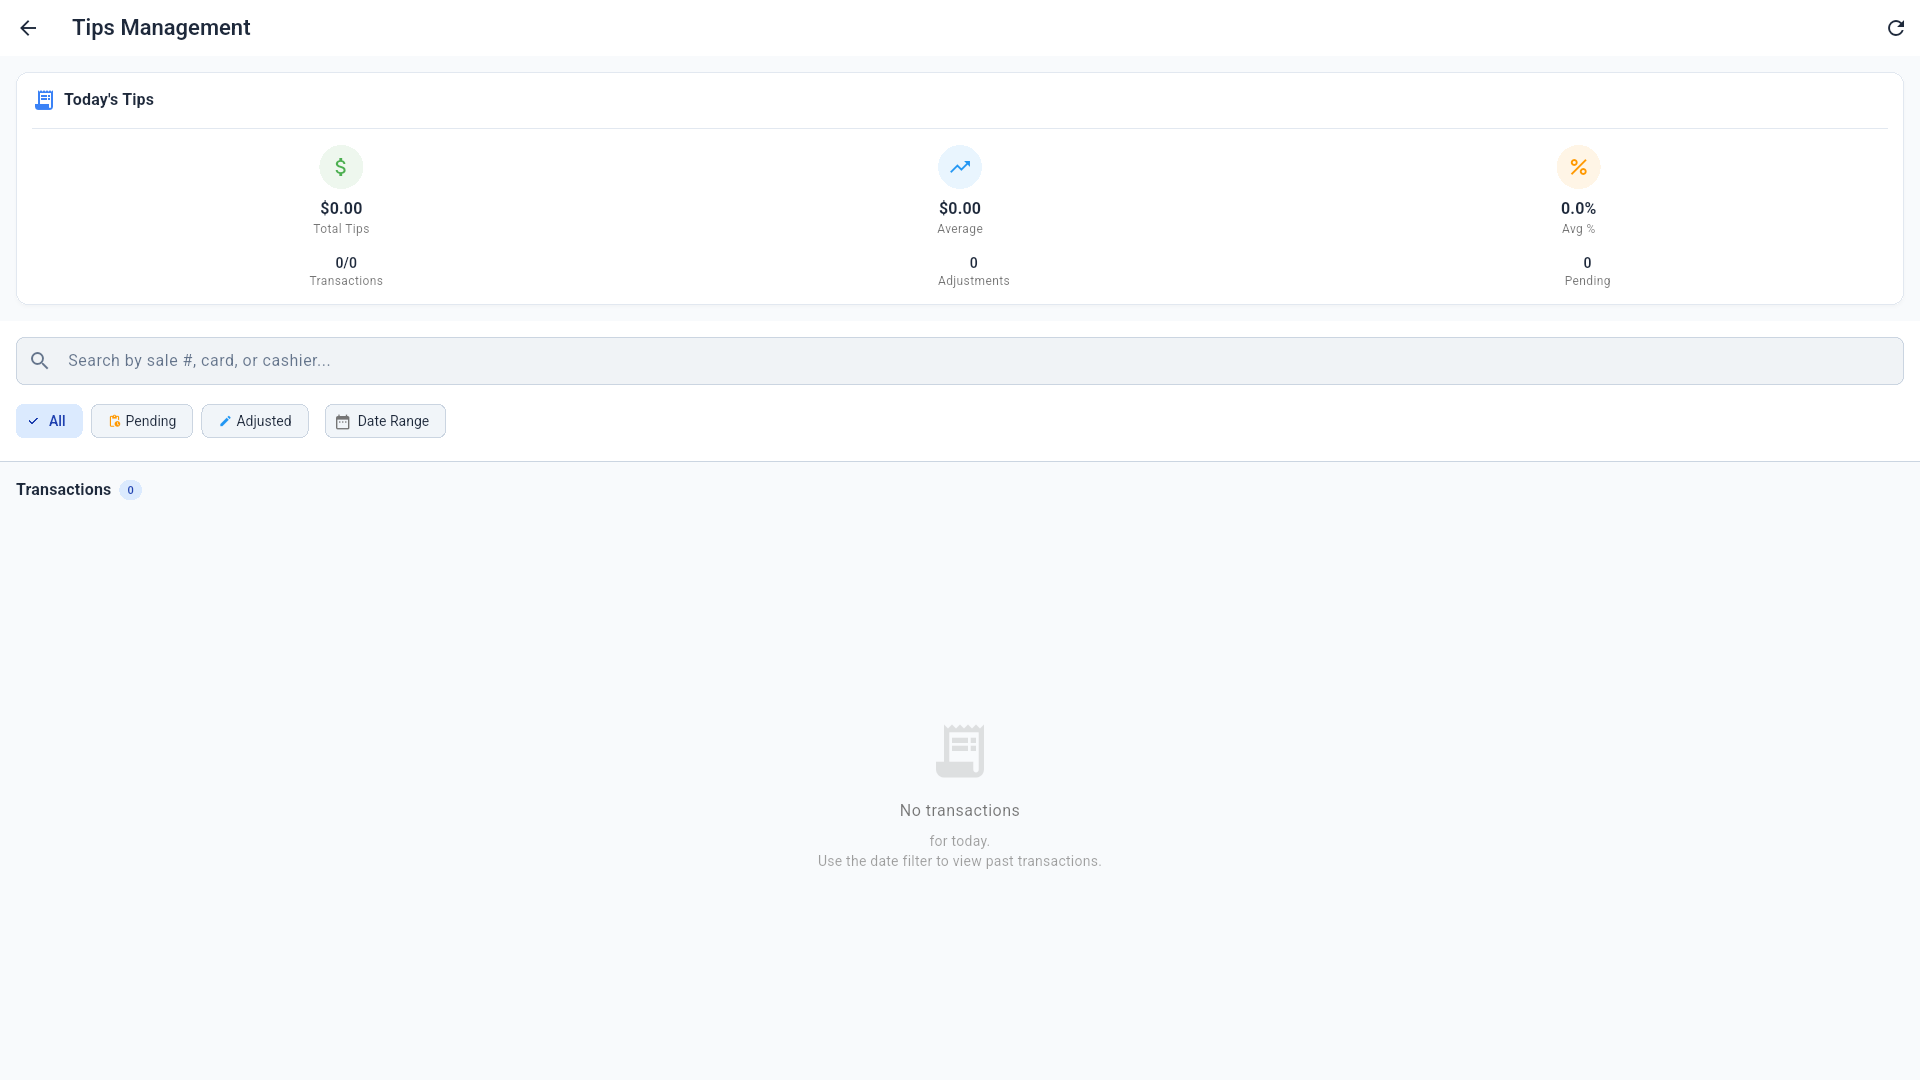
Check In opens the quick time clock (IN / OUT / BREAK / END BREAK). Add Tips opens pending tip adjustments.
10. Online orders and integrated delivery
The POS receives orders from two external channels, through the same pipeline and with the same operation:
| Channel | Prefix | How the customer pays |
|---|---|---|
| Own online store (Storefront) — shop.gcrpos.com/your-store | OL- "Online Order" | Prepaid by card online, or "pay at pickup" (pays at the counter) |
| Uber Eats (direct integration) | UE- | Always prepaid by the platform |
| DoorDash / Grubhub | DD- / GH- | Coming soon (shown as "Coming soon" in the portal) |
10.1 How the POS alerts you when an order arrives
- A pulsing red badge with the pending-order count appears (on every screen) and a chime repeats every 30 seconds while orders sit unattended.
- If nobody accepts within 3 minutes, the POS escalates to an on-screen popup (platform orders have a deadline — if it expires, the platform cancels the order).
- In production we recommend enabling auto-accept in the portal (Settings → Delivery Integrations / Storefront → Ordering): orders accept and print to the kitchen by themselves, and staff only handle exceptions.
10.2 Where they are managed
Tap the badge or open Open Checks: the "Incoming Platform Orders" section on top lists each incoming order with its countdown and Accept / Reject buttons. Cards show the channel banner (Uber Eats / Online Order) and a PREPAID chip when already paid.
On accept:
- The order becomes a sale (with its
UE-/OL-prefix), the kitchen ticket prints automatically (routed per product to its station) and the order appears on the Kitchen Display. - Uber Eats: the sale is prepaid with the platform tender — nothing is charged at the register.
- Storefront prepaid: same — already paid online.
- Storefront "pay at pickup": the sale stays open in Open Checks and is charged at the counter when the customer arrives (any normal tender).
On reject: the customer/platform receives the cancellation (pick the reason — item unavailable, store closed, too busy…).
10.3 Ready and handoff
- On the Kitchen Display, mark the order Ready: Uber is notified the order is ready for the courier; a Storefront customer gets a "ready for pickup" email with their pickup code.
- The Deliver / Picked Up button closes the handoff and prints the delivery slip (packing list + delivery details, plus the driver if the store uses Ask who is delivering — see §6.3). Note: Uber courier orders carry no customer address or phone (platform privacy — the courier has those); own-courier delivery orders from the Storefront do print address, phone and instructions.
10.4 Cancellations and a closed POS
- If the platform cancels an already-accepted order, the POS voids the prepaid sale automatically, marks the kitchen order cancelled and shows a red alert — nothing manual to do.
- If the POS is closed or offline for more than a few minutes, the cloud pauses the store on the marketplace (customers can't order) and auto-rejects orders about to expire. When the POS opens again, the store resumes by itself within a minute.
10.5 Reports
- The X/Z Report includes a "Delivery Platforms" section: prepaid sales per platform, plus the split between tax remitted by the platform (marketplace) and the store's own tax liability — the expected drawer cash never includes these prepaids.
- The Merchant Portal → Reports has the "Delivery Platforms Report" with per-transaction detail and CSV export.
10.6 Setup (once, with your technician)
- Portal → Settings → Delivery Integrations: enable the provider, auto-accept, prep time, Connect with Uber Eats (links the store in one click) and Push Menu Now (uploads the catalog menu to Uber with categories, prices and modifiers).
- Portal → Storefront: publish the online store (slug, hours, branding), the Ordering module (auto-accept, prep time, pickup instructions, how customers pay: at the counter or prepaid by card) and own-courier delivery (fee, minimum order, area note). Every product/category has its own "Visible Online" toggle.
Uber Eats status: the integration is certified with Uber and in pilot; it is enabled store by store with the GCR team.
11. Leaving the session
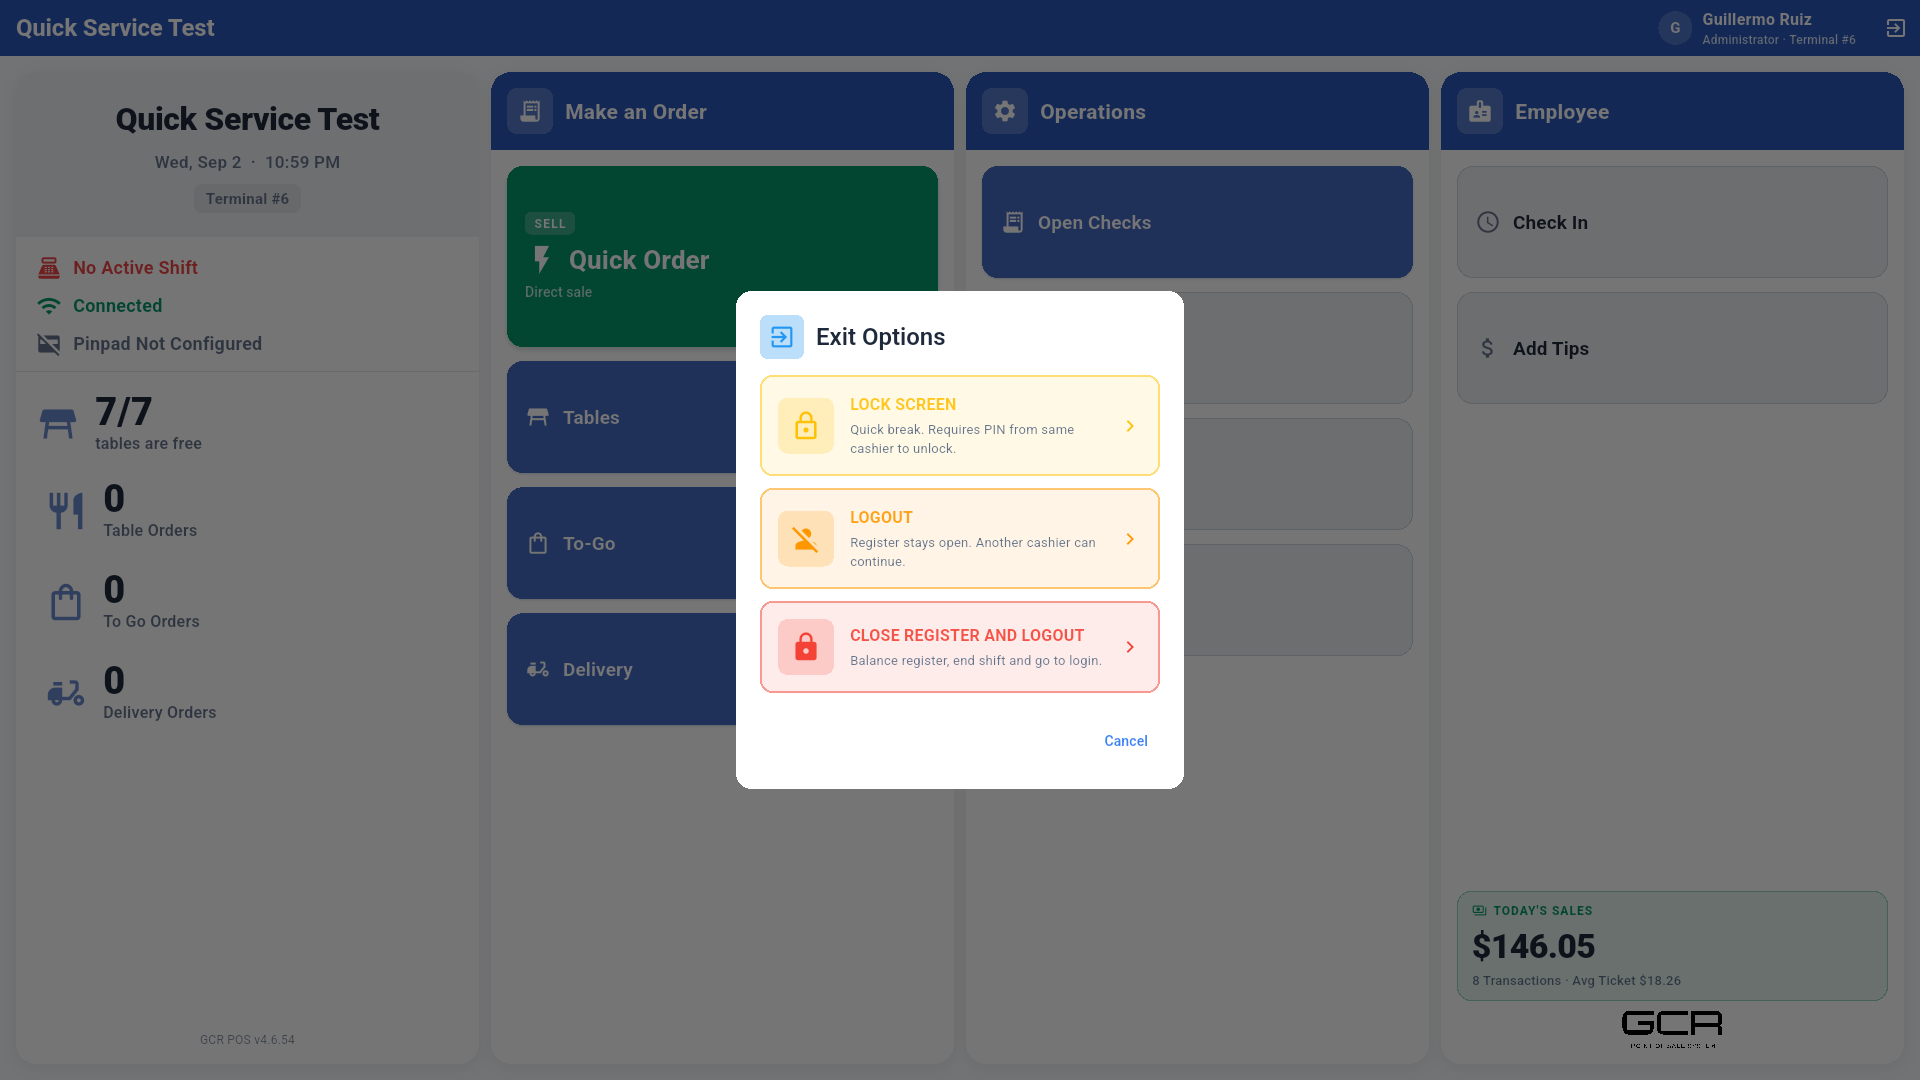
The exit button (top right) offers:
- Lock Screen — quick break; only the same cashier can unlock.
- Logout — signs out but keeps the register open (another cashier can continue).
- Close Register and Logout — balances the register (Z) and signs out.