GCR POS — Back Office & Settings
Guide to the administrative side of the POS. It applies to every mode (Supermarket, Retail, Quick Service, Full Restaurant, Services): the screens are identical; only the way you reach them from the home screen changes.
General rule: business configuration (taxes, payment methods, catalog, employees, permissions) is managed in the cloud Merchant Portal and synced down to the POS automatically. Local changes to portal-managed settings are overwritten on the next sync.
1. Back Office (admin hub)
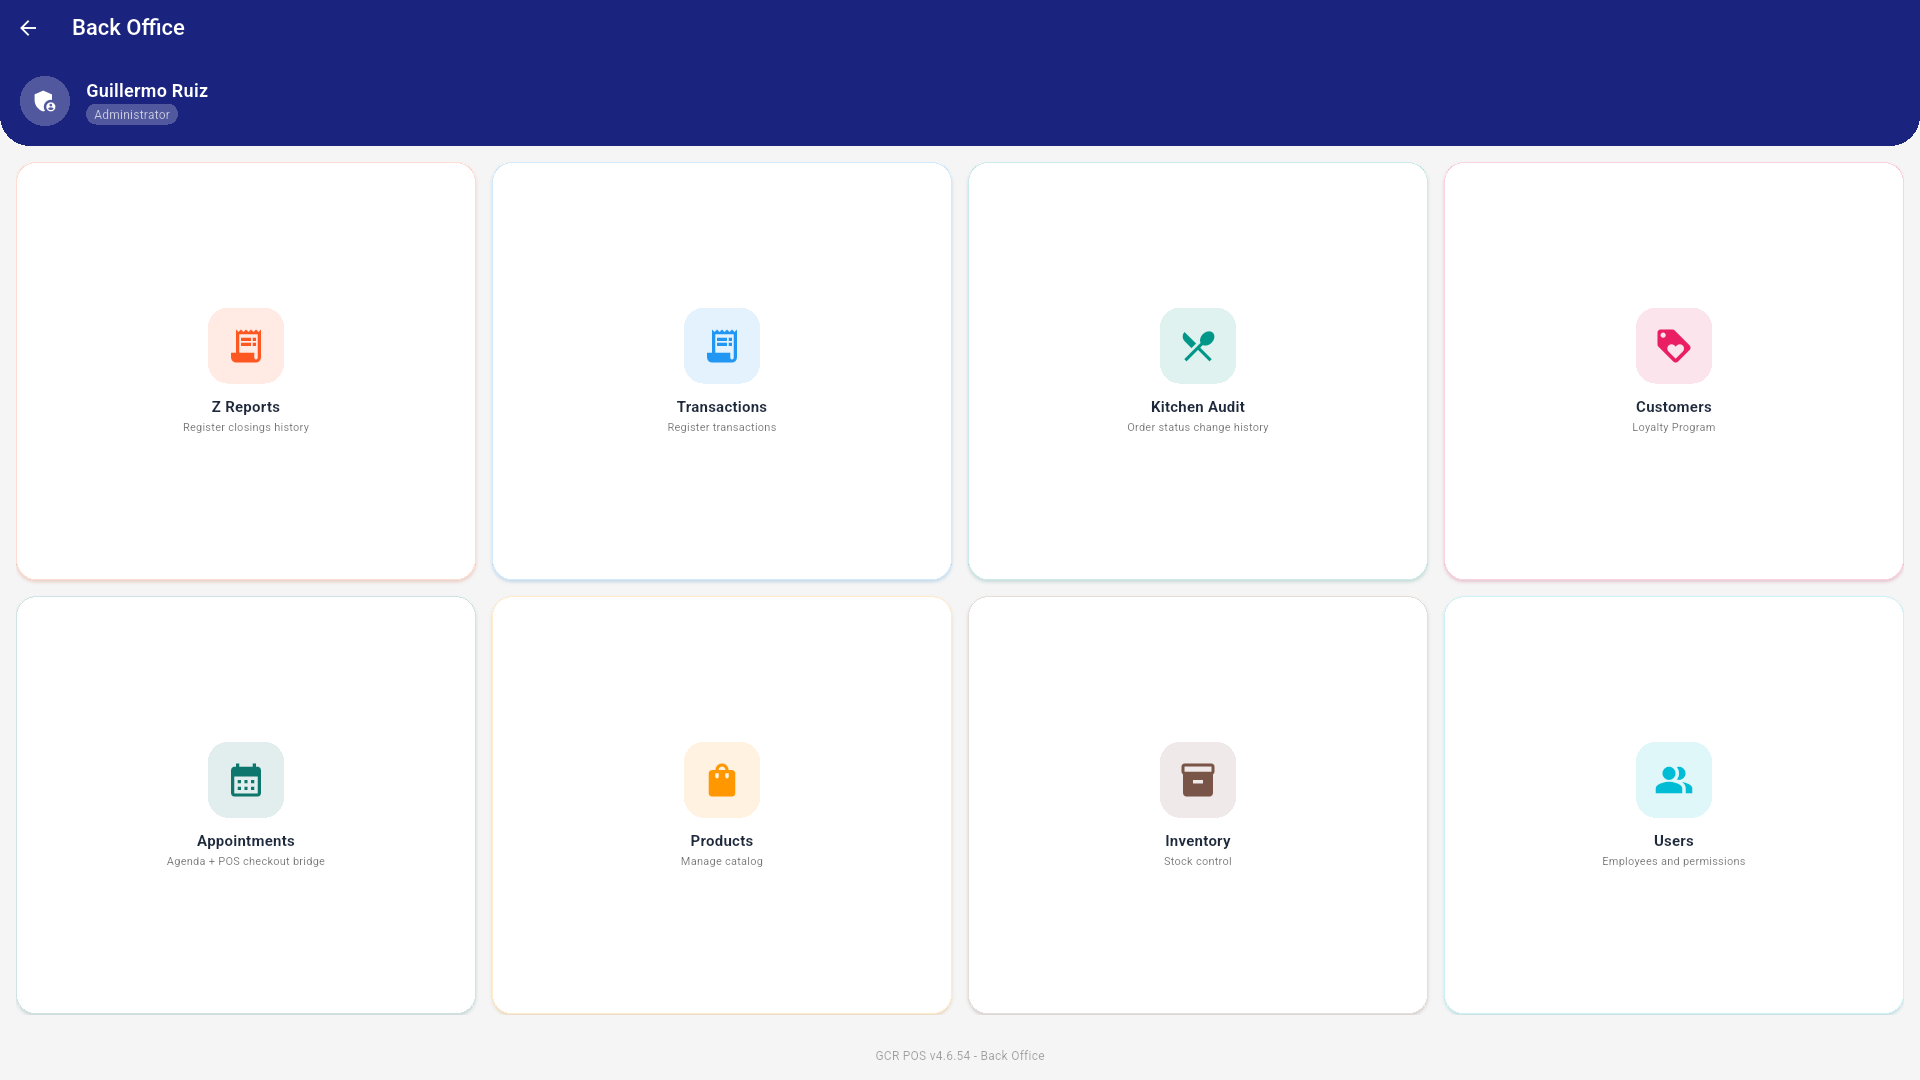
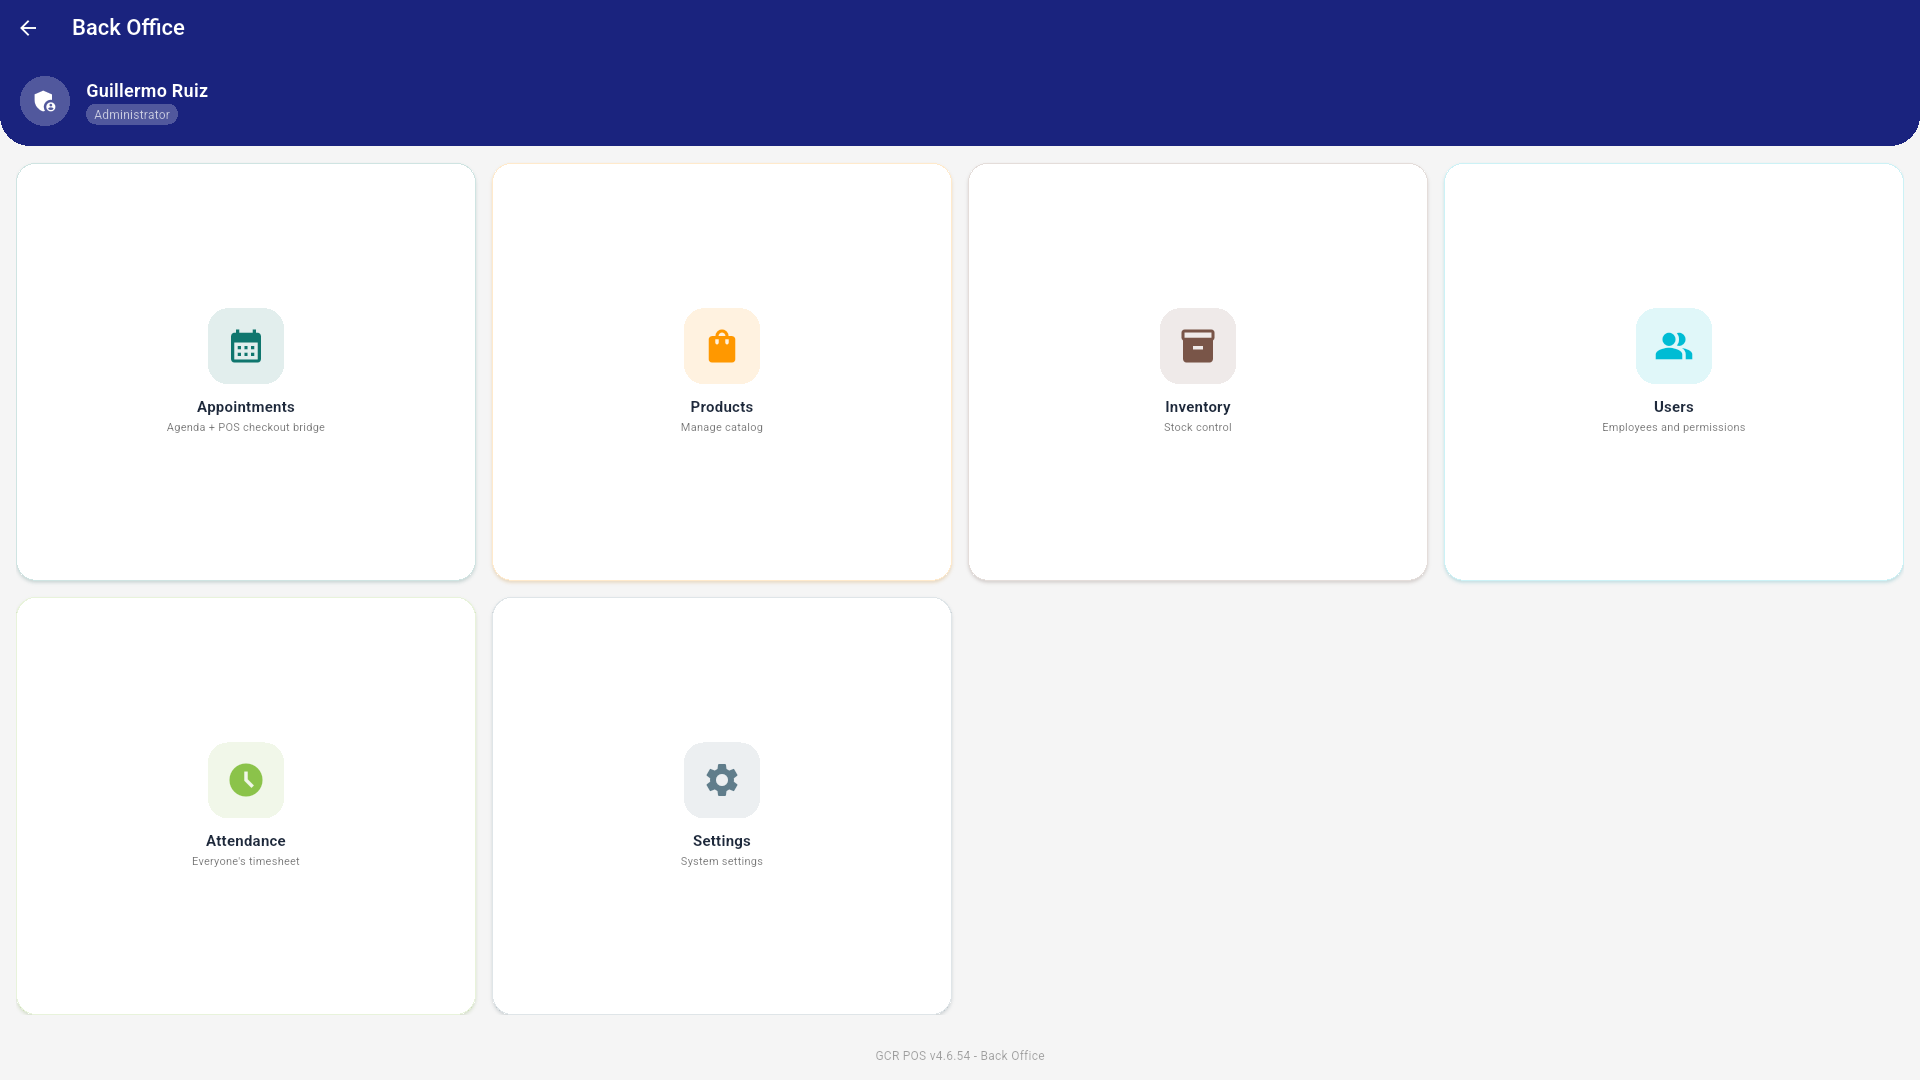
Available modules (depending on role permissions):
| Module | Purpose |
|---|---|
| Z Reports | Register closing history. |
| Transactions | Sales history for the day/range. |
| Kitchen Audit | Kitchen order status-change log. |
| Customers | Customers and loyalty program. |
| Invoices | Open invoices, payments & receipts (see below). |
| Appointments | Appointment agenda (service stores). |
| Products | Catalog: products, categories, brands. |
| Inventory | Stock control. |
| Users | Employees, roles, permissions, sessions. |
| Attendance | Everyone's timesheet. |
| Settings | Store and terminal configuration. |
Invoices only appears when the store has the Invoicing add-on enabled (turned on per store from the GCR admin panel) and the user's role can view customers. It is the invoicing desk on the terminal: open invoices, receive payments, add products to an invoice and reprint the payment receipt. The whole flow is in the B2B Invoicing (On Account) & Accounts Receivable manual.
2. Reports and sales
2.1 Transactions
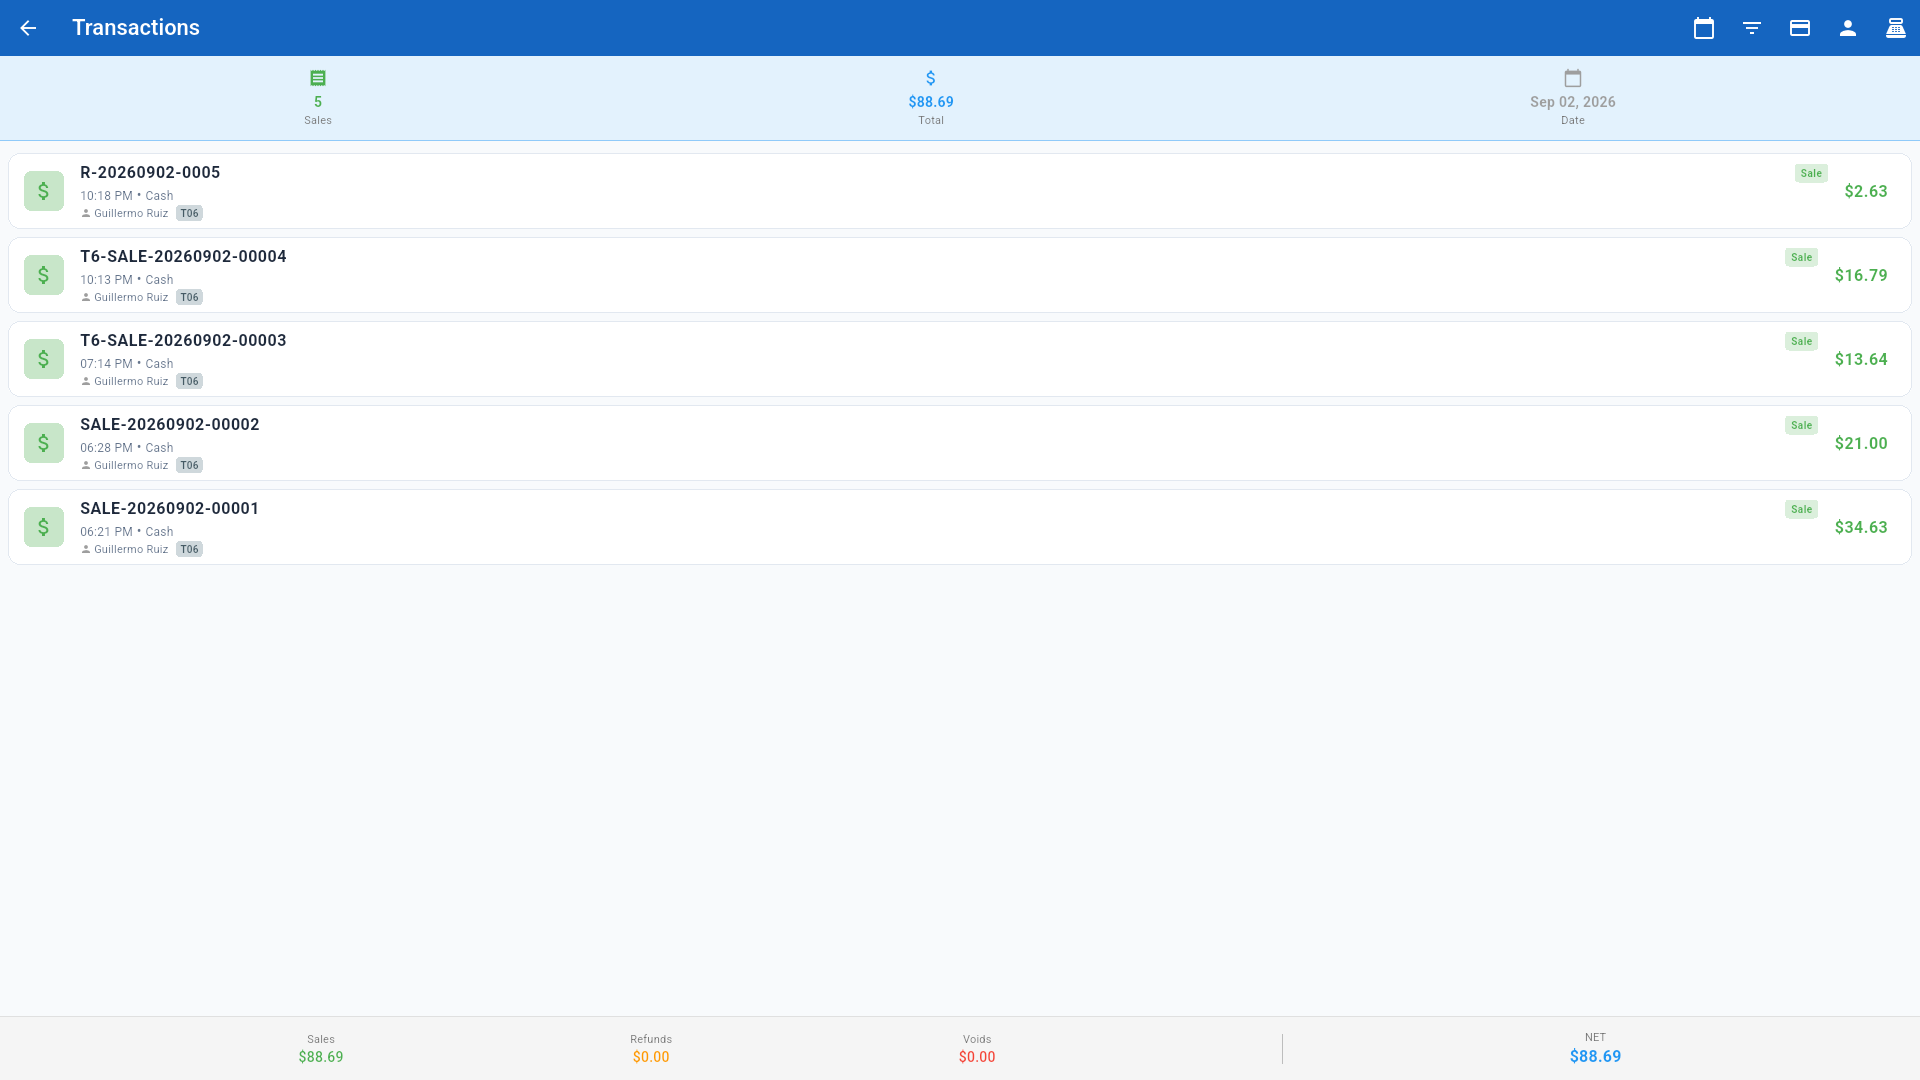
- Day summary at the top: number of sales, total, date (with filters).
- Each row: sale number, time, tender, cashier and terminal.
- The footer totals Sales, Refunds, Voids and NET.
- Tap a sale to see its detail, reprint it, or start a refund (permission based).
Sale detail — the ITEMS section. The detail opens with what the sale sold, without going to the portal: quantity, name, unit price (when the quantity is not 1 or the product is weighed), barcode, modifiers, kitchen note, line discount and per-product fee. Returned or voided lines carry their REFUNDED / VOIDED chip; voids list ITEMS VOIDED and refunds ITEMS REFUNDED (a partial refund shows exactly what came back).
Dual pricing: when the sale was settled on the cash side, the lines show the cash price and add up to the subtotal actually charged. It is not a discount applied twice.
2.2 Z Report History
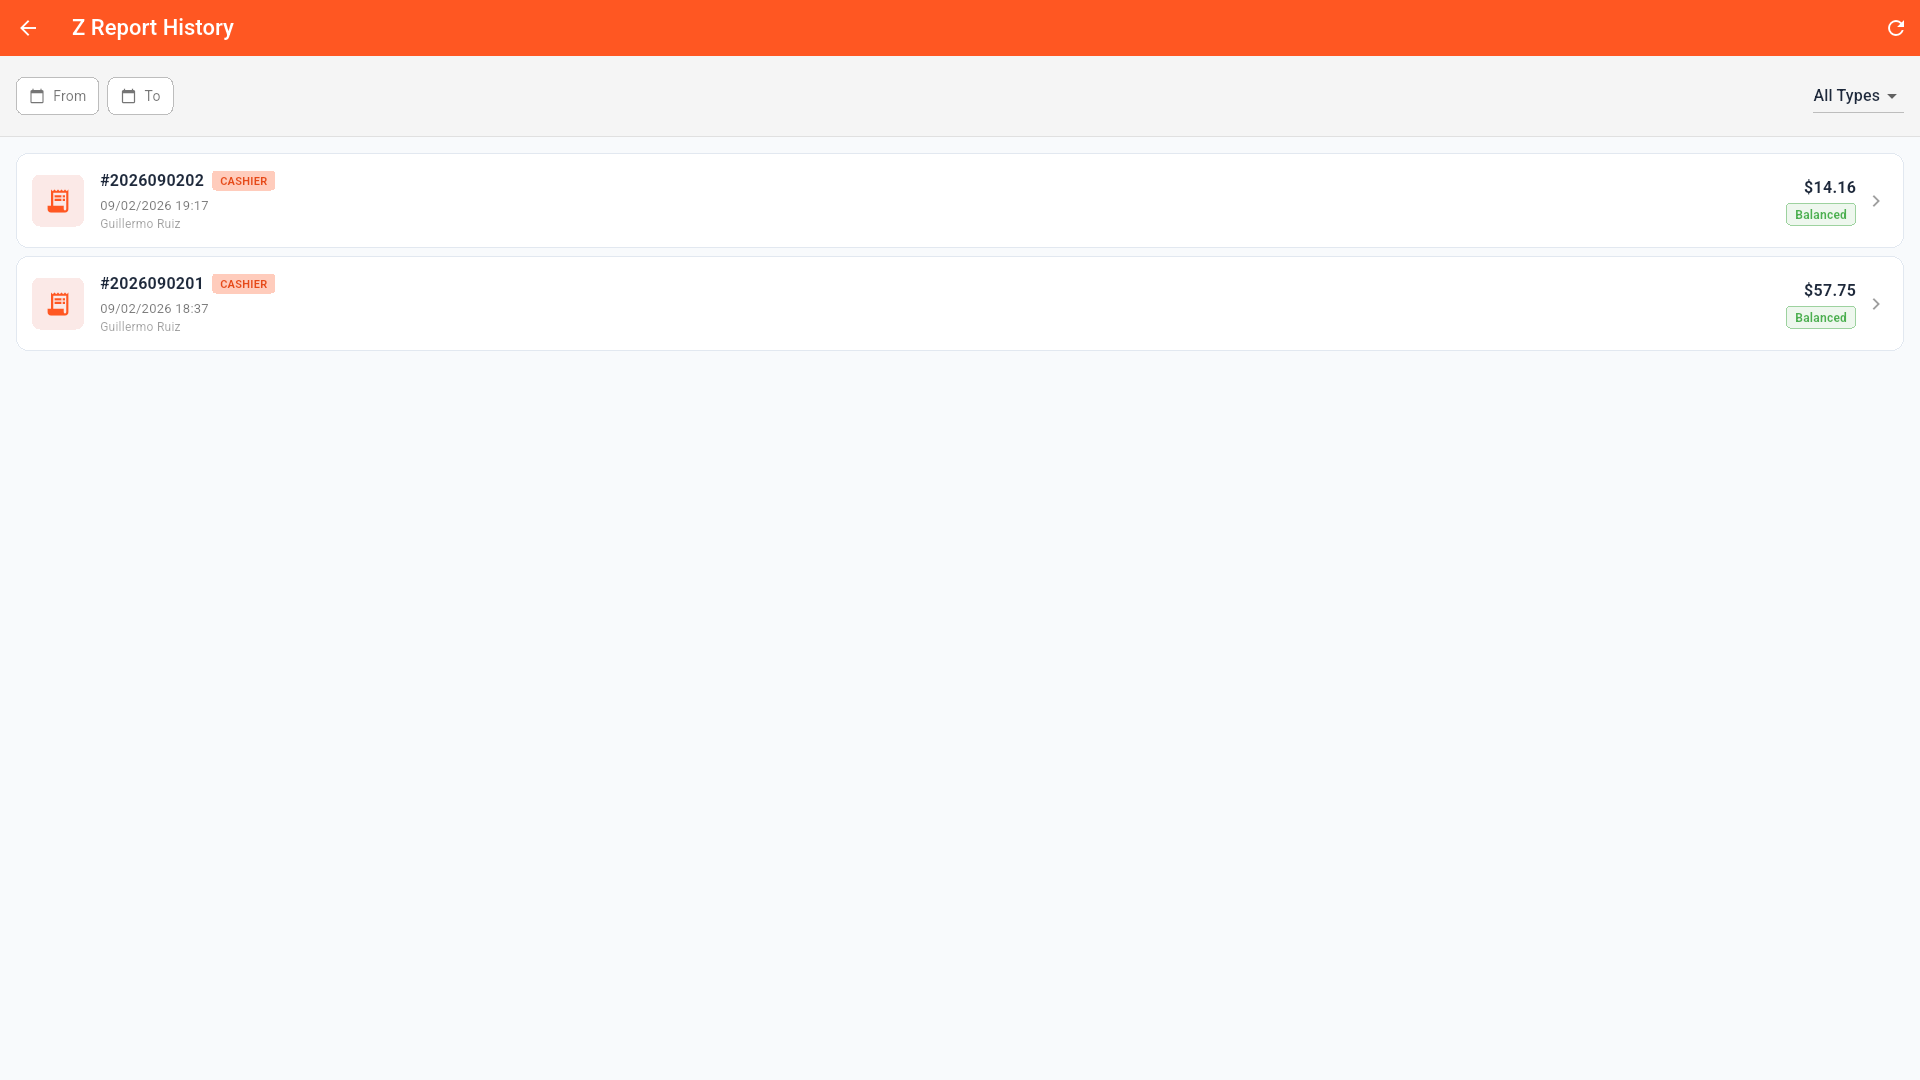
- Each record is a register closing: sequential number, date/time, cashier, amount and status (Balanced when the count matched).
- Filter by date range and type.
2.3 Kitchen Audit
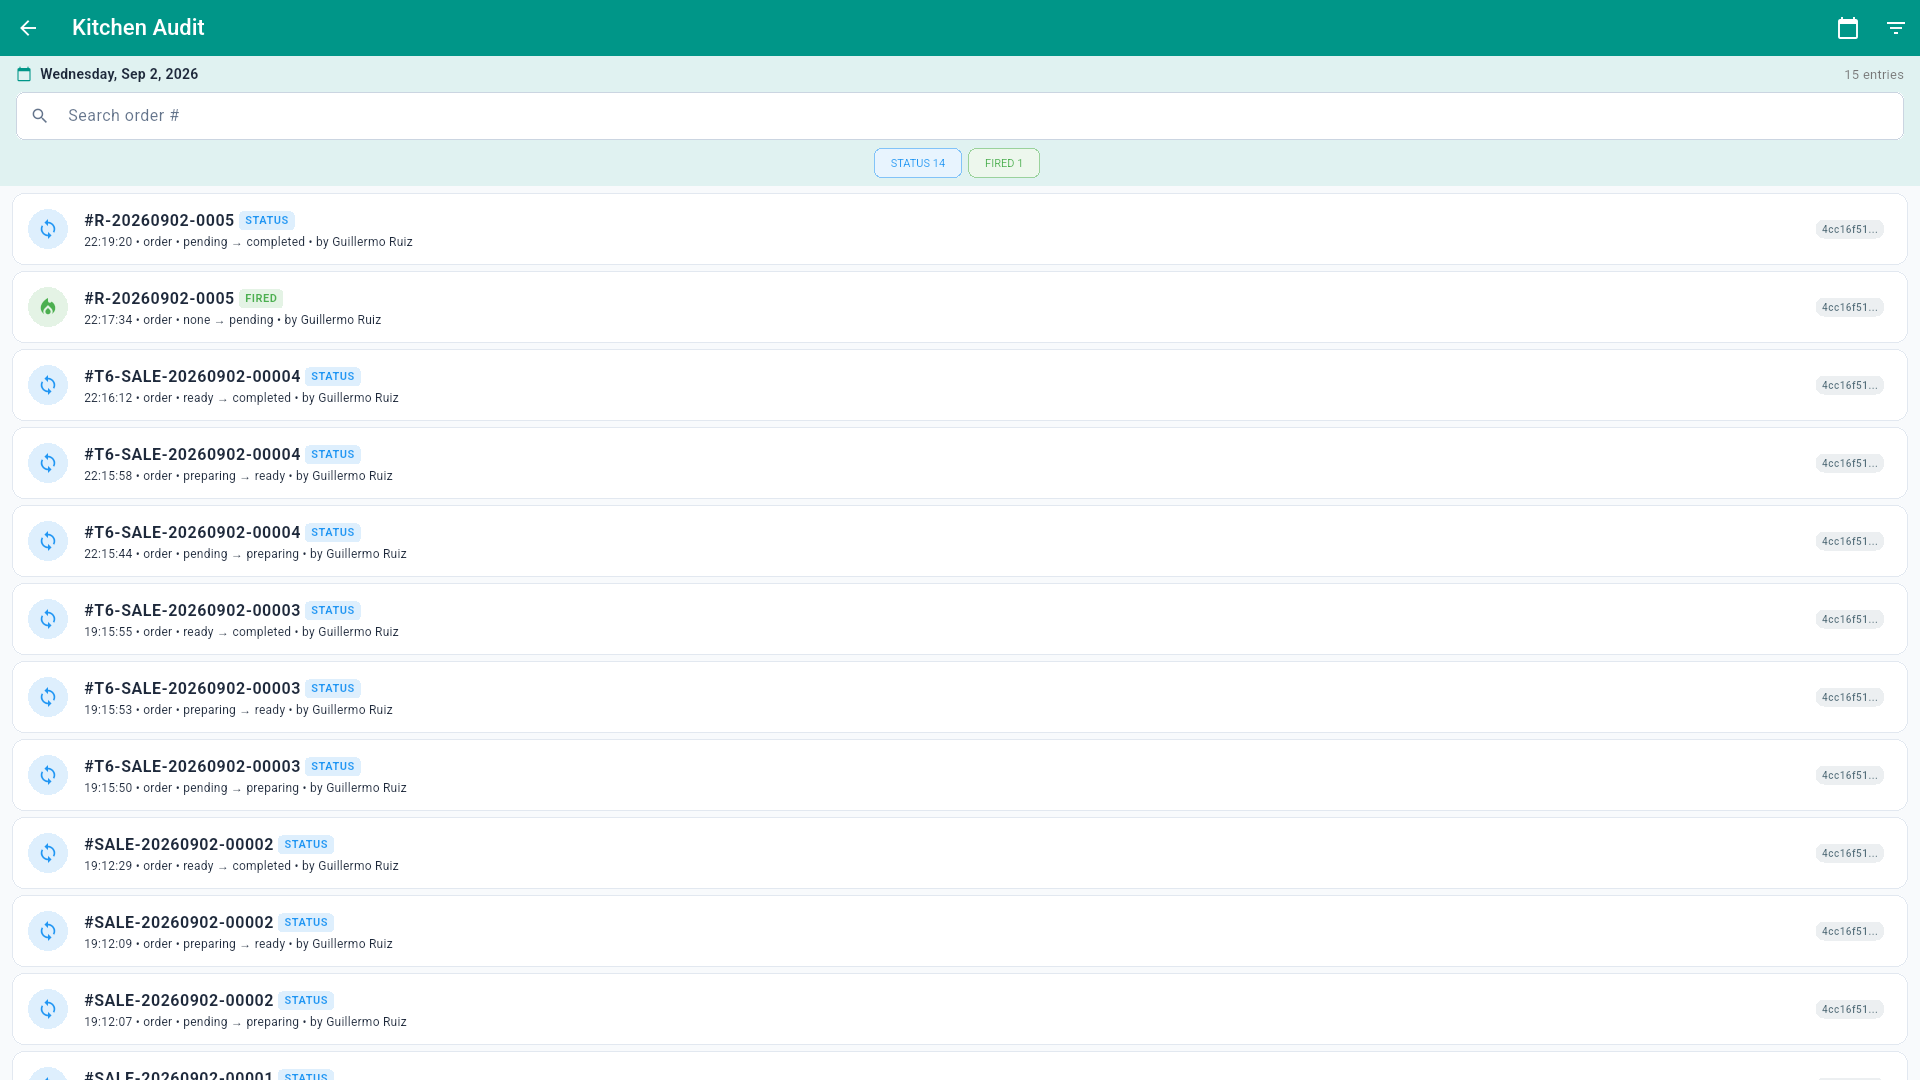
An immutable kitchen log: every order status change (pending → preparing → ready → completed) with who did it and when, plus FIRED events (sent to kitchen). Useful to answer "who marked this order ready?".
3. Catalog and inventory
3.1 Products
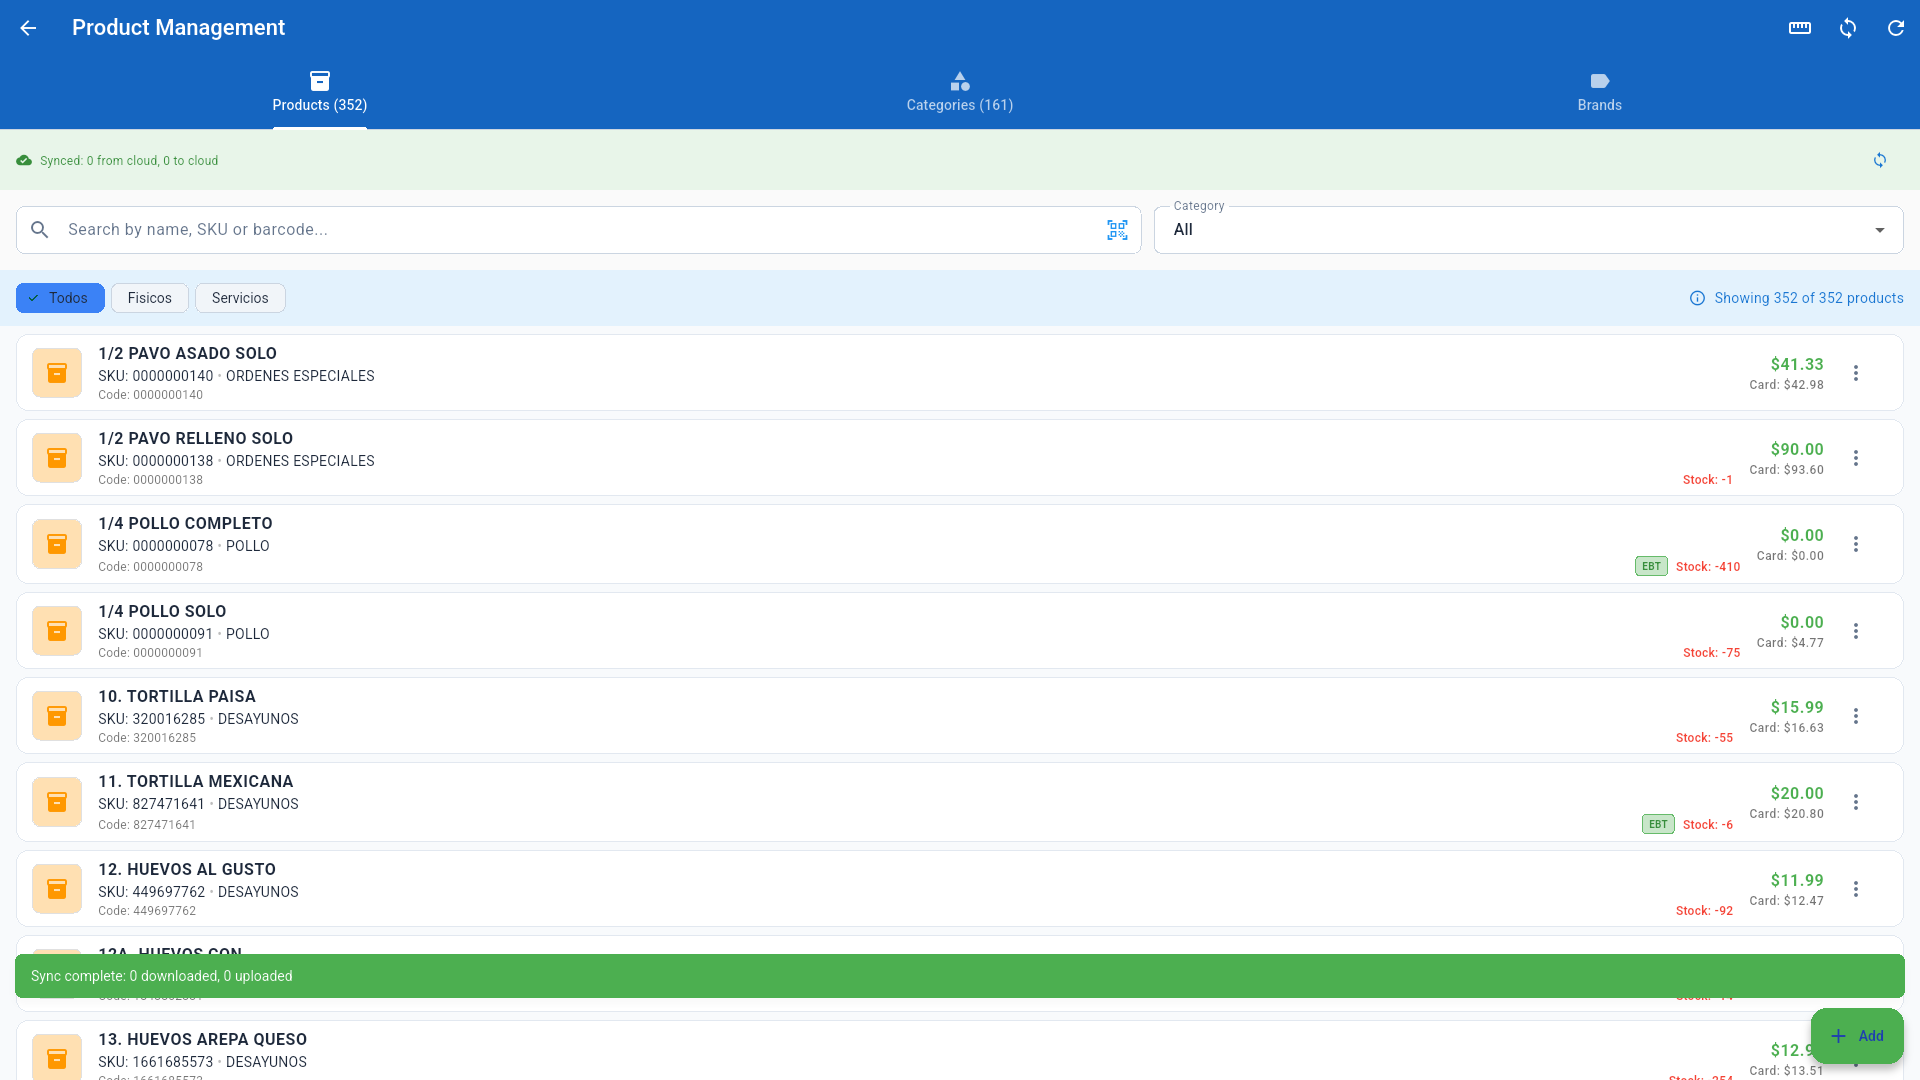
- Products / Categories / Brands tabs.
- Search by name, SKU or barcode; filter by category or type (physical/services).
- Each row shows cash/card price, stock, and the EBT flag when applicable.
- Add creates new products (when the catalog is not portal-only). The green bar reports cloud sync activity.
3.2 Inventory
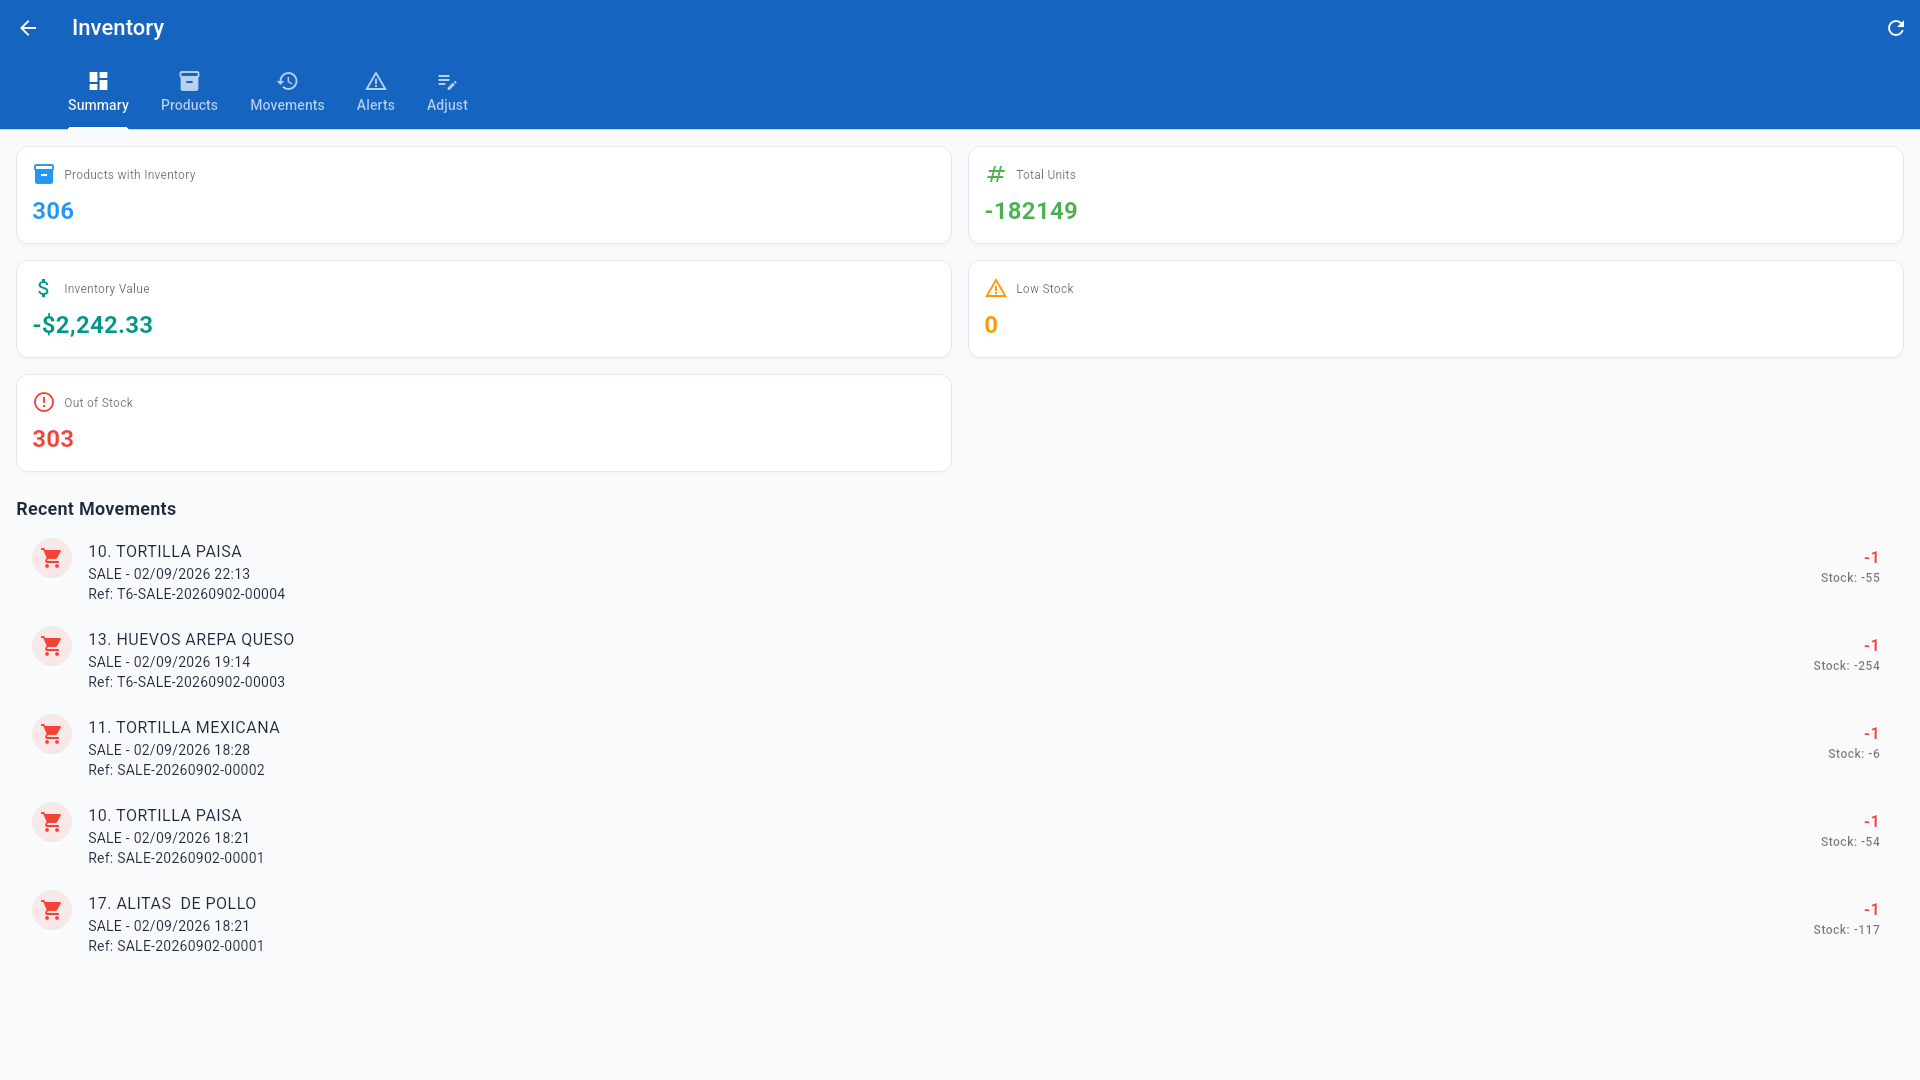
- Summary: products with inventory, total units, inventory value, low stock and out-of-stock counts.
- Products / Movements / Alerts / Adjust: per-product stock, recent movements (each sale decrements stock), alerts, and manual adjustments (receive stock, adjust, physical count).
4. Customers and appointments
4.1 Customers
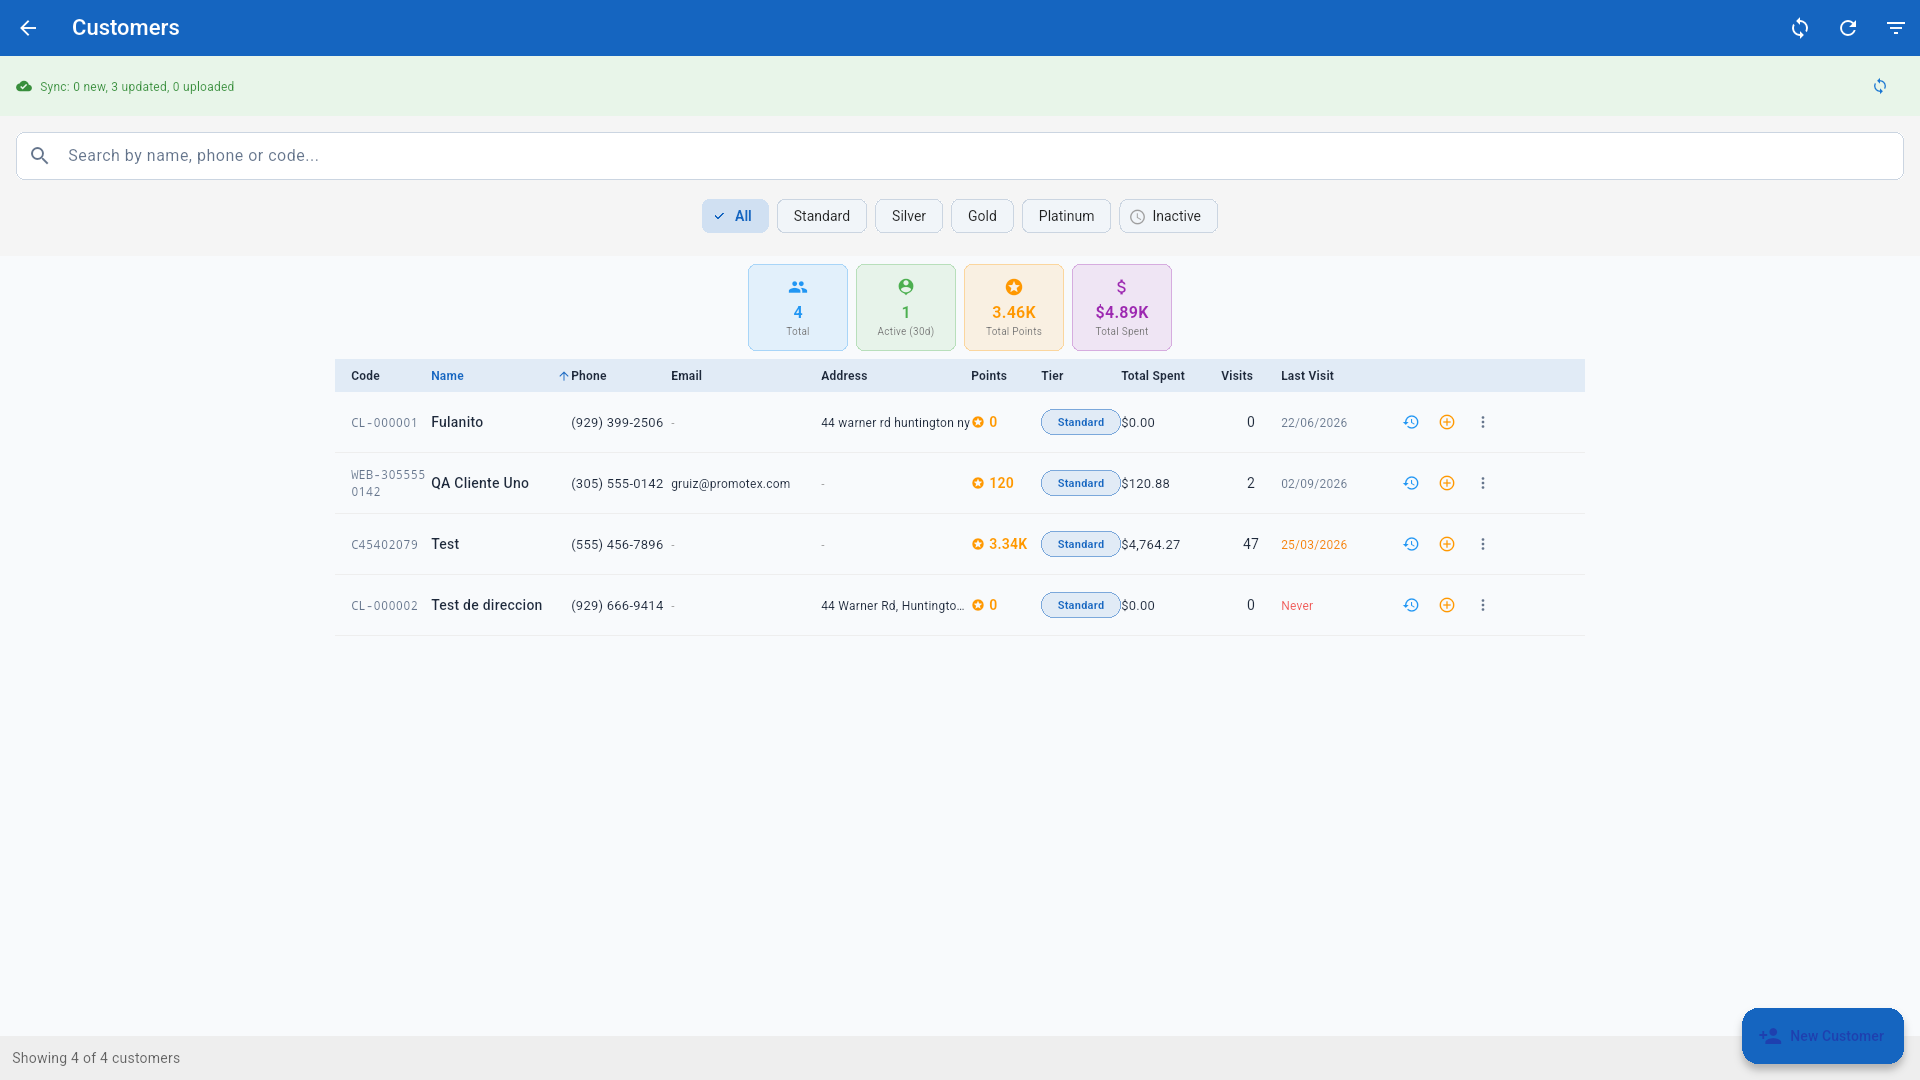
- Search by name, phone or code; filter by tier (Standard, Silver, Gold, Platinum) and status.
- Summary cards: total customers, active in 30 days, total points, total spent.
- New Customer creates a record; the row icons open history and add points.
4.2 Appointments
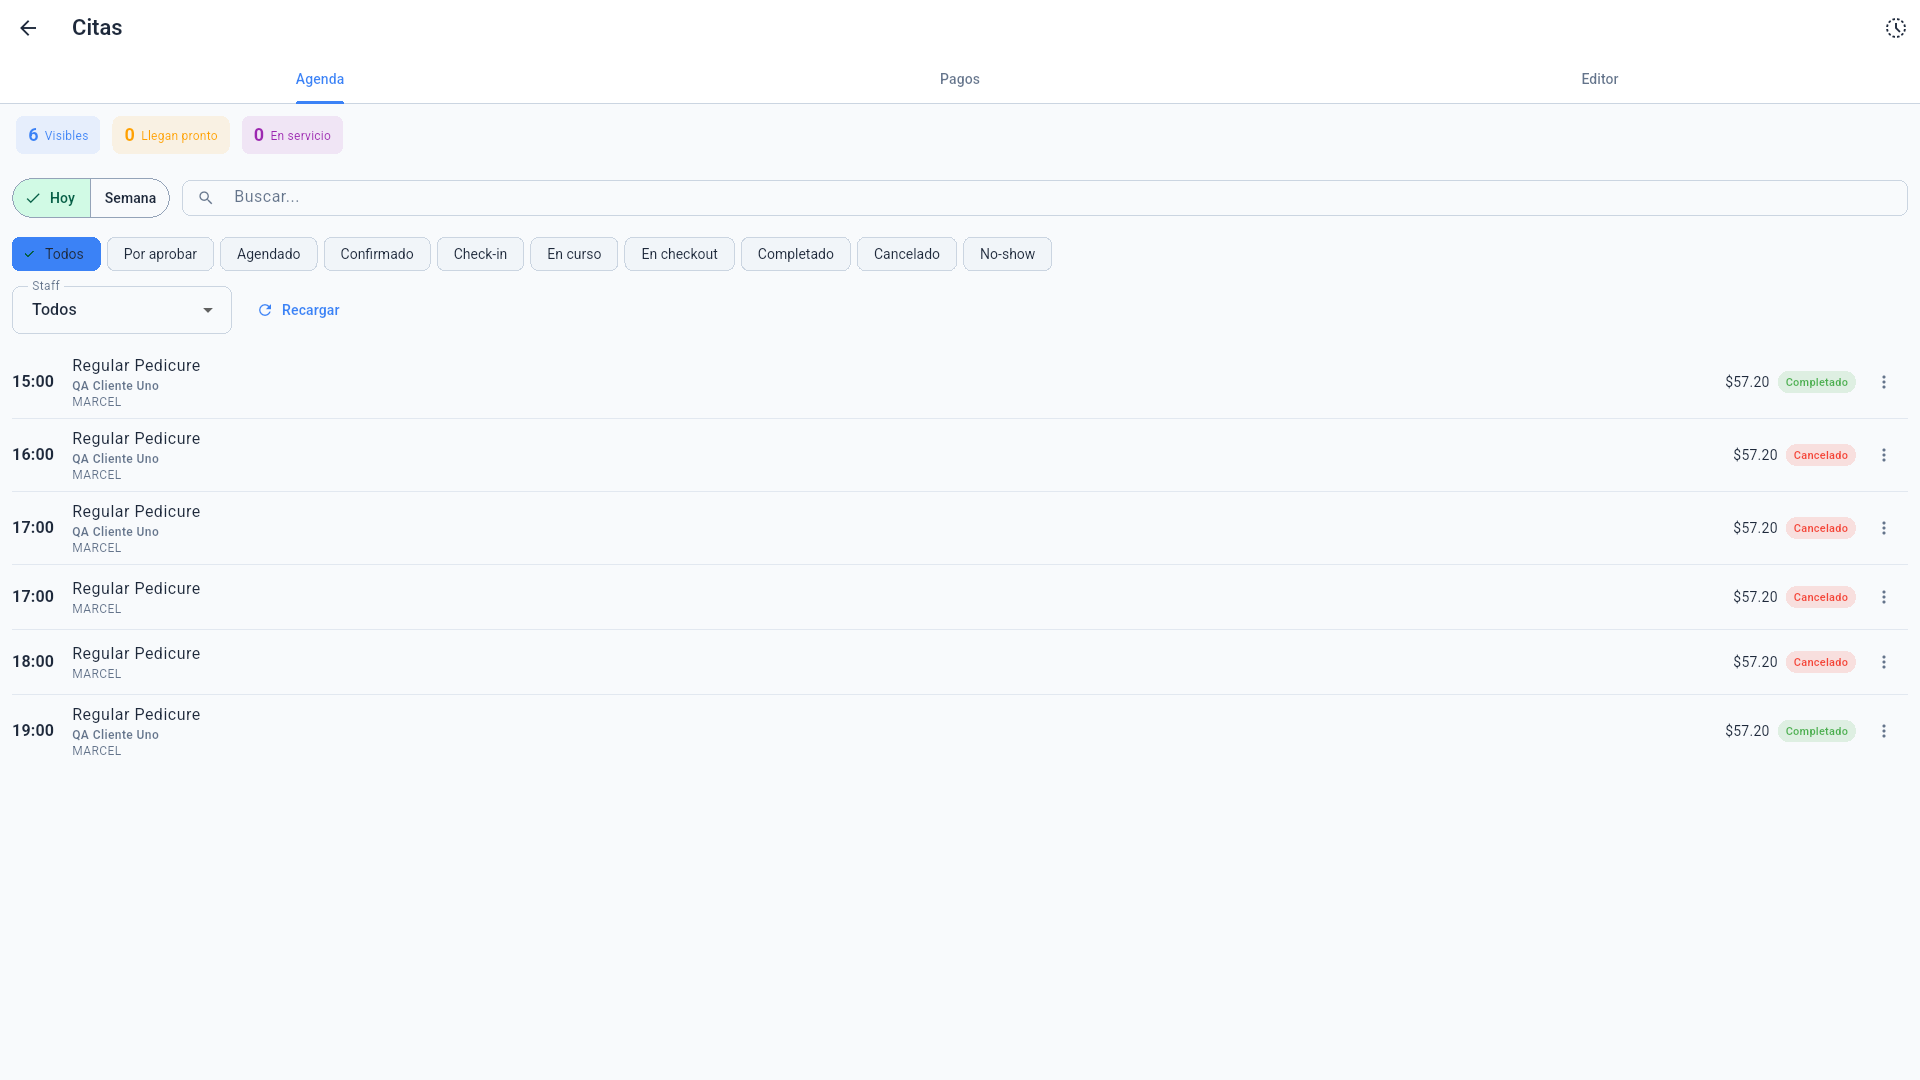
The appointment agenda with status filters (Pending approval, Scheduled, Confirmed, Check-in, In progress, In checkout, Completed, Cancelled, No-show) and a staff filter. In service stores this is the central screen (see the Services mode manual).
5. Staff
5.1 Users (employees, roles, permissions)
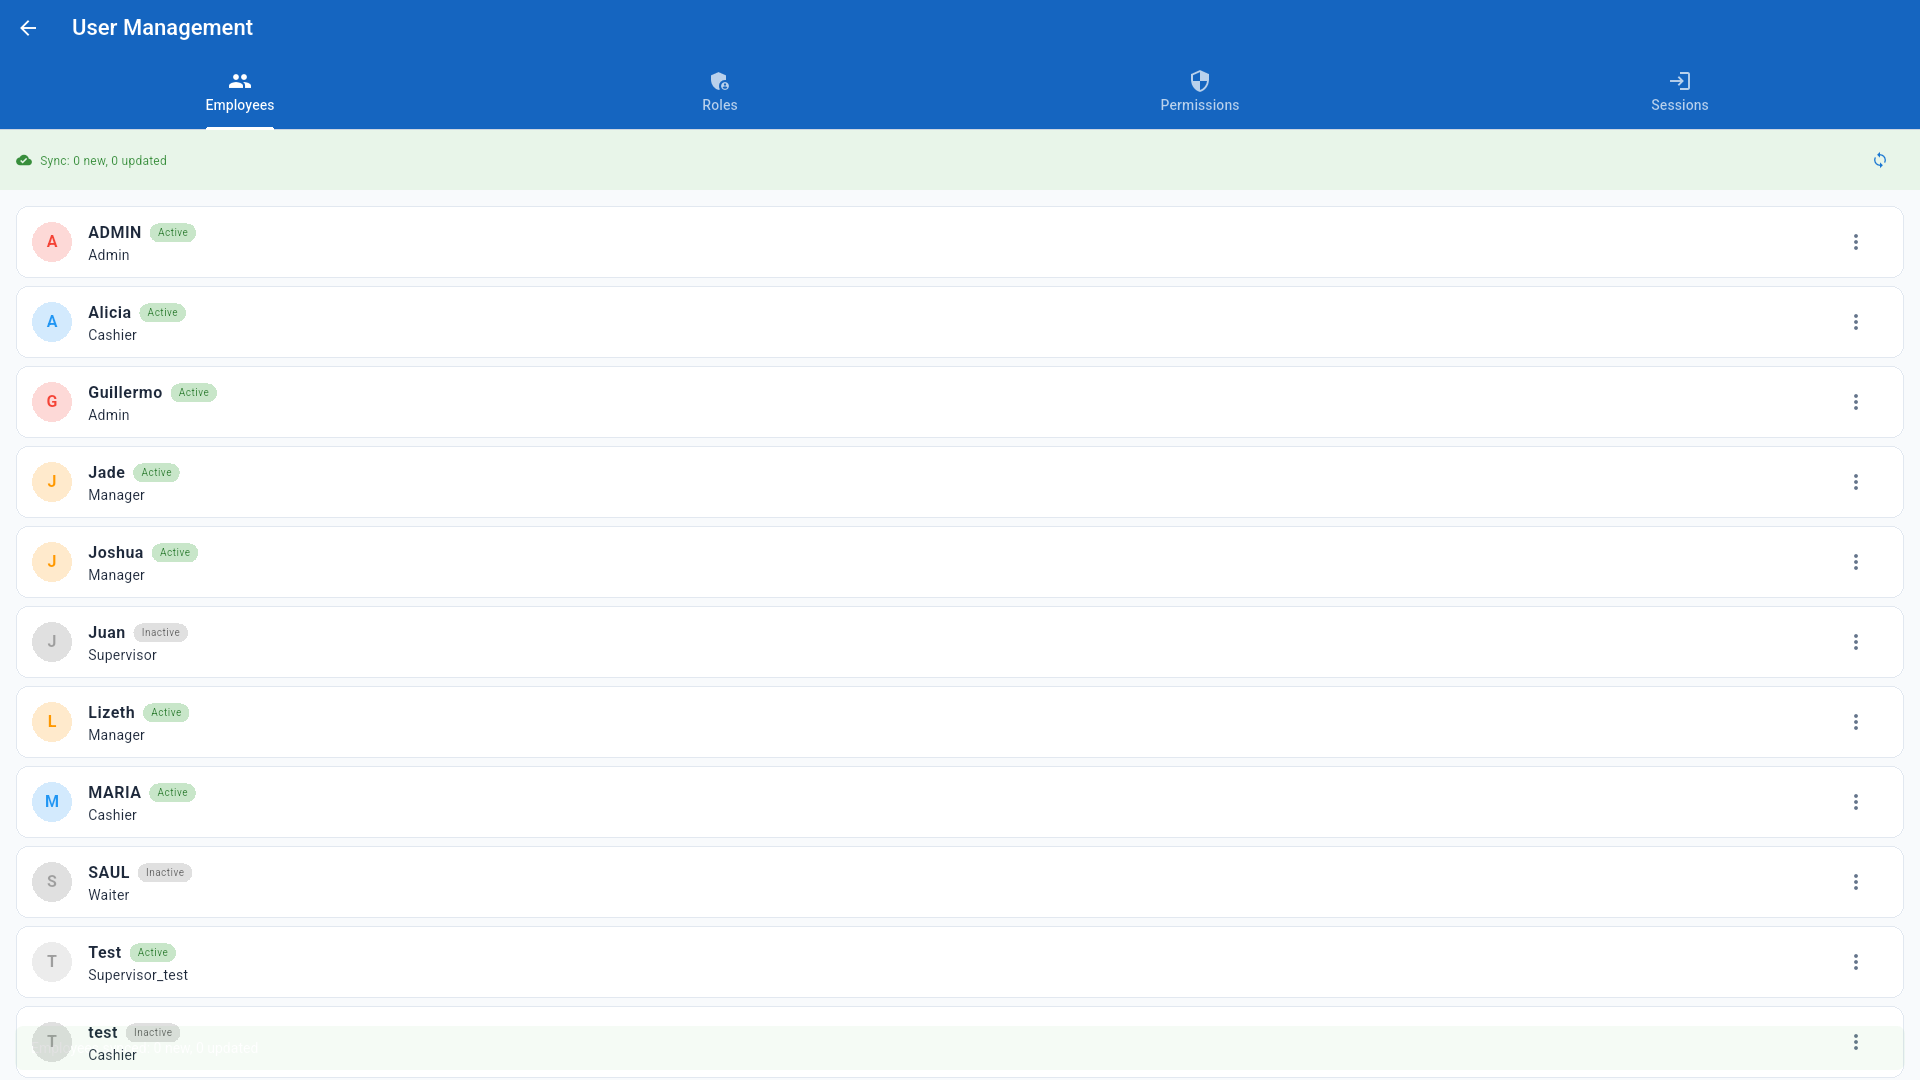
- Employees: user list with role; per-row menu to edit, reset PIN or deactivate.
- Roles / Permissions: what each role can do (managed from the portal and synced down).
- Sessions: active sessions per terminal.
5.2 Attendance
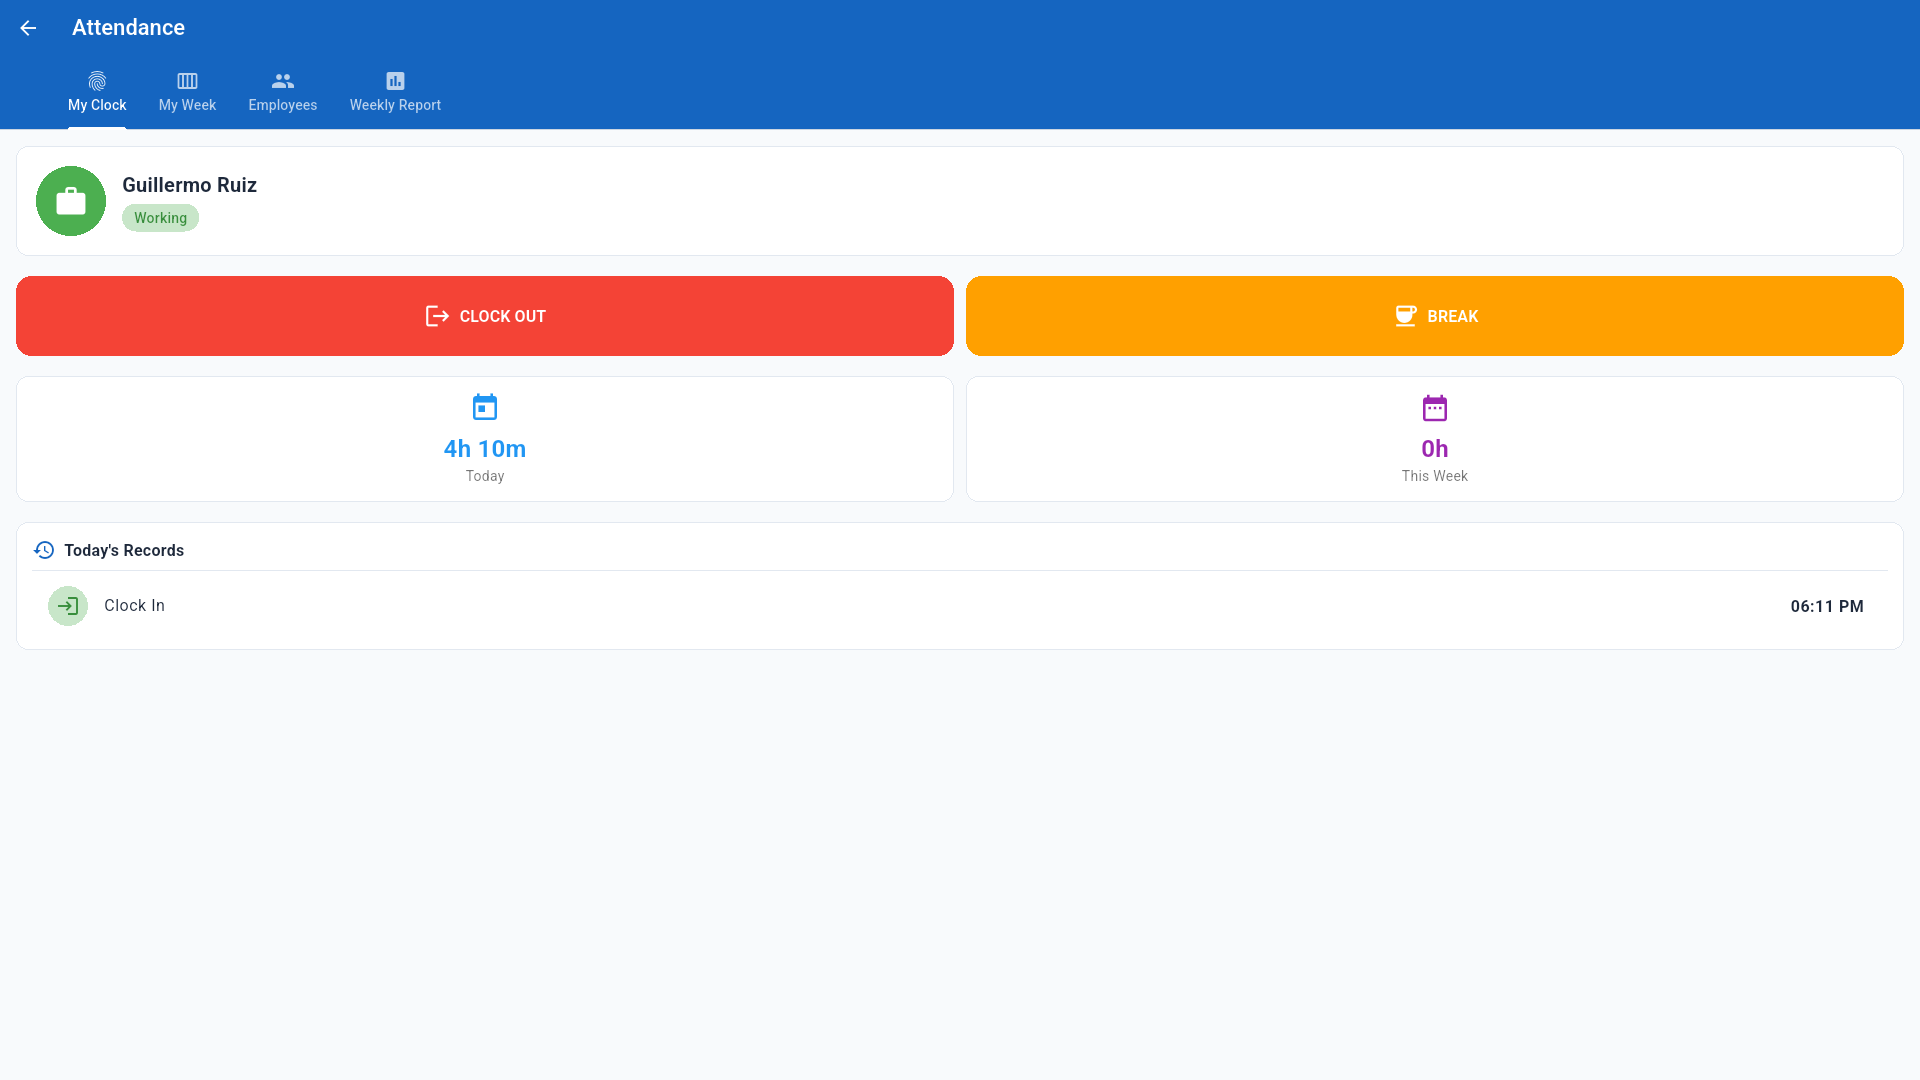
- My Clock: current status (Working / On Break), CLOCK OUT and BREAK buttons, today's and this week's hours, and today's records.
- My Week / Employees / Weekly Report: weekly summaries; managers see everyone.
5.3 Clock In / Out without opening the register
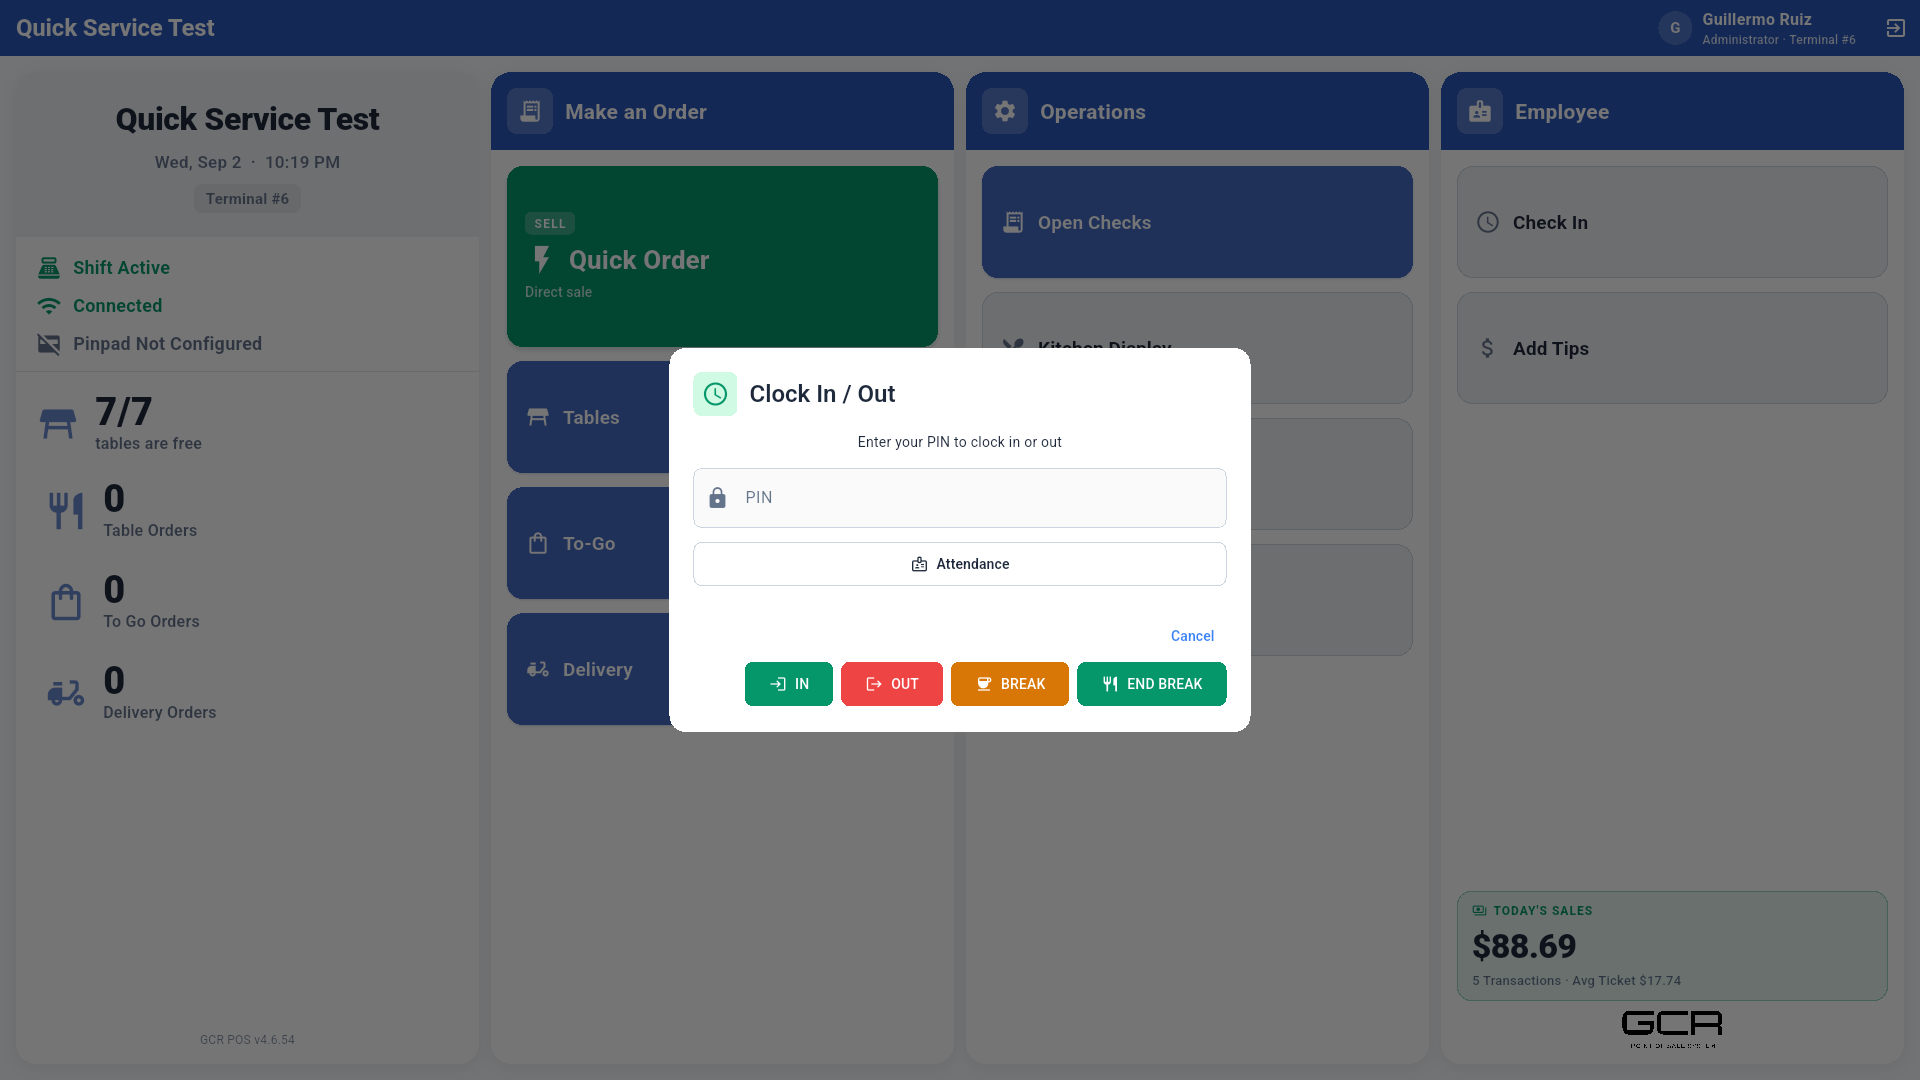
From the PIN screen (Clock In/Out button) or the home (Check In): enter the PIN and use IN / OUT / BREAK / END BREAK. The Attendance button opens the screen above.
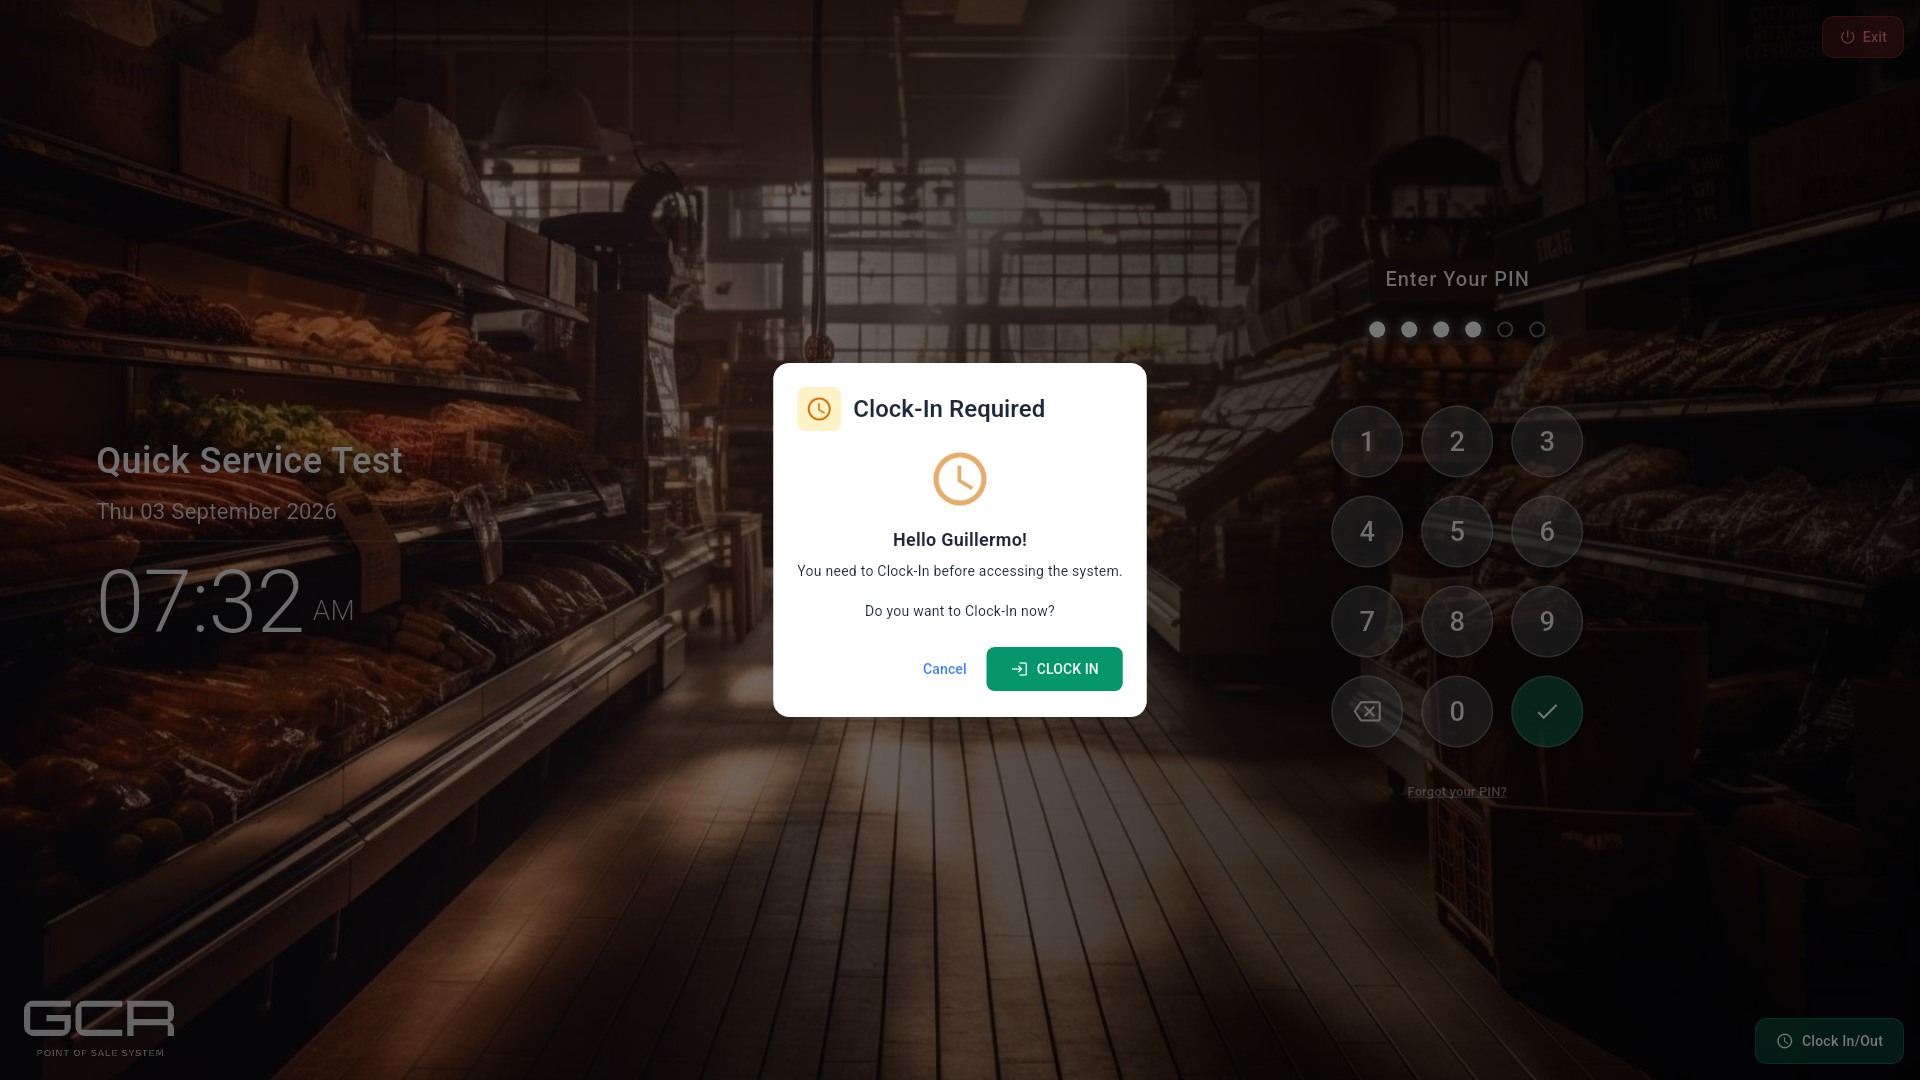
If the role has "Require Clock In" enabled (portal → Employees → Roles & Permissions), the POS demands a punch-in before entering sales and offers it right at login:
5.4 Tips Management
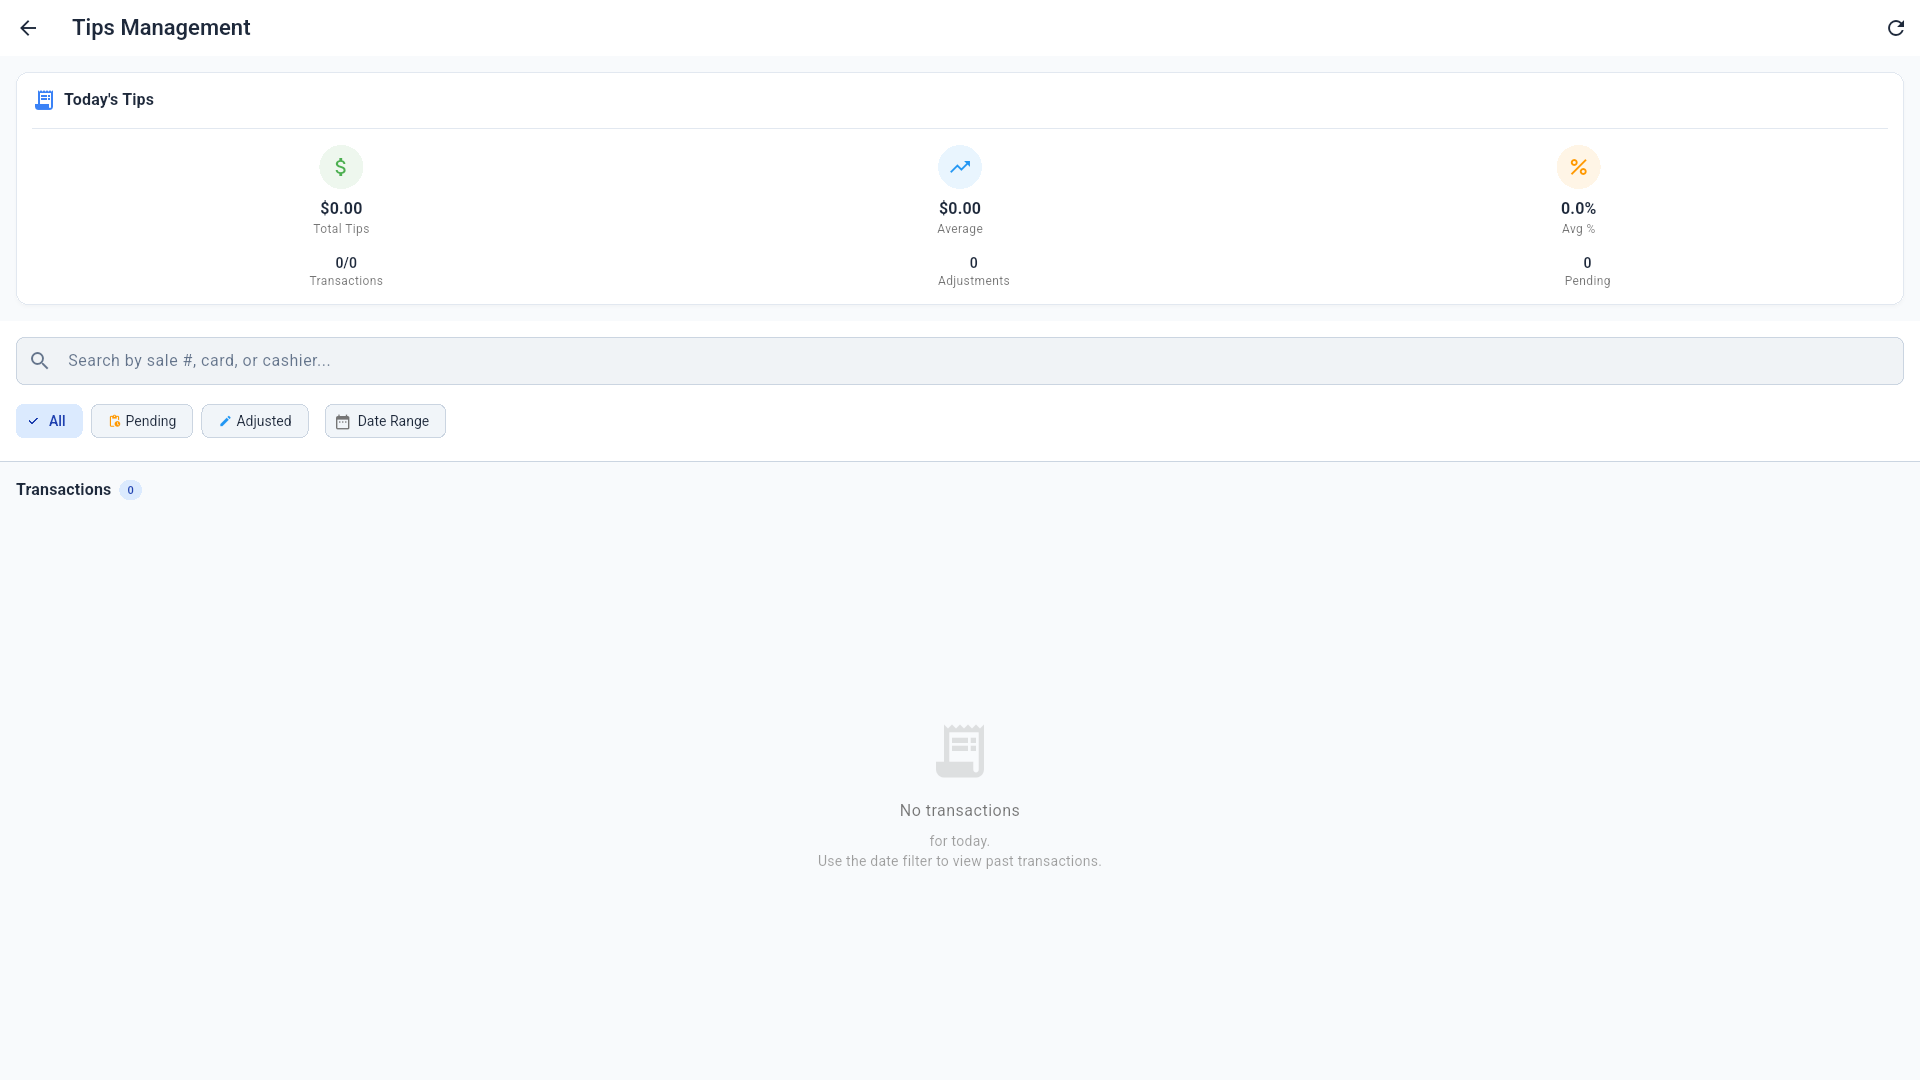
Tip review and adjustment: today's totals, average and percentage, pending adjustments, filters, and search by sale number, card or cashier.
6. Operations (register operations)
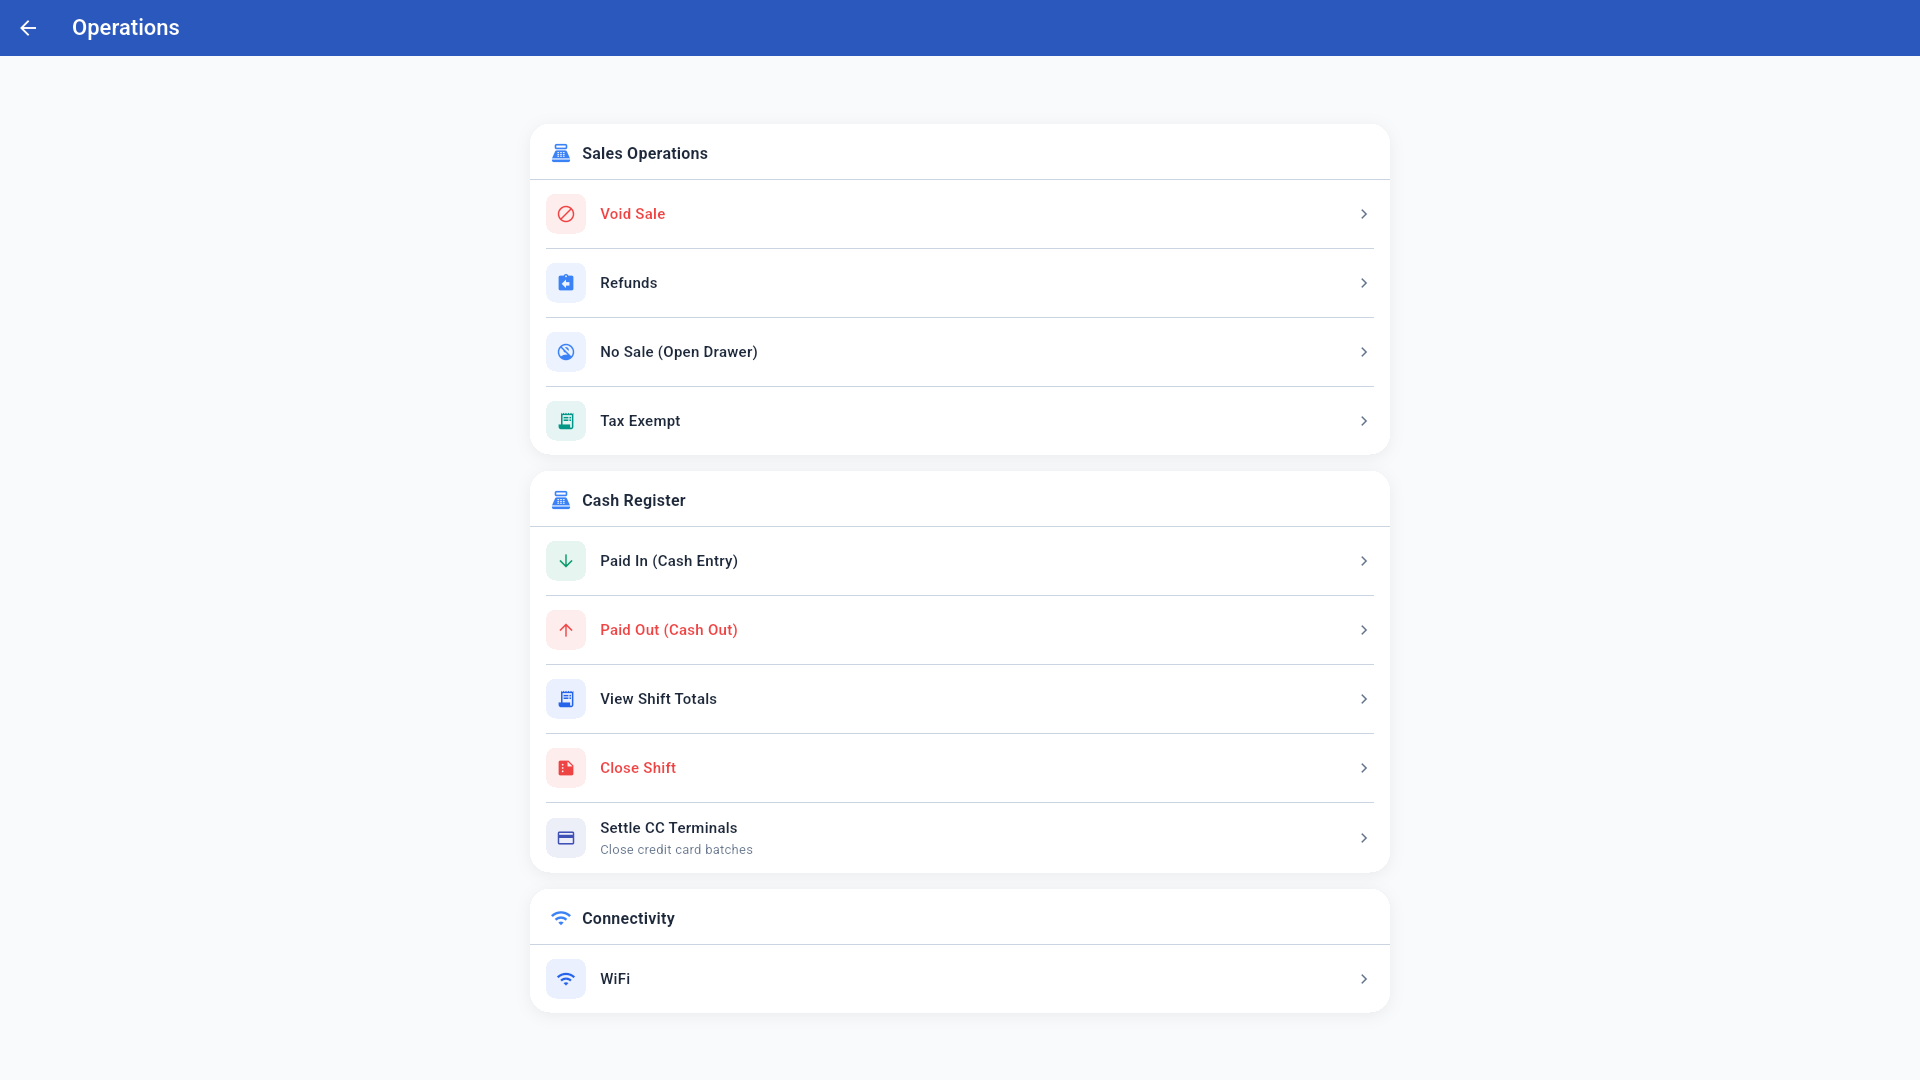
- Void Sale — void a same-day sale.
- Refunds — full or partial refunds for any date.
- No Sale (Open Drawer) — opens the drawer without a sale (logged).
- Tax Exempt — tax-exempt sale.
- Paid In / Paid Out — cash in/out of the drawer (shown in the Z reconciliation).
- View Shift Totals — the X report (read only).
- Close Shift — the register closing (Z report).
- Settle CC Terminals — closes the pinpad's credit card batch.
- WiFi — network diagnostics.
7. X Report (read-only check)
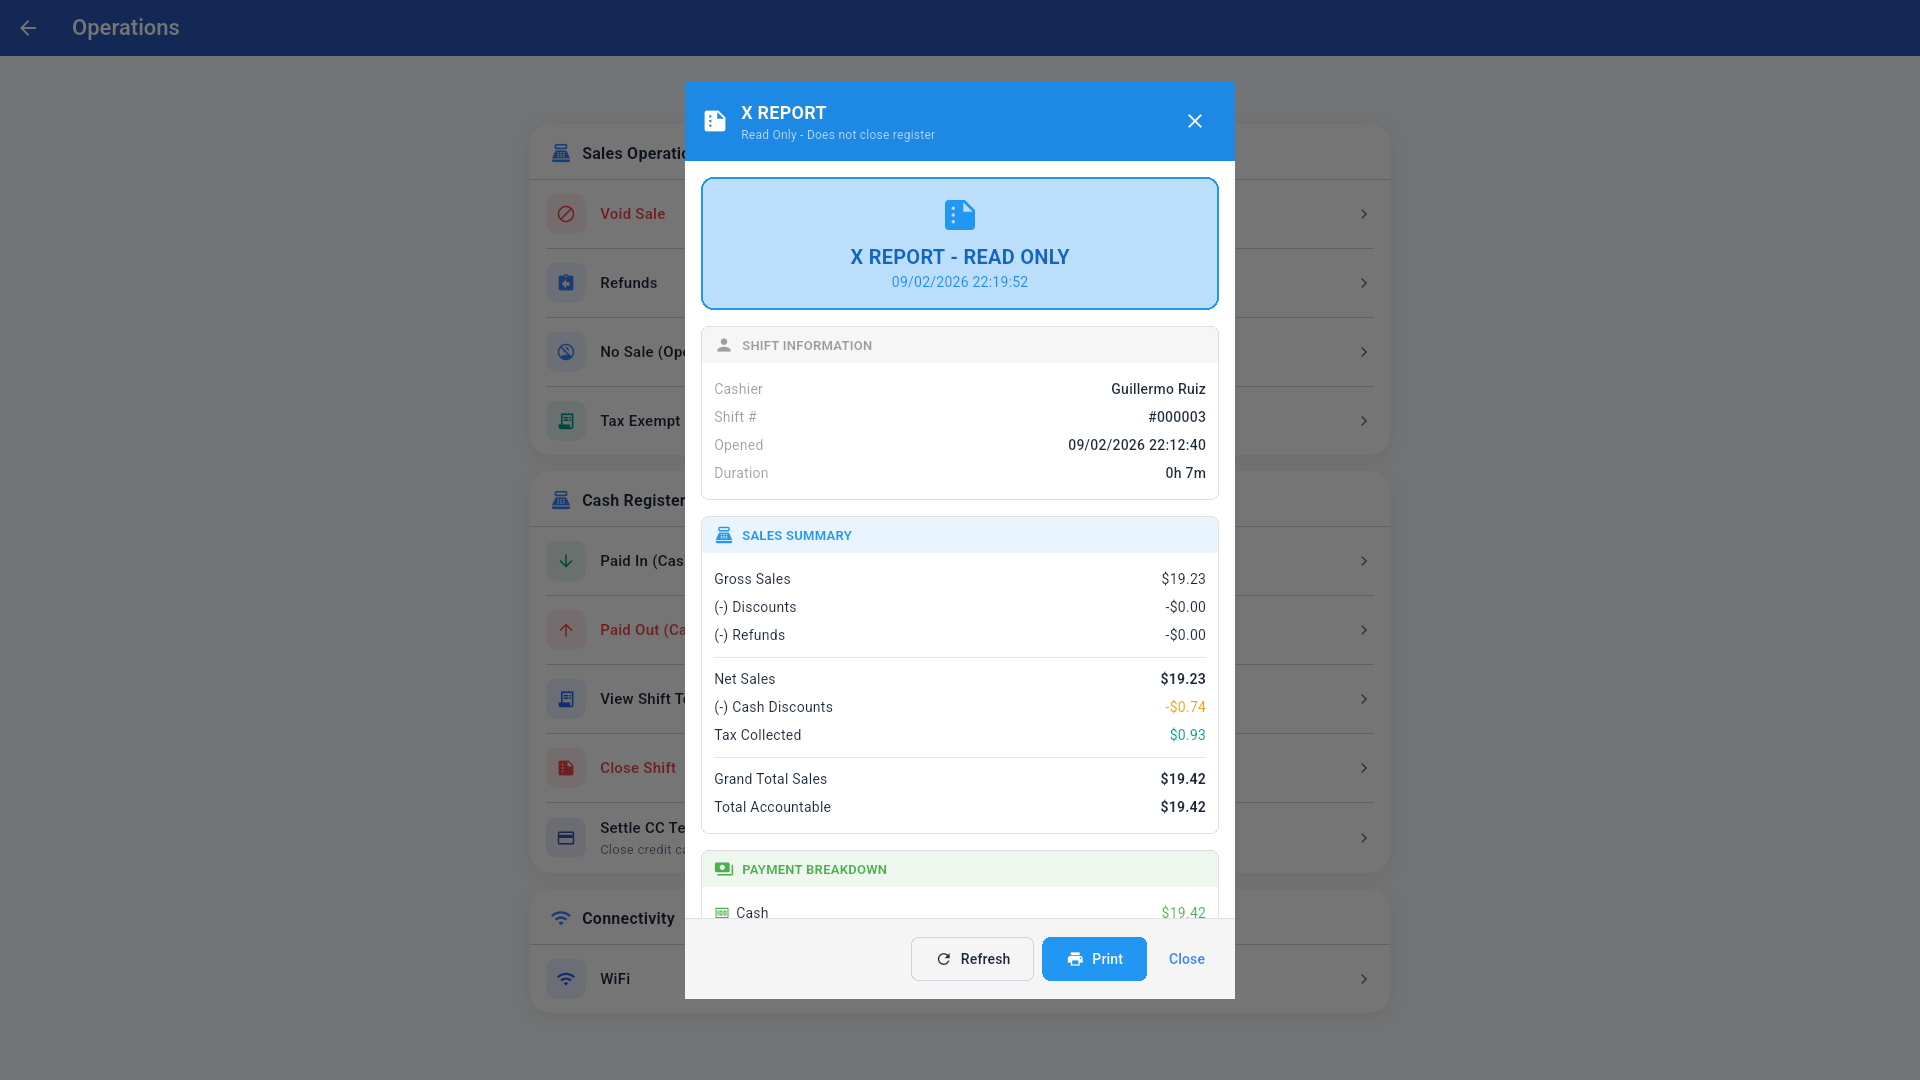
The X Report shows the shift status without closing it: shift info (cashier, number, opened, duration), sales summary (gross, discounts, refunds, net, cash discounts, tax, grand total), and the payment breakdown. Buttons: Refresh / Print / Close.
8. Register closing (Z Report) — step by step
With a shift open, the side menu shows X Report and Z Report:
- Side menu → Z Report (or Operations → Close Shift).
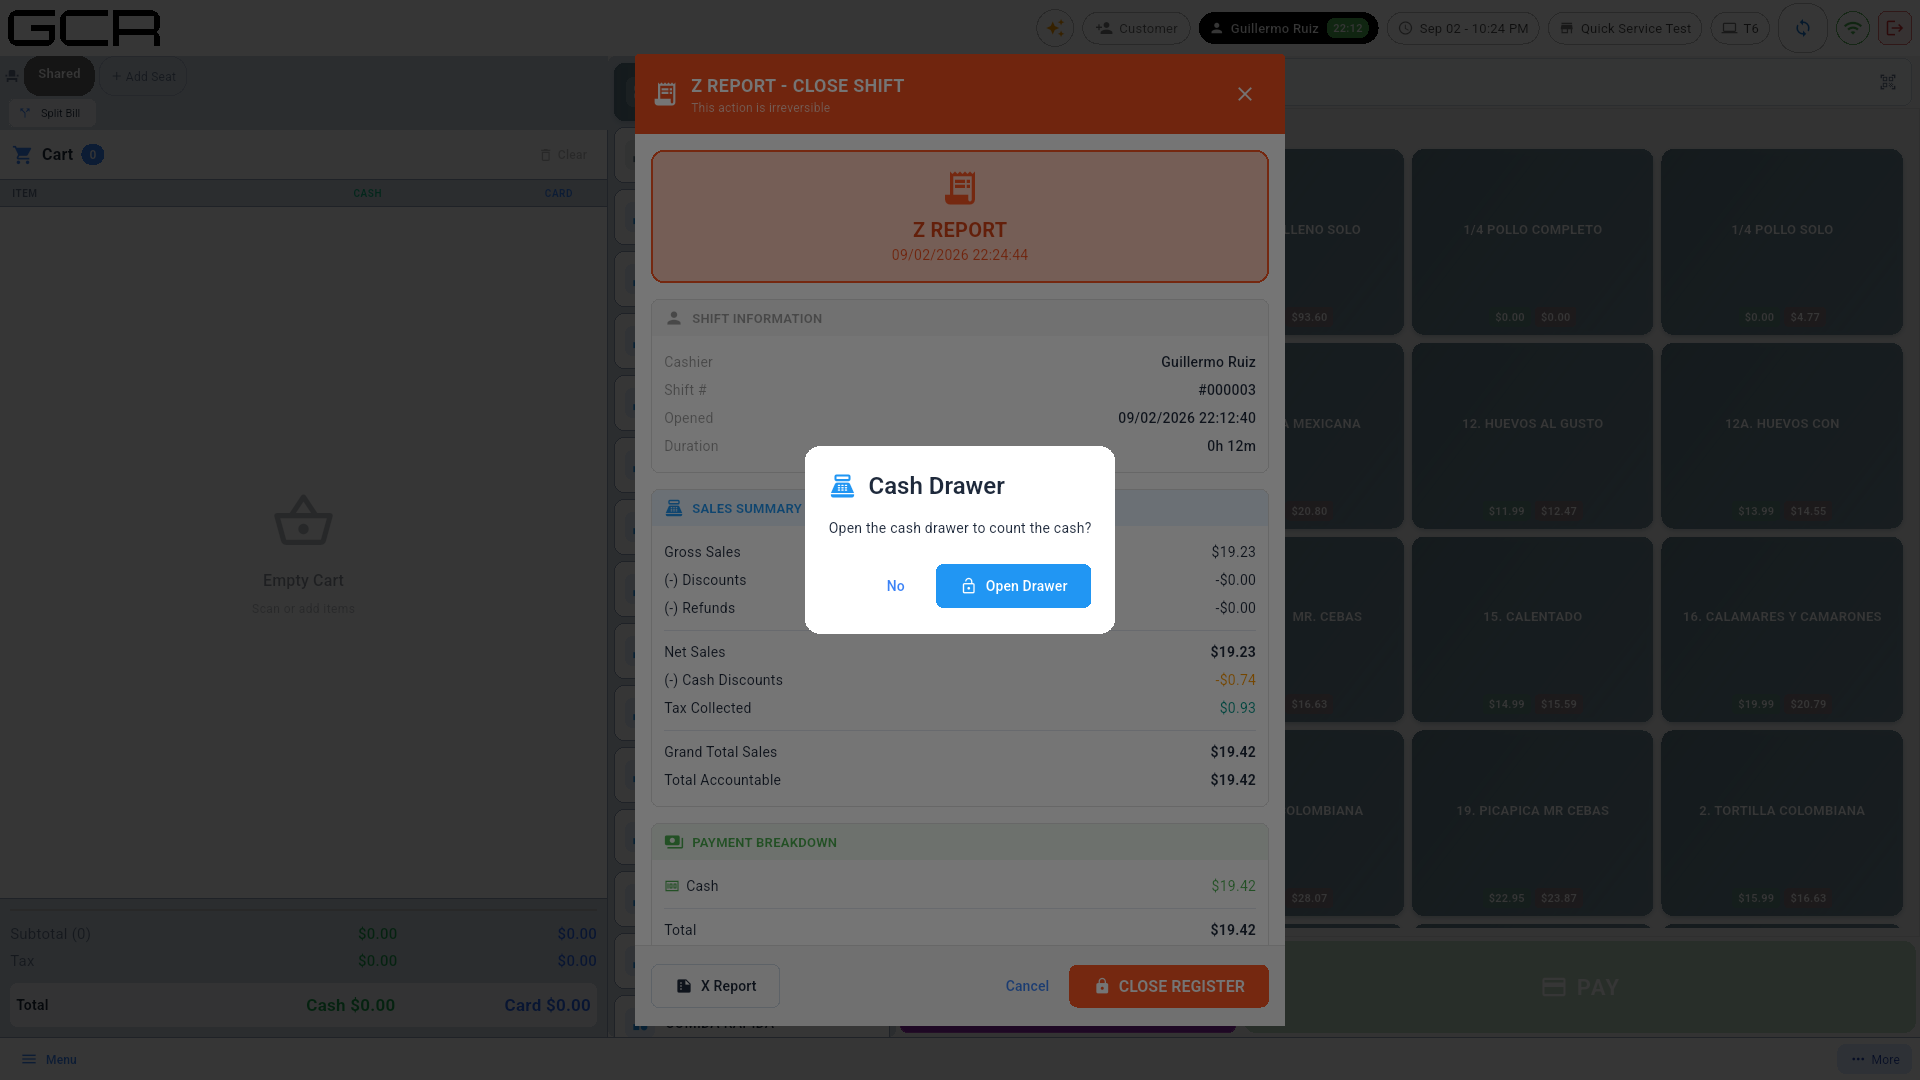
- The POS asks whether to open the drawer to count the cash.
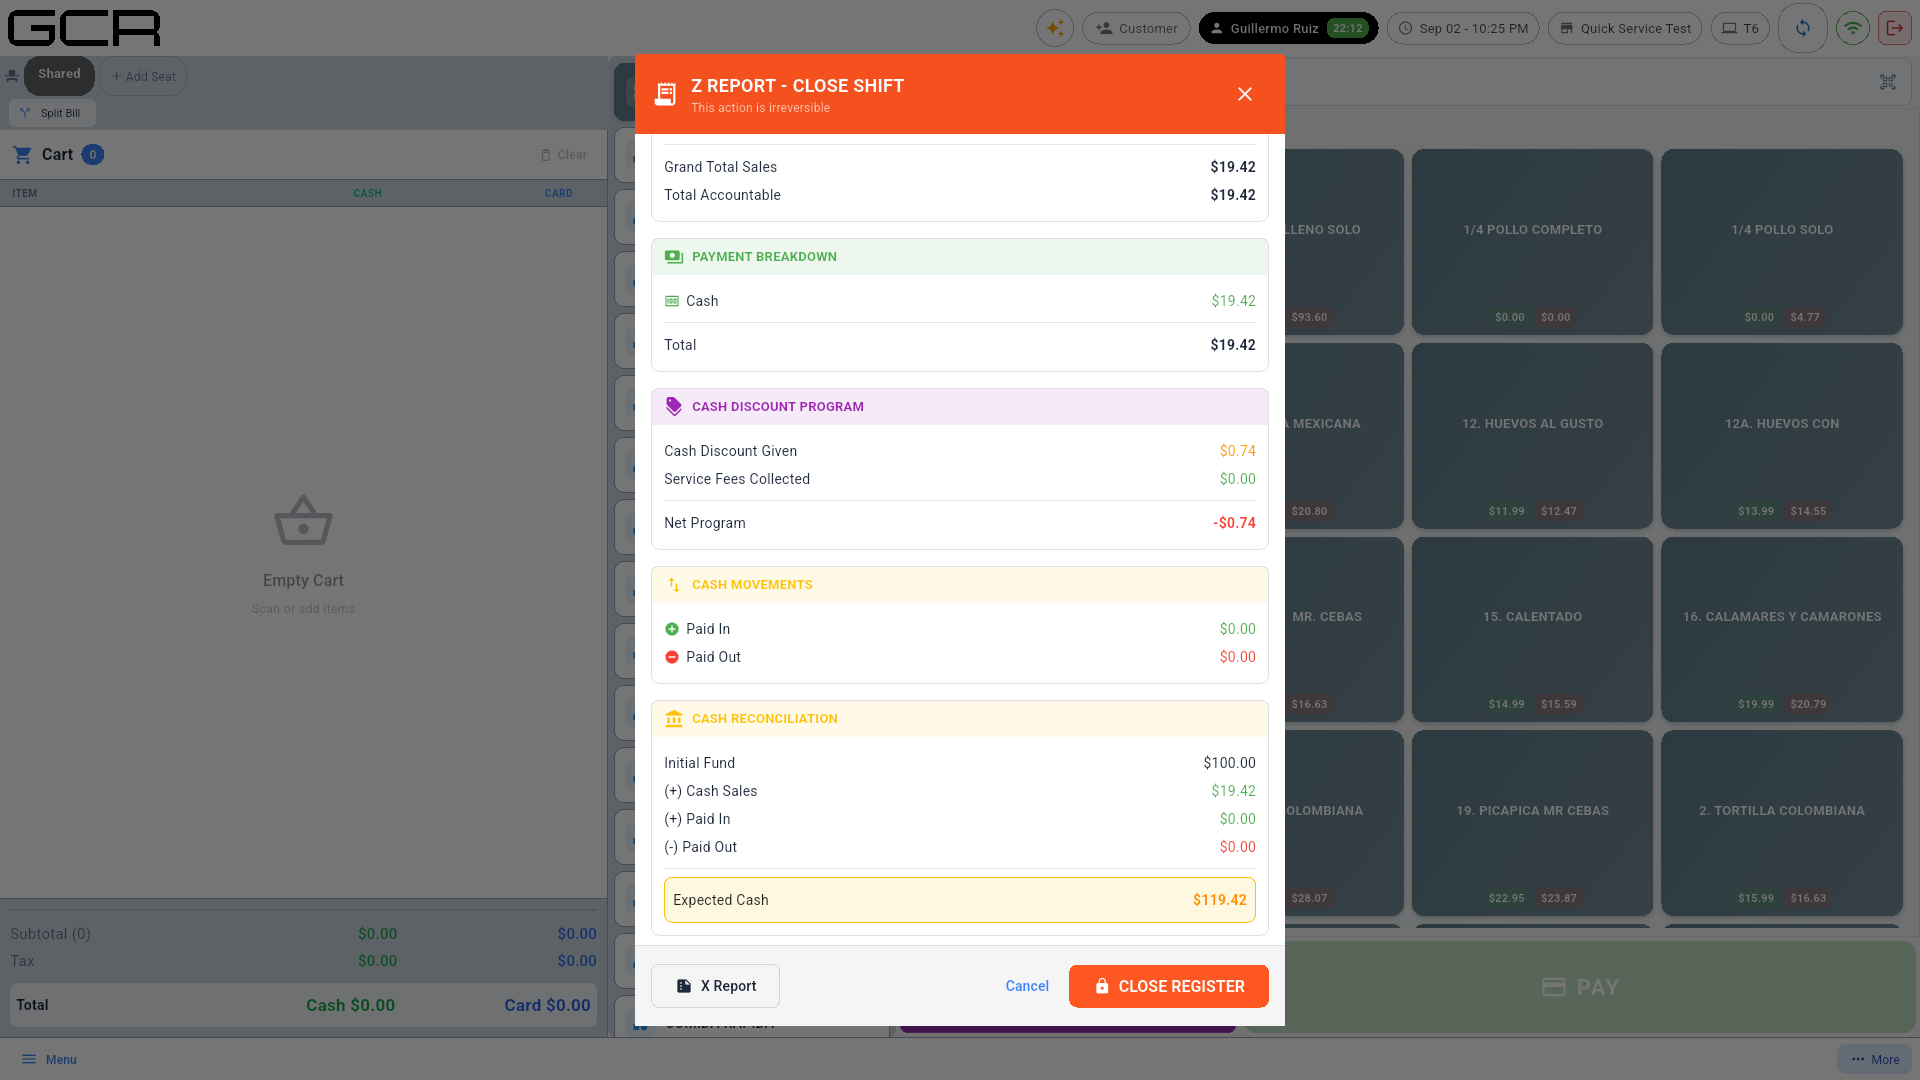
- Review the summary: sales, payment breakdown, cash-discount program, cash movements (Paid In/Out), and the reconciliation: initial fund + cash sales ± paid in/out = Expected Cash.
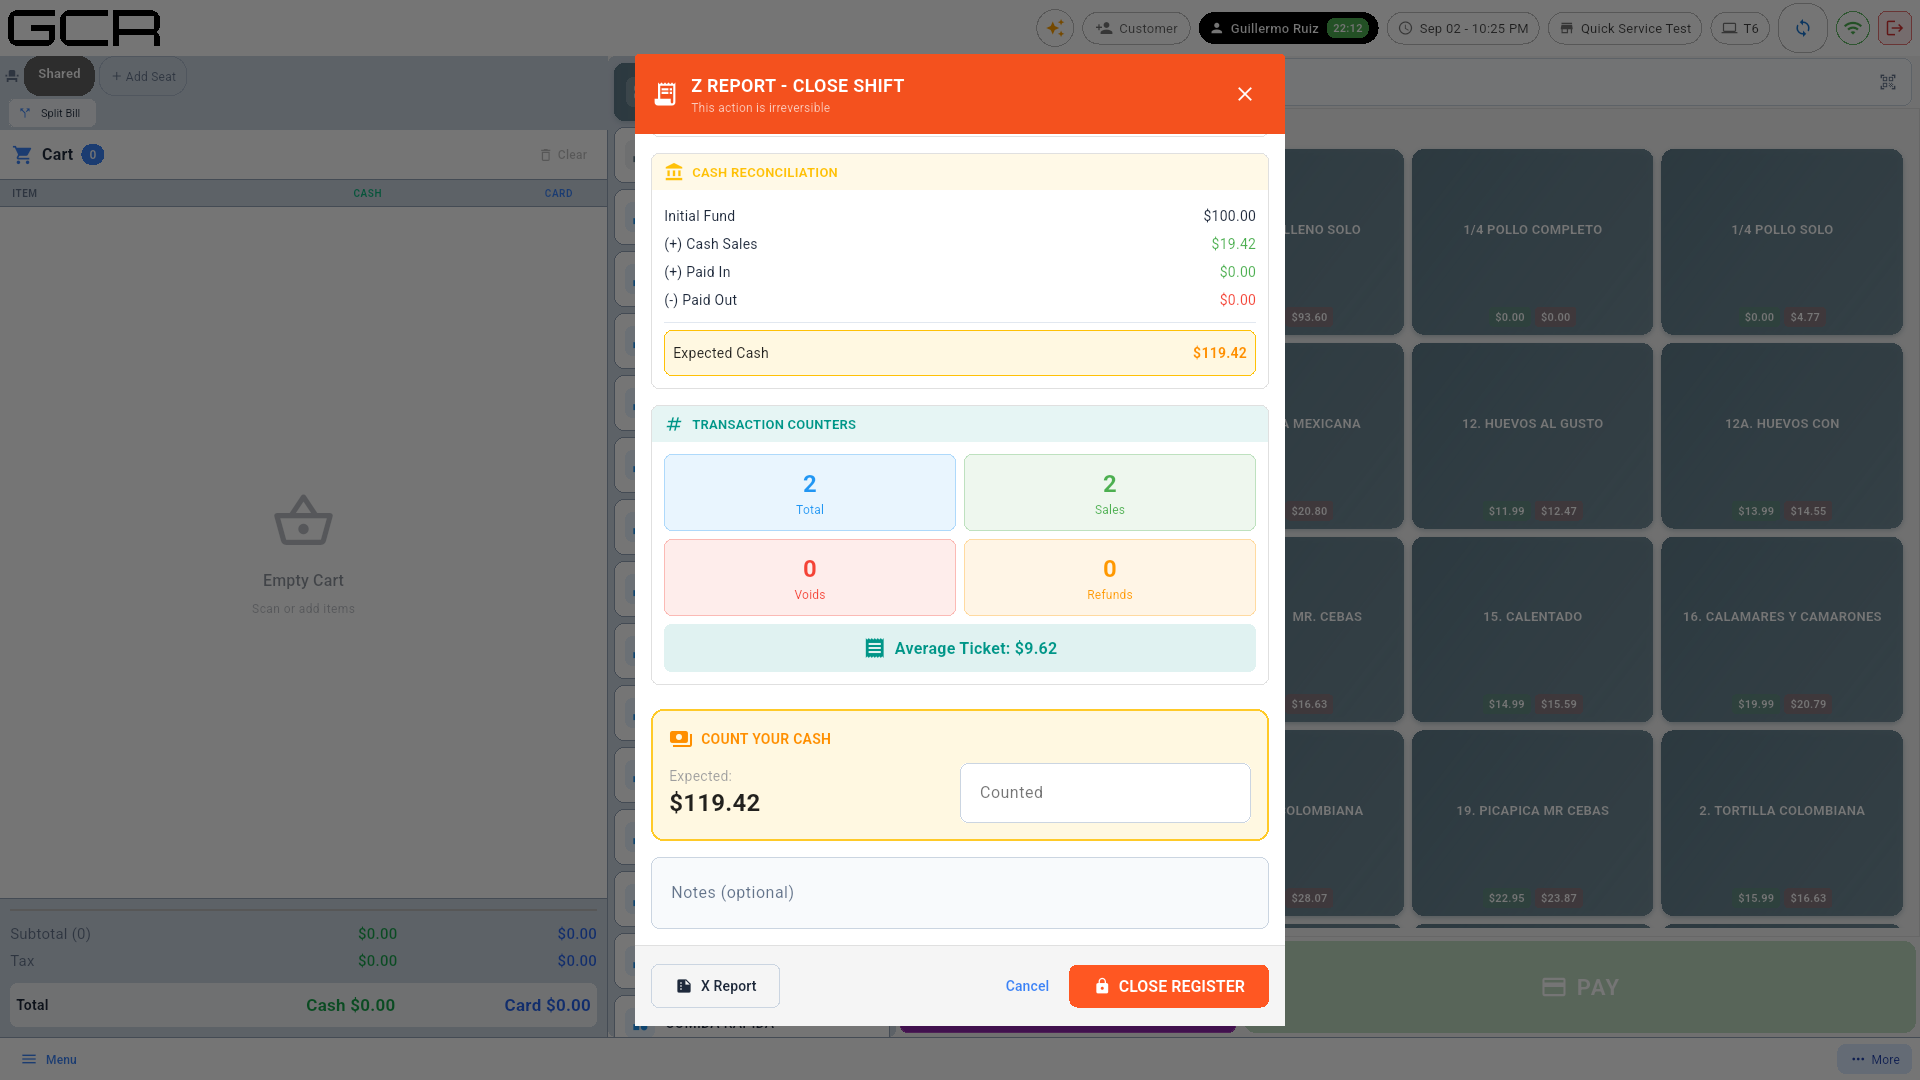
- Count the drawer and type the amount into Counted (COUNT YOUR CASH section). The counters show sales, voids, refunds and average ticket.
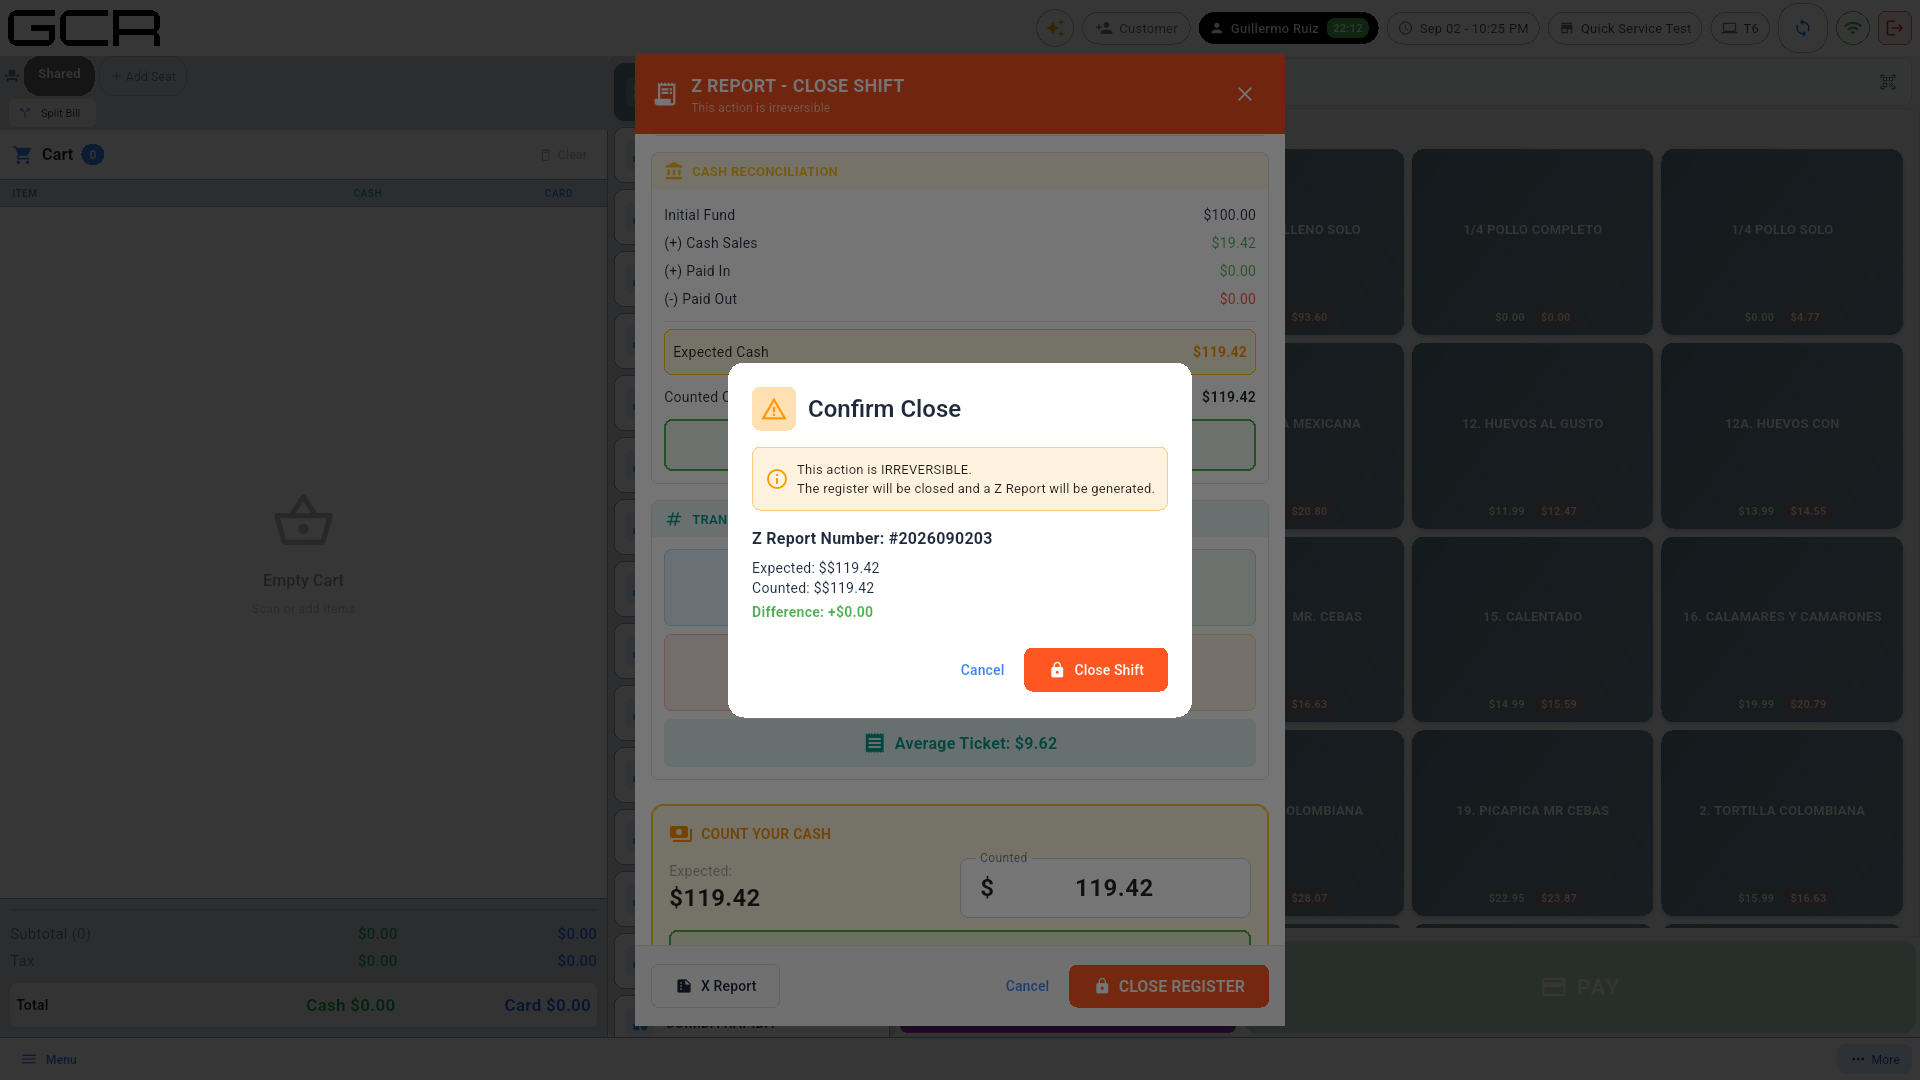
- CLOSE REGISTER → an irreversible confirmation with the Z number, expected, counted, and the difference.
- Result: Register Closed Successfully with the Z number and Balanced status (or the difference). You can print the Z report.
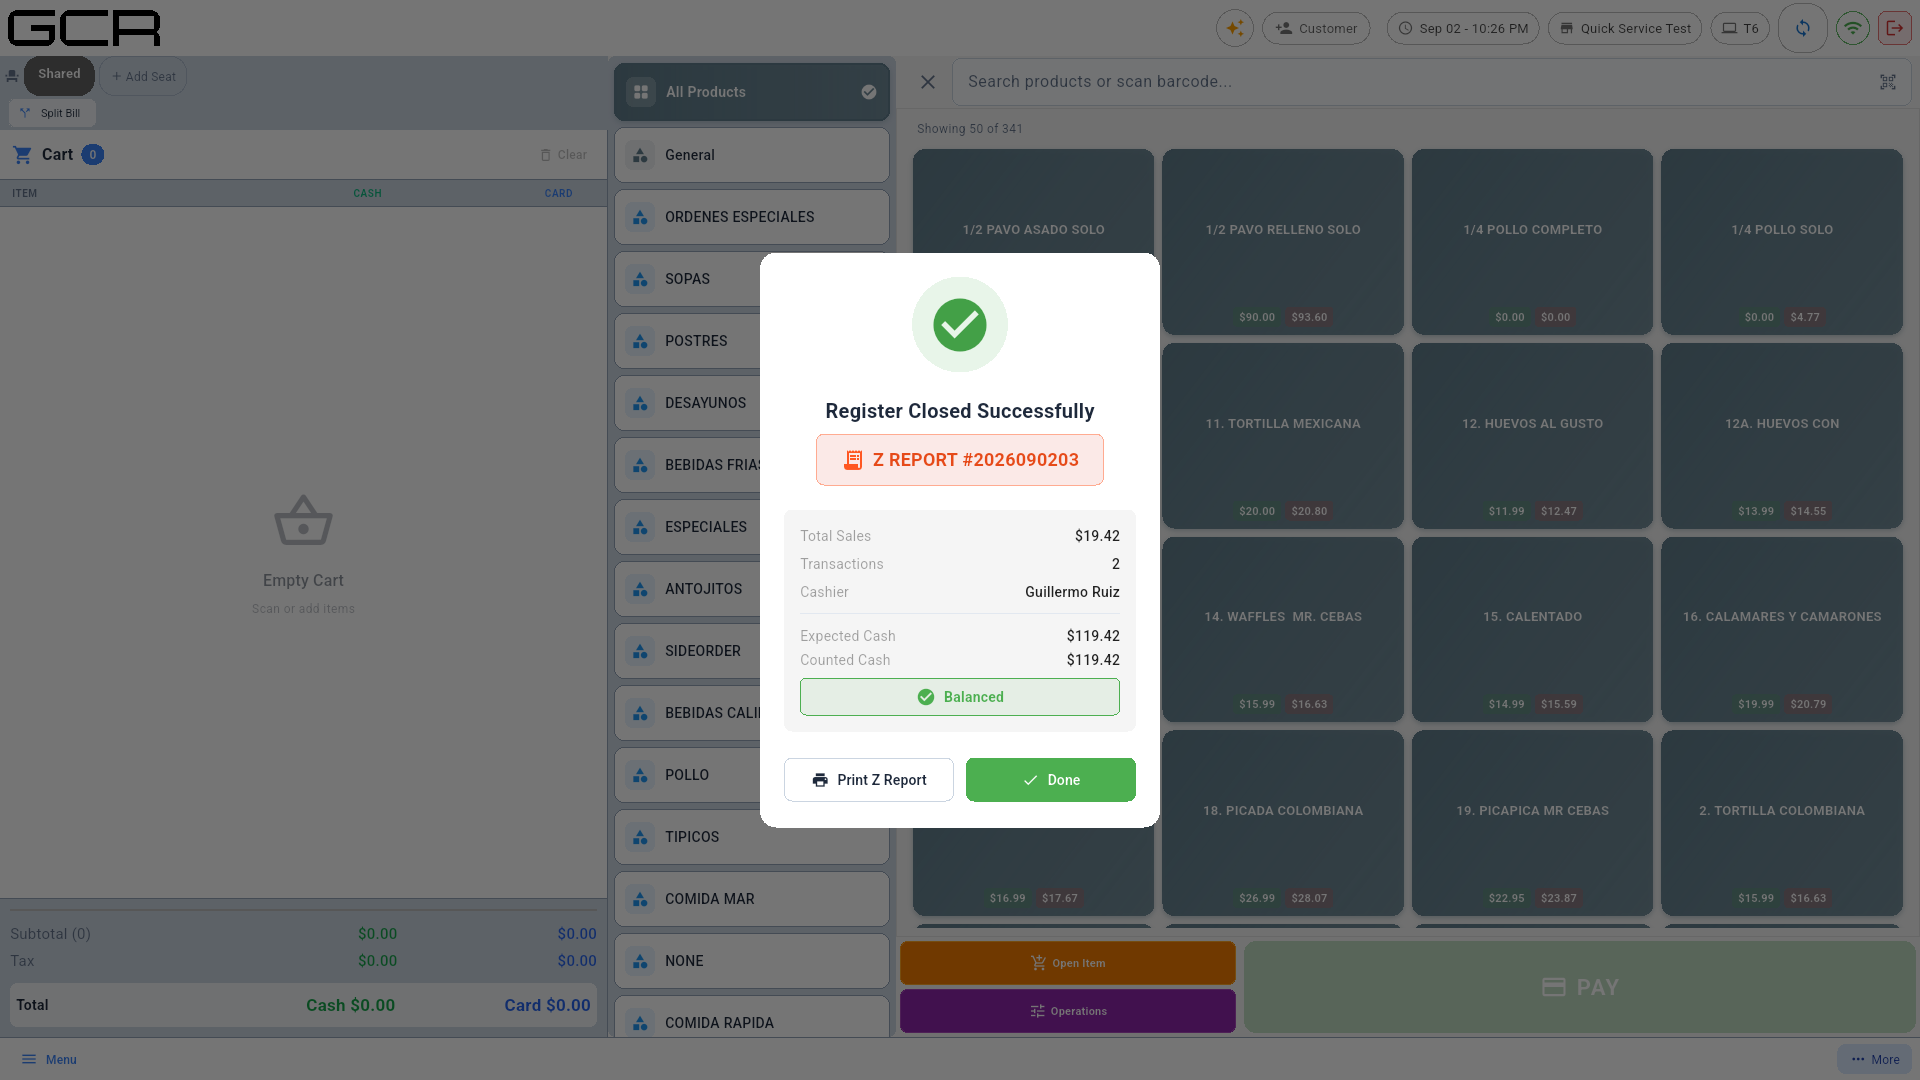
The Z uploads to the cloud and is visible in the Merchant Portal. If the count does not match, the over/short difference is recorded.
9. Settings
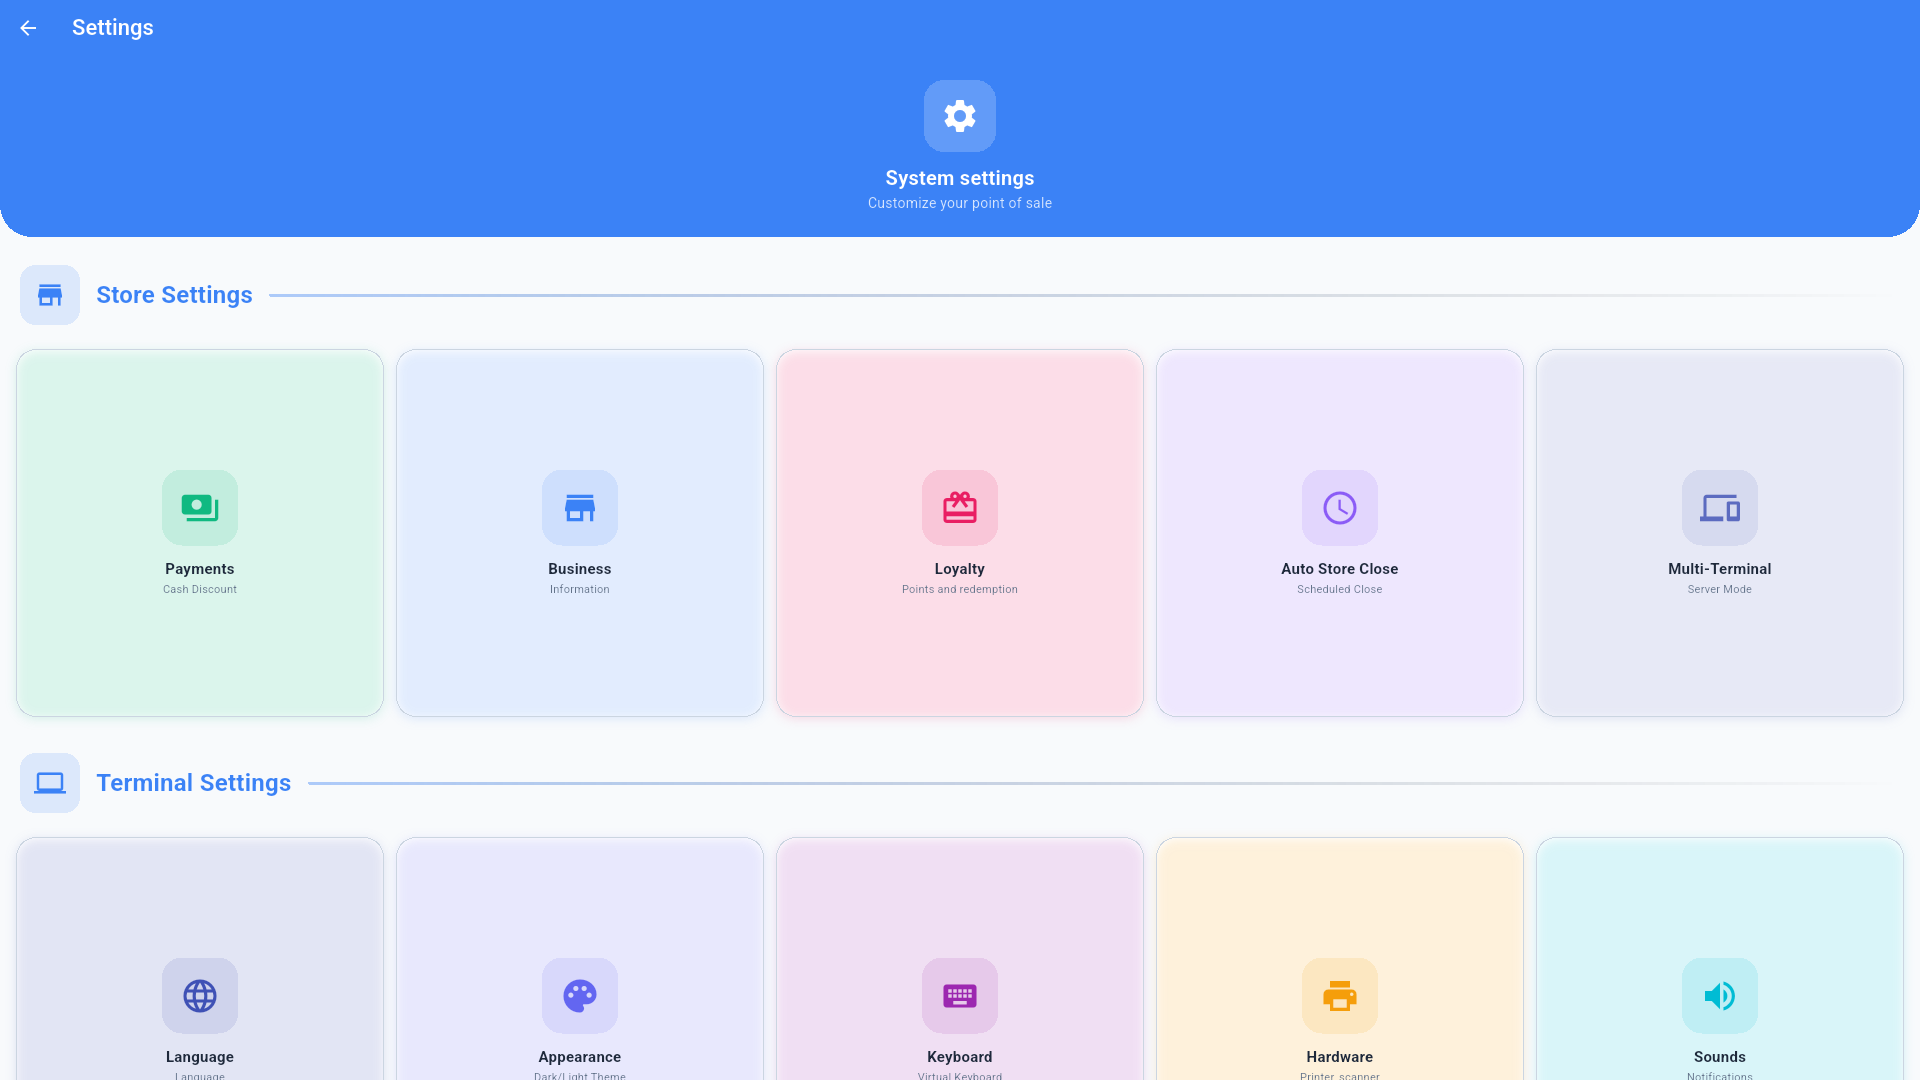
Store Settings (store-wide, mostly portal-managed):
- Payments — cash discount (%), receipt display mode, payment methods. Changes are locked behind the technician PIN.
- Business — business info printed on receipts.
- Loyalty — points program.
- Auto Store Close — scheduled automatic closing.
- Multi-Terminal — the terminal's role in the network. Since 4.7.0 the portal decides it, not the terminal: a Single or Cloud register moves to a direct connection on its own, and a LAN register waits for the portal to designate which machine in the store is the server. The screen is now a status view; the technician changes the role from the portal (see the 4.7.0 migration and new installation technician manuals).
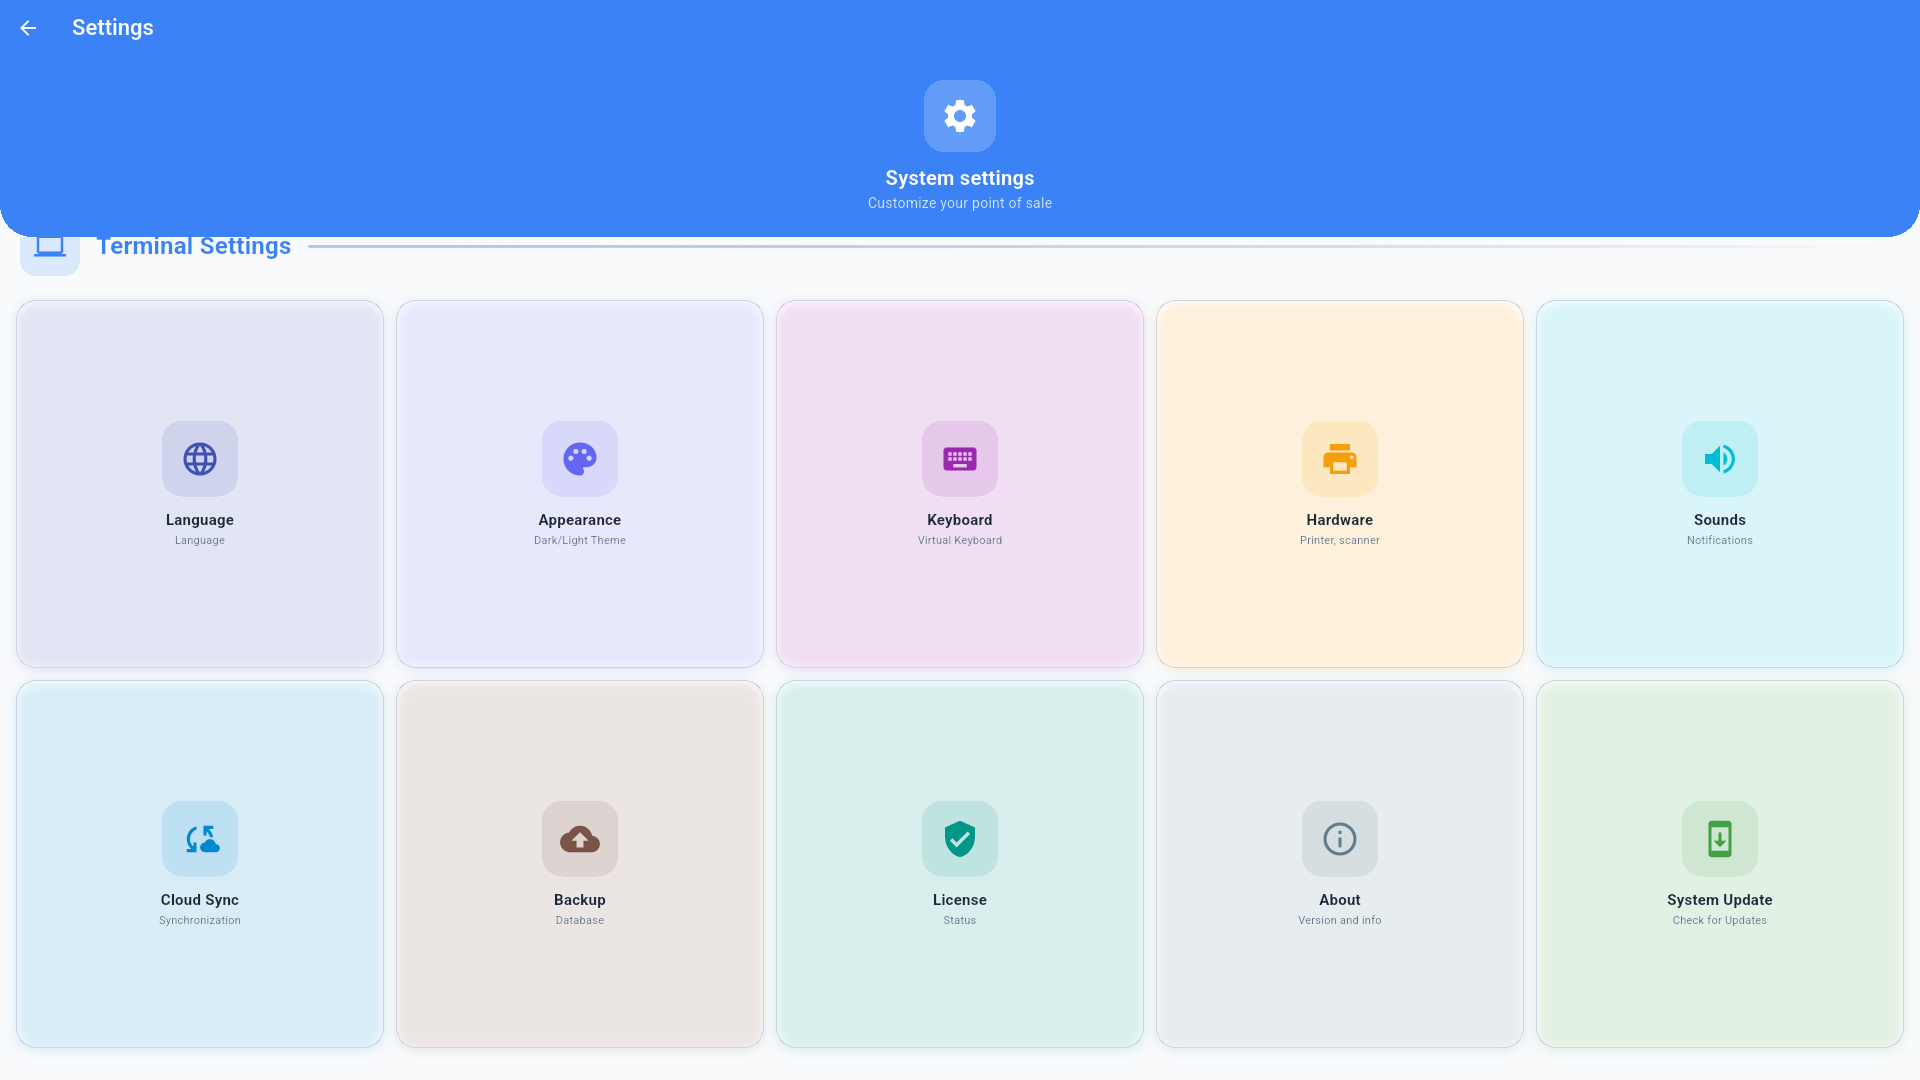
Terminal Settings (this device):
- Language — UI language (English, Español, 中文, 한국어, Italiano).
- Appearance — light/dark theme.
- Keyboard — virtual keyboard.
- Hardware — printer, print stations, cash drawer, scanner, scale
(technician PIN; see the technician manual).
With no printer configured the POS no longer opens the system print dialog. The receipt is on screen, and the Print / Reprint buttons say "No printer configured" in orange; the automatic prints after a sale simply do not come out. It is not a printing failure — the printer has not been set up here.
- Sounds — scan, sale and error sounds.
- Cloud Sync — manual cloud synchronization.
- Backup — local backup/restore, restore open shift, upload logs to support.
- License — license status.
- About / System Update — version info; check for updates.
Application updates
When GCR publishes a version for your device, the POS announces it and offers three ways out: Update now, Later and Install tonight (install at the hour you pick, typically after closing).
- Windows: at the scheduled hour the register closes itself, installs and reopens. Nobody has to be there.
- Android 12 or newer: the app replaces itself with no dialogs, and the register relaunches when the system reports the package changed. It needs the "install unknown apps" permission granted once.
- Android 11 or older: the APK is downloaded ahead of time, but the system installer waits for a tap. The scheduling confirmation says so; it does not promise an install that will not happen.
Each Android device family only receives the APK that belongs to it, so a terminal never downloads another model's build.
Cloud Sync
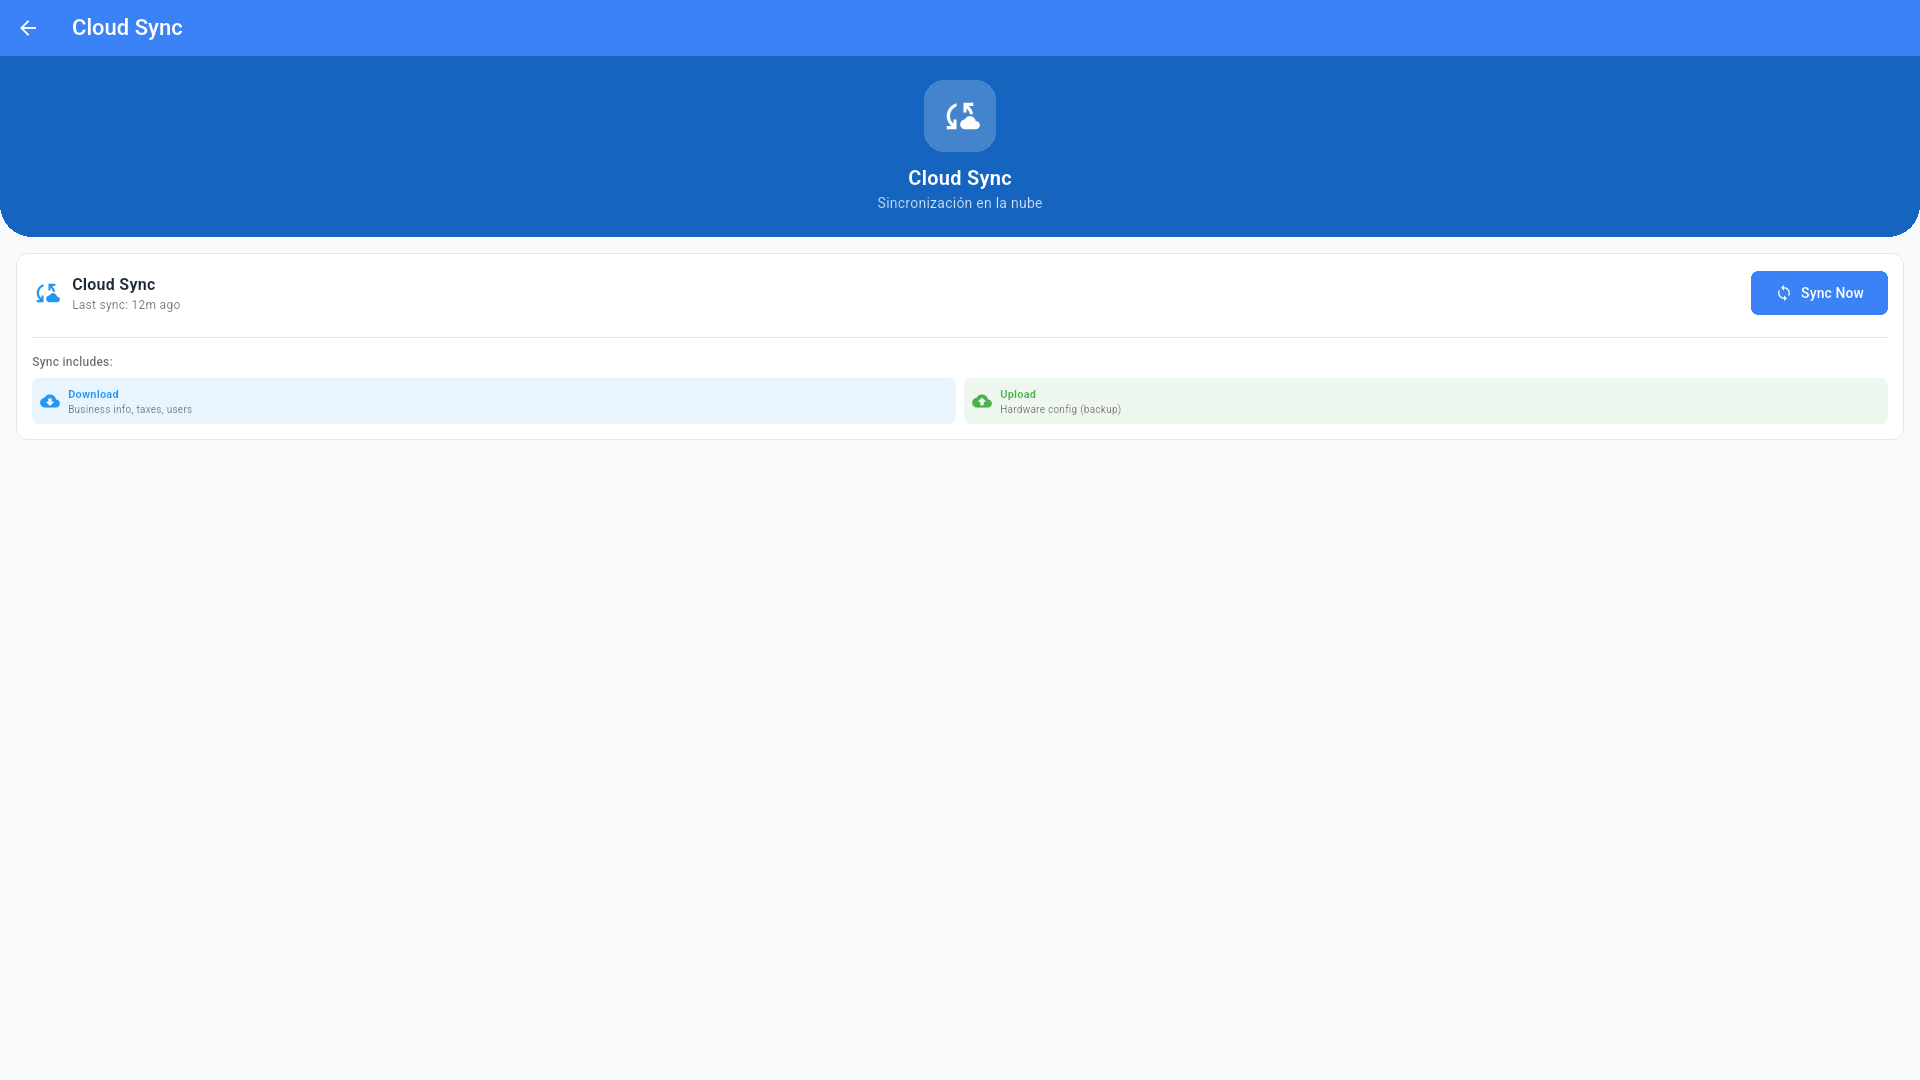
Sync Now forces an immediate synchronization: it downloads business info, taxes, users, catalog and portal-managed settings, and uploads the hardware-config backup. Use it after portal changes or when support asks.